
The article describes 8 steps for writing and posting a Joomla article. These steps are done each time you add a new article to your site.
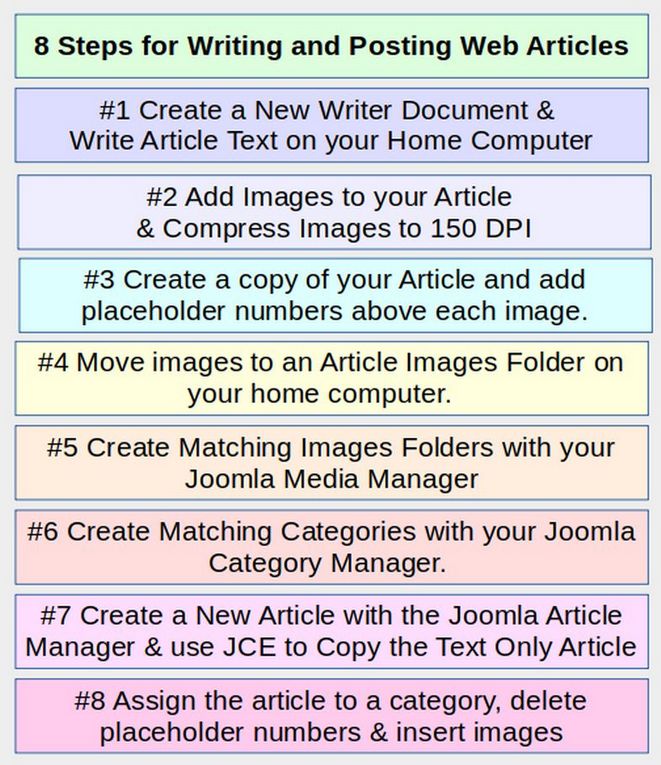
Let’s take a closer look at each of these 8 steps.
#1 Create a New Writer Document & Write Article Text on your Home Computer
Because Microsoft Word adds a huge amount of hidden and harmful coding to Word documents, it is best to create your web pages using a free word processor called Libre Office. This free program is available for the Microsoft Windows operating system, the Apple Mac operating system and the Linux operating system. Libre Writer is also useful for compressing the file sizes of images. Ideally, this should be done on a Linux computer – which comes with Libre Office. But you can get a free copy of Libre Office for any computer at the following link: https://www.libreoffice.org/download/libreoffice-fresh/
Write Your First Article – Welcome to our website – as a Libre Writer document
The first article you should write and post at the top of your Home page is called the Welcome Article. The title is typically Welcome to Our Website! The Welcome Article explains what your website is all about and why viewers should take the time to read it. Like all your other articles, your first article will consist primarily of a combination of text and images. The first step to creating your Welcome article is to create a new Writer document. Save the document to your website 0 Welcome folder which should be in your Articles folder.
This Welcome article (and most other articles) can be divided into the following 5 parts:
Part 1 is the Title: Welcome to our Website!
Part 2 is the Introduction TEXT:
Welcome to our website. Our mission is to help you!
Part 3 is the Main Body Content which may include several points:
Main Body First Idea TEXT:
We offer all kinds of tips to help you achieve your goals.
Main Body Second Idea TEXT:
We also provide a network to help you reach others.
Part 4 is the Conclusion TEXT
We are a great resource for helping you achieve your goals!
Part 5 is the Call for Action TEXT:
Feel free to contact us with any questions you may have!
Once you have some text, it is time to add images for site visitors that are more visually oriented.
2 Add Images to your Article
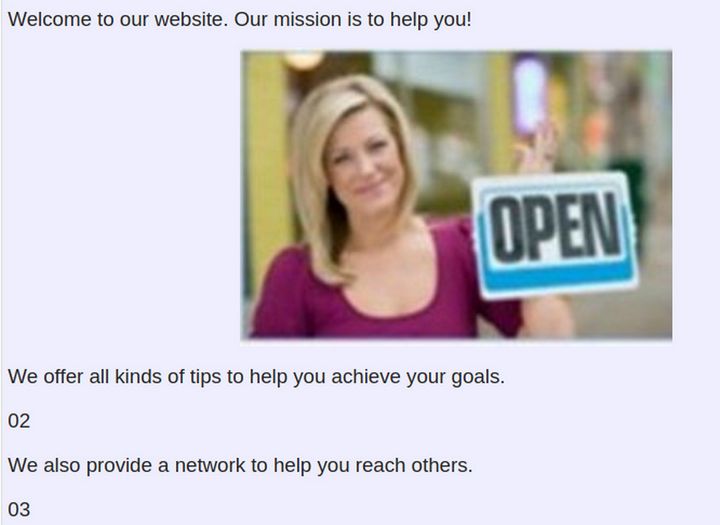
Below we have the same article only now we have added an image to match each sentence or paragraph:
Welcome to our website. Our mission is to help you!

We offer all kinds of tips to help you achieve your goals.

We also provide a network to help you reach others.

We are a great resource for helping you achieve your goals! Feel free to contact us with any questions you may have!
Why we recommend a lot of images
Most articles and web pages are simply a combination of text and images. A common problem with websites is that they contain too much text and not enough images. As a rule of thumb, there should be at least as much space taken up with images as there is with text.
Getting Images to Add to your Articles
In the above example, we wrote our first article, called Welcome to our Website. We had 3 images in this article. But where did they come from? The Internet is very visual. Take your time to find images which support your ideas. Use as many images as possible which show people and especially showing children. Charts, graphs and tables can also be copied as images. Images often convey much more information than text and help readers, and especially beginners, better understand the message you are trying to convey.
Use a Screen Capture tool to Capture Images
One way to get images for your articles and slide shows is to take them with a digital camera. Another is to capture images and screen shots from the Internet using a screen capture tool. In Linux, there is an excellent free screen capture tool called Flameshot.
Reduce the File Size of your images by compressing them
Before posting any images to the Internet, we will need to optimize them. The file size of a normal captured image is over 100KB. Once we are done writing our article and adding all of the images we want, assuming we are using Libre Writer, we can go through the article and right click on each image. Then click Compress. On the Compress Image screen, change the DPI from 300 to 150.
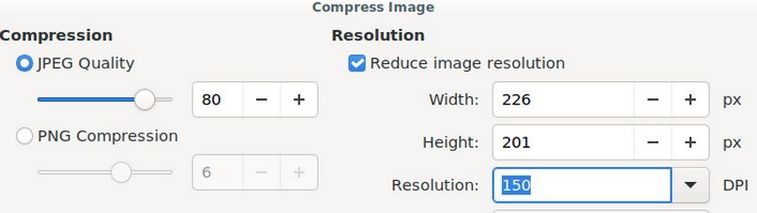
Then click OK. This will turn the image into a JPEG image and also reduce its file size for the web.
#3 Create a copy of your Article and add placeholder numbers above each image.
Website images are handled differently from text in that text can be copy pasted directly into a website article. Images on the other hand must be transferred and posted one at a time as websites and the internet consider every image to be an individual link. Therefore, we need to create a text only version of our Libre Writer document before we can transfer the article to our website. This involves replacing each image with a placeholder number and then saving each image as a separate file. Here is a copy of our Welcome article with the placeholder numbers above each image:
Welcome to our website. Our mission is to help you!
01

We offer all kinds of tips to help you achieve your goals.
02

We also a network to help you reach others.
03

We are a great resource for helping you achieve your goals! Feel free to contact us with any questions you may have!
Save the copy of the 0-Welcome article as w0-welcome with both articles in your 0 Welcome folder which is in your Articles folder. Thus, you will have TWO versions of each article. Next, close the first Document and continue working with the WEB version of your Welcome article.
#4 Move images to an Article Images Folder on your home computer.
We are ready to place all of the welcome article images in our website images/0_welcome/welcome folder. If you haven’t already done so, create a 0_welcome article image folder for this article inside the 0_welcome category images folder we created previously on your home computer. We will save our three welcome article images inside of this 0_welcome images folder. This should be numbered 01, 02 and 03. Once you have created the welcome article images folder, right click on each image and click on SAVE...
Because these image files will be transferred directly to your website, file names for these image files should be in lower case. No spaces or capital letters. It is best to save images as JPG files which is what Libre Writer does automatically after they are compressed. Then give the image a name (01, 02, 03, etc) and click SAVE. Here is our 0_welcome images folder with our three images in it:
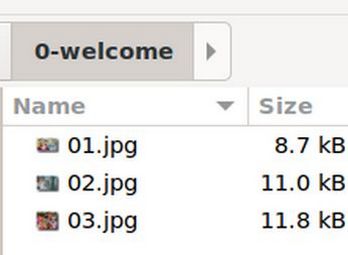
As you save each image, you should check to make sure none of these images is over 100 KB, but usually Libre Writer Compress Graphic does a good job of optimizing and compressing the images as they are captured and transferred. Note that all of the images are under 50 KB.
Below is what the Text Only (web) version of the Welcome article looks like after the four images have been copied to the images folder and the images have then been deleted from the WEB version of your Writer document and replaced by the placeholders, 01, 02 and 03:
Welcome to our website. Our mission is to help you!
01
We offer all kinds of tips to help you achieve your goals.
02
We also provide a network to help you reach others.
03
We are a great resource for helping you achieve your goals! Feel free to contact us with any questions you may have!
Note that the web version does not have any actual images. It now consists only of text – with 01, 02, etc indicating where the images should be inserted back in to the text one the text itself has been copied and pasted into the website article.
Now that you have created a WEB or TEXT ONLY version of your Welcome Article and your 3 Welcome Article images are placed into their proper folder on your HOME computer, it is time to copy each of these 3 images into a similar folder on your website server.
#5 Create Matching Images Folders with your Joomla Media Manager
Log into your Joomla Dashboard and click Content, Media. We will use the Joomla Media Manager to create a new images folder for our new article. The welcome article is special because it does not need an images category folder. Just create a folder called 0-welcome. To create a new images folder, click Create New Folder:
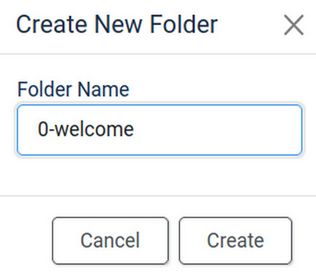
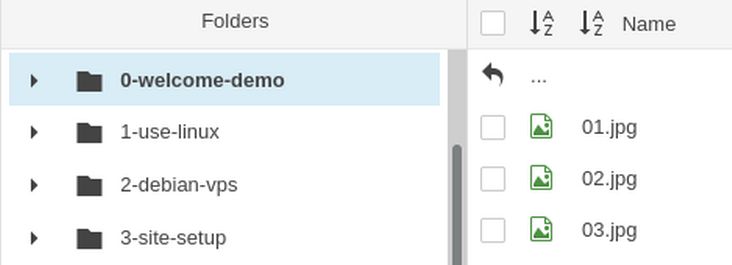
Type the name of the article (in lower case with no spaces) in the box. We will type in 0_welcome for the name of this images folder. Then click Create. Here is my 0-welcome images folder and my 9 image category folders.
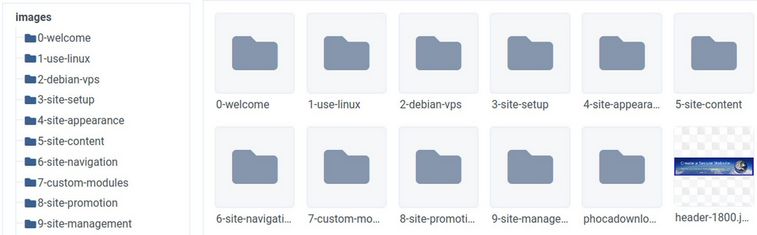
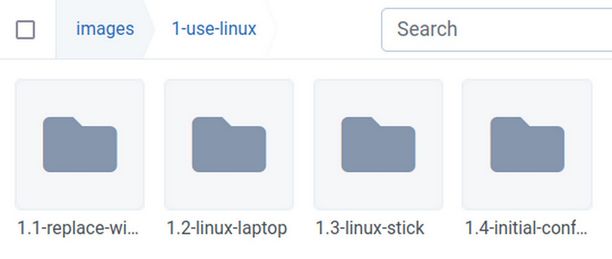
Here are the four image article folders inside of the first image category folder:
Each time you write a new article, or add a new web page, you should create a folder for the images in that new article in both your home computer’s images folder and also your website’s images folder. Now that we have our category folders made, we are ready to transfer our welcome article images from our home computer images welcome folder to our website welcome folder.
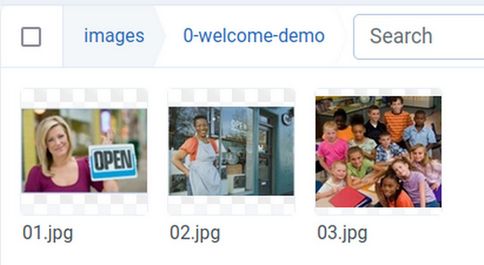
To upload images from your home computer to the 0-welcome folder, open the 0-welcome folder. Then click Upload. Then open your 0-welcome images folder on your home computer. Click on the first image file to select it. After selecting the first image in your images folder, hold the control key down on your keyboard as you select all remaining images in this folder. This will allow you to load 30 images at a time. Then click OK. The images will be loaded automatically. Here are the 3 images inside of my 0-welcome images folder:
Once you have loaded your images for your Home page welcome article, you are ready to add the Welcome Article to your Joomla website. But first, we will create our Joomla Categories.
#6 Create Matching Categories with your Joomla Category Manager.
To build your website, first you create categories, then place articles inside of categories. We will now build the category structure for the Create a Secure Website dot com website:
Website: Create a Secure Website (9 categories)
1 Use a Linux Computer
2 Create a Secure VPS
3 Site Setup
4 Site Appearance
5 Site Content
6 Site Navigation
7 Create Custom Modules
8 Site Promotion
9 Site Management
The numbers in front of the names help keep the categories and articles organized. Creating all 9 categories takes only a couple of minutes.
Go to Content, Categories and click New. Type in the Title of your first category. Then copy paste a short description into the workspace (using Control plus V for paste in the popup window). Select the text and change the font size to 14.
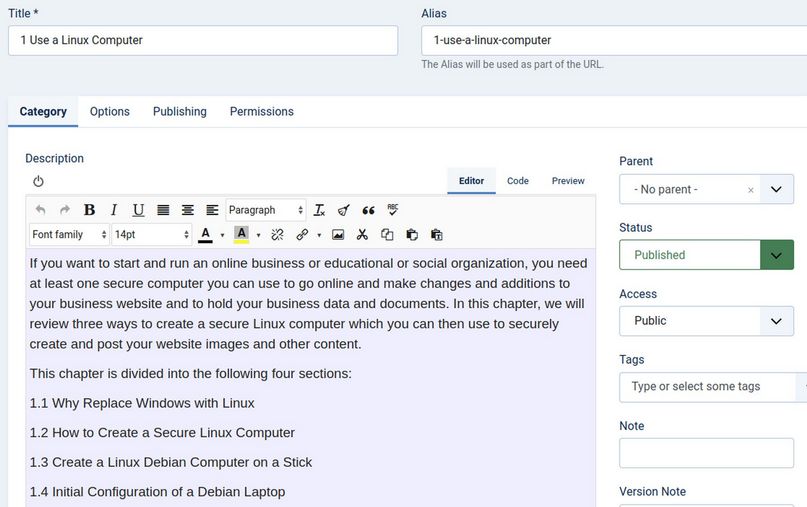
Then click Save and New to add the remaining categories.
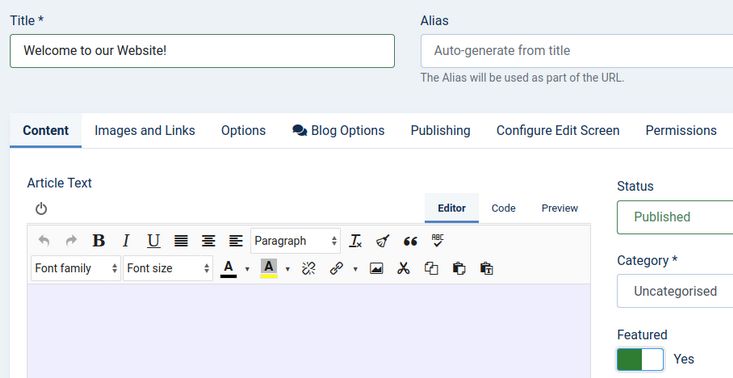
#7 Post the Text Only version of your Article with the Joomla Article Manager
Create a New Article with the Joomla Article Manager & use JCE to Copy Paste the Text Only Article… Once your welcome images are loaded into the Media Manager, click on Content, Articles, New (or plus sign). This will take you to the Add New Article page. Give your new article a title such as Welcome to our Website!. For most articles, we will assign them to a category. But for the article we will set it as a Featured Article so it will display on our Home page.
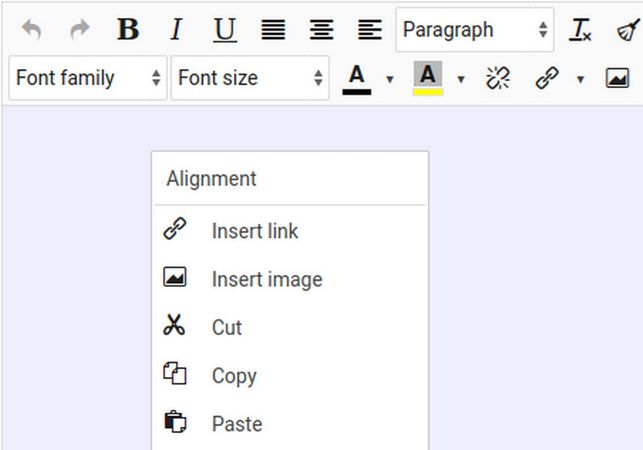
Then open the text only version of the Welcome articles folder on your HOME computer. Copy this article into your clipboard. Then, put your cursor in this Joomla Article Window and right click on Paste.
This brings up the JCE Editor Paste window. Put your cursor in this window and press Control +V on your home computer keyboard. This will paste the text into the Clipboard Window.
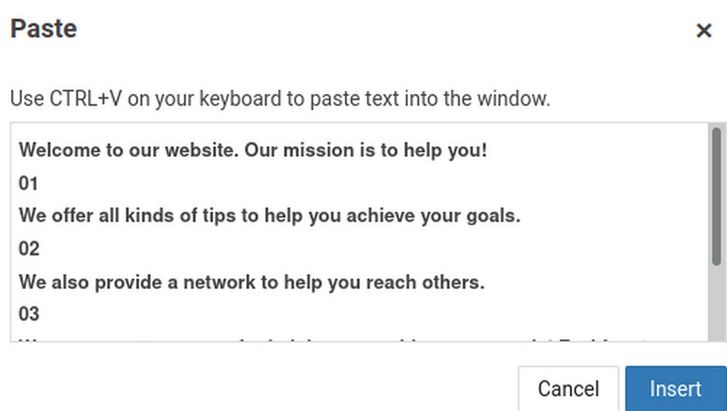
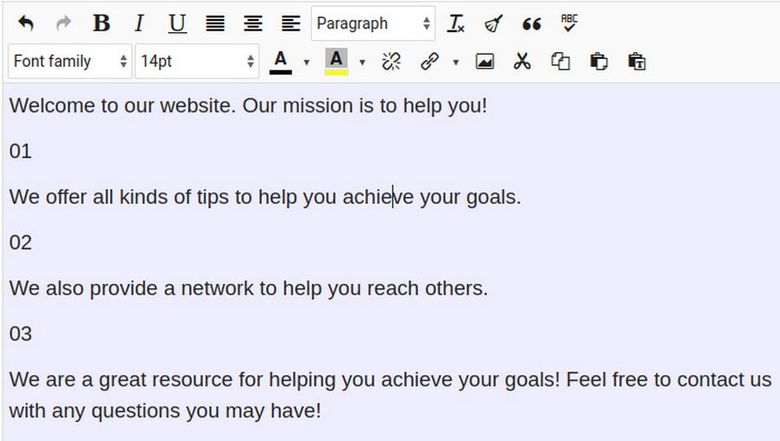
Then click on INSERT to paste the text into the workspace. Then select the text and change the font size to 14. Here is what the text will now look like in the workspace:
Save the Text Only Version of your Article.
After the text is in, but before adding images, it is a good idea to click SAVE. This is because only a limited about of information can be transmitted to the server with any given request. Now that we have posted the text only version of our article into the Article Manager, it is time to insert the images back in.
#8 Assign the article to a category, delete placeholder numbers & insert images
The Welcome article does not have a category. But we did assign it to Featured Articles. Before we transfer the 01 image back to our web article, we need to first delete the placeholder number 01, leaving our cursor where this image placeholder was. Then click on the JCE Images icon – which is the icon with the mountains in the right side of the second row above. This will bring up the JCE Images Manager. Click on the 0-welcome images folder to open it:
The JCE Images Manager will display all of the images folders from the Joomla Media Manager. First open the images folder for your article. Then click on the Image you want to insert to select it. Our Welcome Article has 3 images. Select the first one (01). You can format the size and alignment of the image if you want to make it bigger or smaller. Increase the size of the image by entering 400 in the Dimensions box. Type Open for Business in the alternate text box.
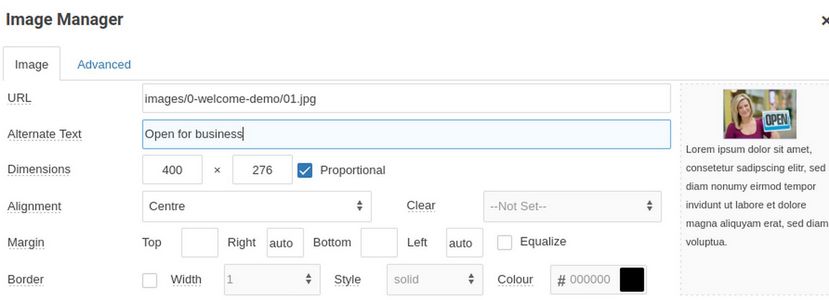
Click on INSERT. This will place the image in the correct place inside the article.
Delete the extra spaces between images and paragraphs. Then save your new article. Repeat the above steps for the remaining images in your article.
TIP: Only add 10 images at a time. If you have more than images, add 10 then click on the SAVE button, then add 10 more.
Then click on VIEW SITE to see how the Home page looks. Your new article will now appear at the top of your Home page.
If we created an article that was not a Featured Article, we would need to create a menu item for our article in the main menu. That topic will be covered in the next chapter.
What’s Next?
Now that we have posted our Welcome article with its images, we will review how to use Libre Draw and Flameshot to create images for our website articles.