
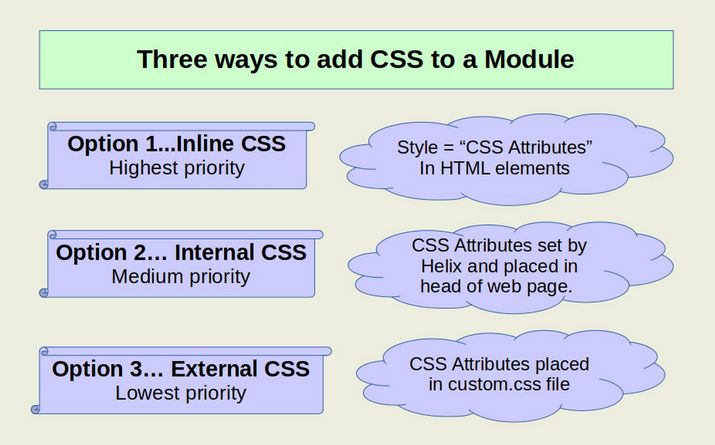
In the last article, we styled a feature box title and description with inline CSS using the JCE Editor. In this article, we will use Helix to style a feature box title and description using Internal CSS. We will then use External CSS to style a feature box.
Style a Module Title and Description with Helix and Internal CSS
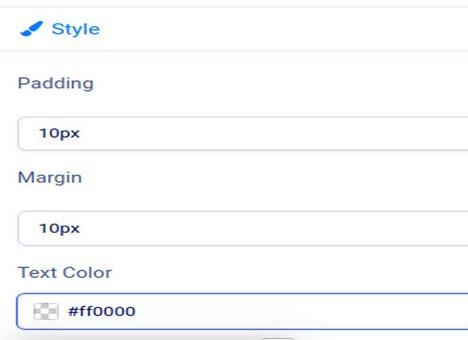
Go to Templates, Styles and click on the Helix template. Click Layout, Top Row 1 Edit. Then click Style. Change the text color to red (#ff0000).
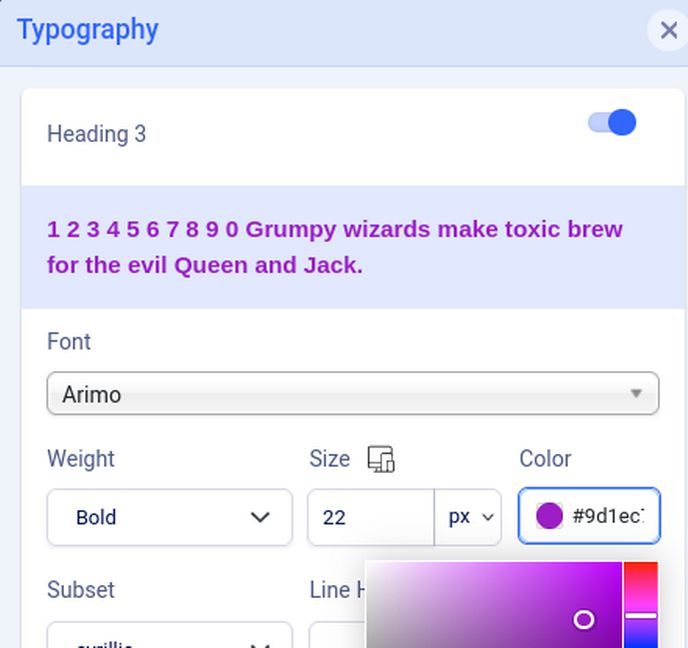
Then click Apply. Then click Typography. Heading 3. Change the text color to purple and the font size to 22.
Then click Save and close and view the site.

This changed the title color and size and the description text color on the first and third modules, but not the second one. This is because the second module was styled with Inline CSS and Inline CSS has priority over Internal CSS. To see the Internal CSS, right click on the Demo Page and click View Page Source/ Scroll down to about line 24 to see several internal styles:

Here are the two relevant internal styles:
<style>h3{
font-family: 'Arimo', sans-serif;
font-size: 22px;
font-weight: 700;
color: #9d1ec7;
text-decoration: none;}</style>
<style>#sp-top-row-1{
background-color:#DDFFDD;
color:#FF0000;
padding:10px;
margin:10px; }</style>
Internal styles are always placed in the head section of the HTML and always begin with <style> and end with </style>. Between the style opening and closing brackets, the first item is either an element selector such as h3, or an ID selector such as #sp-top-row-1 or a class selector which begins with a dot (example: .my-class). We will take a closer look at classes in a moment. After the selector, there is a curly bracket. This is followed by other properties and values. After each property is a colon and after each value is a semi-colon.
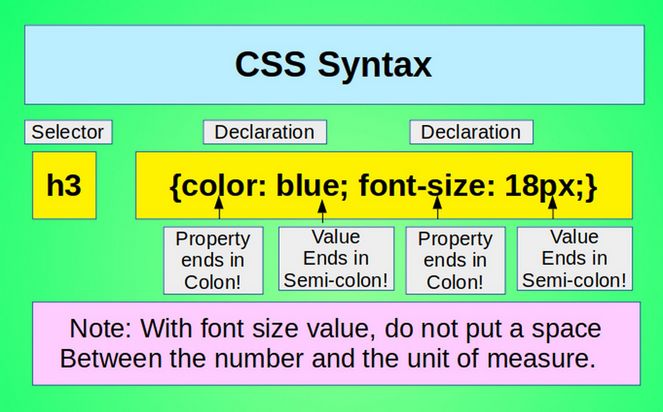
A CSS rule is a line of code which modifies a particular HTML element. Each CSS Rule has three main parts: a selector, and one or more properties and one or more values.
Each CSS or Style declaration consists of a property and a value. The property is the style attribute you want to change. Each property has a value which must be precisely spelled out.
CSS Properties
CSS properties are the specific options for modifying the appearance of HTML tags or elements. There are different property options for Headings, Paragraphs, Tables, Rows, and Cells. A common question is which properties of the headings, paragraphs, tables, rows and cells should be called out or modified? The truth is that all property modifications are optional. However, be aware that if you fail to specify the precise properties you want for the appearance of your web page or table, you will be leaving it up to the browser default settings to define the various properties. Because different browsers have different default settings, if you fail to define module properties, your web page may look very different from one browser to the next. So the best option is to define all of the important properties for every heading, paragraph, table, row and cell if its appearance matters.
How to change the module description paragraph style?
Using Inline CSS, we were able to change the paragraph style for any given module without affecting the general paragraph style used on the rest of our website. However, while the row style allowed us to change the font color for that row, it did not have a setting to change the font size for that row. One solution to this problem is to view the page with Firefox or Libre Wolf browser. Then click Tools, Browser Tools, Web Developer Tools. Then click on the far left icon called Pick an Element and hover over the first module description. Then click on it. In the left column is the HTML and in the middle column is the CSS. The font size is take from the body font size which is 14px. In the HTML, there is a class called sp-module.
We can add a custom value to this sp-module class:
.sp-module {font-size: 20px;}
In the Helix Template Edit screen, click on Custom Code and copy paste the above into the Custom CSS box. Then click Save and Close and View the site:

Again, the change only affected the first and third modules, but not the second one. Right click on the Page and click View Page Source to see that a new internal style has been added to the head of the HTML code: <style>.sp-module {font-size: 20px;}</style>
Problems with Internal CSS
The biggest problem with Internal CSS is that it has to be added line by line to the head of each web page. A modern web page may have more than 10,000 lines of custom CSS. Internal CSS turns your website source code into an unreadable mess. It addition, it is very time consuming to use the Firefox Inspector to figure out the names of each class that needs to be changed. Thankfully, there is a better option. That is to use the custom.css external style sheet and spend time at the beginning to create a series of styles or classes for your modules and then assign module classes to your modules as you create your modules. Let’s take a look at how this is done.
How to Transfer Internal CSS to your custom.css file
Open your Module Demo Page. Then right click and select View Page Source. Here are three internal CSS styles we just created for our custom modules:
<style>.sp-module {font-size: 20px;}</style>
<style>h3{font-family: 'Arimo', sans-serif;font-size: 22px;font-weight: 700;color: #9d1ec7;text-decoration: none;}</style>
<style>#sp-top-row-1{ background-color:#DDFFDD;color:#FF0000;padding:10px;margin:10px; }</style>
To transfer these three styles to our custom.css file, copy paste the CSS. Then remove the style opening and closing brackets to form this CSS list:
.sp-module {font-size: 20px;}
h3{font-family: 'Arimo', sans-serif;font-size: 22px;font-weight: 700;color: #9d1ec7;text-decoration: none;}
#sp-top-row-1{ background-color:#DDFFDD;color:#FF0000;padding:10px;margin:10px; }
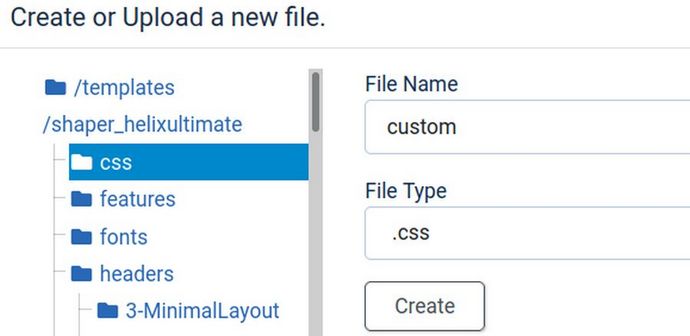
Then go to Template Code and click on the Helix template to edit it. Then click on the css folder in the left column to open it. We have previously created a custom.css file. But if you do not have a custom.css file in your template css folder, just click the New File button at the top of the page. For file name, type custom and for File Type, select css. Then click on the css folder in the left column to select it. Then click Create.
Open the custom.css file and copy paste the above internal css into the end of the custom.css file. Then click Save and Close. Then click Close.
We next need to undo the Internal CSS changes we made. Click Templates, Styles, Then click on the Helix Template to edit it. Click Custom Code and delete this line:
.sp-module {font-size: 20px;}
Then click Save. View the front end to confirm that the description font is still 20 px. Then right click on the page and view source to confirm that this internal style is now gone. Thus, the sp-module font size is now controlled by our custom.css file rather than by the Helix Internal CSS.
Next in the Helix Template Edit screen, click Typography and turn off Heading 3. Then click Save. View the front end to confirm that the Heading 3 font is still purple. Then right click on the page and view source to confirm that the h3 internal style is now gone. Thus, the h3 font is now controlled by our custom.css file rather than by the Helix Internal CSS.
Next in the Helix Template Edit screen, click Layout, Top Row 1 Edit, Style. Delete the Padding, Margin, red font color and change the background color to sky blue #ccccff. Then click Apply. Then click Save. View the front end to confirm that the module description font is still red. However, the background color for row 1 is now sky blue rather than light green:

Right click on the page and view source. The top row 1 internal style now shows this line:
<style>#sp-top-row-1{ background-color:#CCCCFF; }</style>
Thus, most of the CSS for top row 1 is now controlled by our custom.css file. However, the background color is still controlled by the Helix Internal CSS. And Feature Box 2 is still controlled by Inline CSS created by the JCE Editor.
Cascading Order
CSS actually stands for Cascading Style Sheets. The word cascading means that – when an element has more than one style method applied to it - some styles have priority over other styles. As we have seen, an inline style has the highest priority, and will override internal and external styles and browser defaults.
Next, internal styles have priority over our custom.css file. Because our custom.css file is not actually part of the web page, but is a separate file linked in the head of the web page, our custom.css file is called an External Style Sheet. Here is the link to our custom.css file in the head or top section of the Page Source:
<link href="/templates/shaper_helixultimate/css/custom.css" rel="stylesheet" />
Look at View Page Source and you will see that there are actually 12 external CSS style sheets with links in the head of our Page Source. Because the custom.css file is the last CSS Style Sheet, whatever is in our custom.css file will “over-ride” all of the other style sheets and will be chosen by the web browser to display the page. In fact, if there is more than one style set for the same element or selector in the custom.css file, the last CSS setting will be applied to that element and any prior settings will be ignored.
Understanding CSS Inheritance and Specificity
In addition to Inline CSS having priority over Internal CSS and Internal CSS having priority over External CSS, some types of selectors have priority over other types of selectors. The term “Specificity” is the method browsers use to decide which CSS property values will be applied when displaying a web page.
As we noted earlier, there are three primary types of selectors. These are elements, such as h3, classes such as .my-class and ID selectors such as #sp-top-row-1. Because an ID selector can only be used ONCE on a given website, it is the most specific. Any CSS applied to this ID will have priority over any ID applied to a class or an element. Thus, we need to be careful when adding styles using the Helix Layout Style function as these styles will have priority over the class styles we will be looking at below!
Class styles are more specific than the element styles and will thus have priority over element styles. However because the same class style can be used in several places on our website, it is not as specific as an ID selector.
In short, an ID selector is a name preceded by a hash character (#) while a class selector is a name preceded by a period. An ID selector is used to style an individual element while a class selector can be used to style a group of elements.
Why Classes are better than ID Selectors
We have seen that the Helix template uses element selectors such as the h3 selector to style the h3 element. Helix also uses class selectors such as .sp-module to style a group of modules. In addition, Helix uses ID selectors such as #sp-top-row-1 to style elements in a particular row we create with the Helix Layout tool. Element selectors, class selectors and ID selectors can then be placed either in the internal <style> in the head or top section of the web page or linked to an external style sheet such as our custom.css file. We can also use Inline CSS to style an individual custom module – but this can be a lot of work and result in some modules looking much different from other modules.
What we really need is a way to first create one or more module designs – much as an architect can design one or more houses - and then apply a specific module design to a specific custom module regardless of the actual content in the module. ID selectors can not be used for this purpose because they are too specific. Each ID selector can only be applied to one module. Element selectors also will not work because they are too general and would apply styles to other parts of our website that we do not want to have a custom style. Thankfully, classes are just right because they can be applied to many modules without affecting our entire website.
To solve this problem of assigning a specific style to a specific module, Joomla allows us to create Preset classes and then assign the class to any module we want to control the appearance of each custom module.
What’s Next?
In the next article, we will create a custom class and then use Joomla to apply our custom class to a specific custom module.