
Hestia has an easy backup and restore system. However, this is best used for restoring a website on the same server. We will use a different process to move a website from one Hestia server to a different one. This process is similar to the process of moving a website from Cpanel to Hestia. Be aware that this process will result in all old custom emails being lost so you should review and copy any old emails you may want to retain before making the move.
Three components of a Website
Content Management Systems such as Joomla and Wordpress consist of three main components. The first component consists of the website Files which are located in a folder called public_html. The second component is a website database which holds additional information. The third component is the custom website emails which are located in a separate folder. The process for migrating the Files and Database, but not emails consists of 12 steps:
#1 Set up a Canhost account using a secure Proton Mail email address. Change Additional Information from CAD to USD. Enter your name, address, city, state and zip code which is needed for registering your domain name. https://www.canhost.ca/hosting/register.php
#2 Transfer your domain names to your new Canhost account so you can manage their DNS Records directly from your Canhost account. Then add an ns1 A record to one of your domain names. Then pay for a VPS-Express-2 Server $20 per month with 4 GB RAM, 4 CPU, 40 GB SSD storage. This is enough space to run up to about 20 Joomla websites. Use the domain ns1.yourwebsite.com for the host name and change the Operating System from CentOS to Debian 12. Add a server password and system username.
#3 SSH into your VPS. Wait to get an email from CanHost which contains your primary IP address.
Open a terminal on your home computer. Use the Primary IP address given to you by Canhost in their email to SSH into your new server from our home computer terminal with this command:
ssh yourusername@yourIPaddress>
Example: ssh
Press Enter. Then type yes to accept the SSH connection. Then enter your VPS password and press Enter. Your terminal screen should then display the line that looks something like:
This means you are logged into your Debian VPS and can begin to edit its settings.
Create a Root User and Password
We need to create a Root User in order to install the Hestia Control Panel. However, we need to change the SSH configuration file before we can create a root user. Once logged into your user SSH session, copy paste: sudo nano /etc/ssh/sshd_config
to open the ssh configuration file. Use the down arrow to scroll down to PermitRootLogin. Delete the hash at the beginning of the line PermitRootLogin and set the value to yes:
PermitRootLogin yes
Save this file by pressing the Control key and the lower case o key at the same time, followed by pressing the Enter key. Close the file by pressing Control plus the x key at the same time. To make the new setting take effect, restart the ssh service:
sudo systemctl restart sshd.service
While VPS is running, and still in your user ssh session, copy paste the following into the ssh terminal: sudo passwd root
Enter your sudo user password. Then add a root password typing it twice. Reply should be: passwd: password updated successfully
Log out of the user SSH with exit. Then close the home terminal.
#4 Install Hestia to your new VPS
SSH into your VPS from your home computer terminal with this command: ssh root@yourIPaddress> For example, ssh
When prompted for the password, use the root password you just created. Once logged in as the root user, uninstall the Canhost firewall called CSF with these commands: cd /etc/csf
Press enter, then copy paste: sh uninstall.sh
Then press Enter again. Go back to root with cd /
Next, install the Midnight Commander graphical file manager with this command: apt install mc
Midnight Commander is a graphical file manager that makes it easier to edit and move files in our VPS. We will use Midnight Commander to change some settings after we install Hestia.
While logged in as root, copy and paste the following commands:
apt-get update
apt-get upgrade
Then open a browser and go to the Hestia Install page.
https://hestiacp.com/install.html
Uncheck mutli-php and clamav. Then click Submit. This screen will appear:
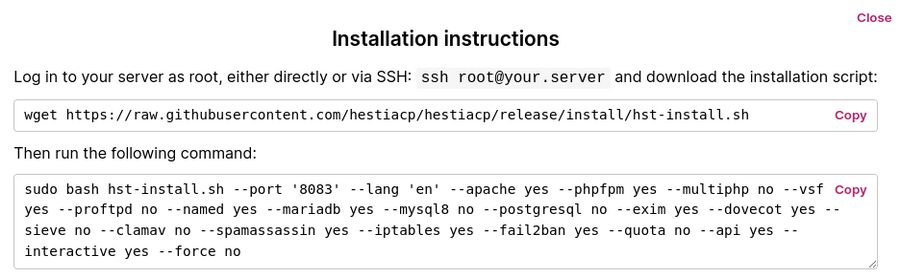
While logged into your server as root via SSH: ssh
wget https://raw.githubusercontent.com/hestiacp/hestiacp/release/install/hst-install.sh
Then copy paste this into the ssh root terminal:
sudo bash hst-install.sh --port '8083' --lang 'en' --apache yes --phpfpm yes --multiphp no --vsftpd yes --proftpd no --named yes --mariadb yes --mysql8 no --postgresql no --exim yes --dovecot yes --sieve no --clamav no --spamassassin yes --iptables yes --fail2ban yes --quota no --api yes --interactive yes --force no
Press Enter. Wait for the Thank you screen to appear.
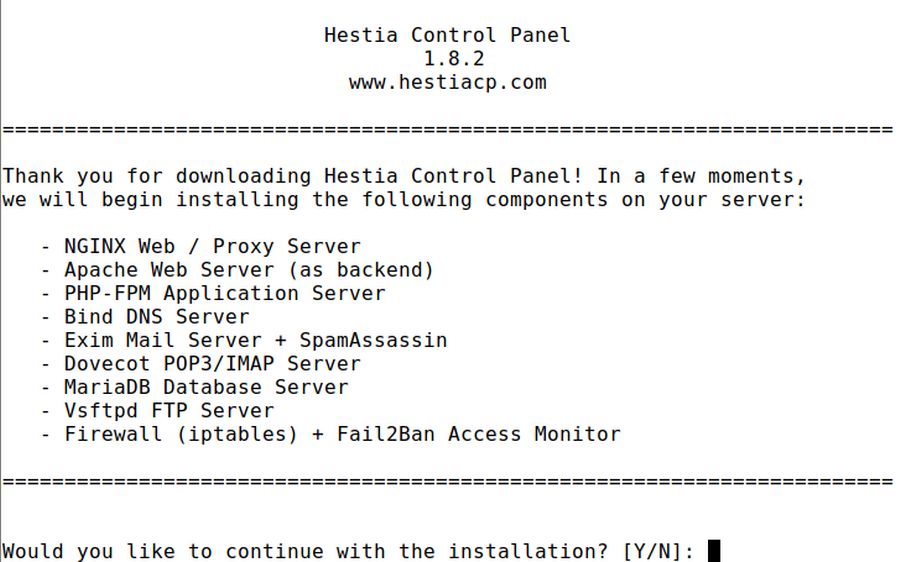
Then type Y. Then type your email and FQDN:

It is best to be connected to the Internet with a high speed and secure Ethernet cable. Then press Enter. After the installer finishes, it will end with Press any key to continue. Do not press any key! First, scroll up the page and copy paste the Hestia URL and password!!!
Admin URL: https://76.28.214.202:8083
Username: admin Password: ImQwmOHv1rg1Yi9g
Then scroll back down the page and press Enter. Then close the terminal. The server will restart. You do not need to log into the server. Instead, open a browser and copy paste the Hestia URL:
You can also log in with the domain name:port number
ns1.example.com:8083
Either way, Firefox will state: Warning: Potential Security Risk Ahead. Click Advanced. Then click Accept Risk and Continue. The Hestia Control Panel Log in screen will appear:
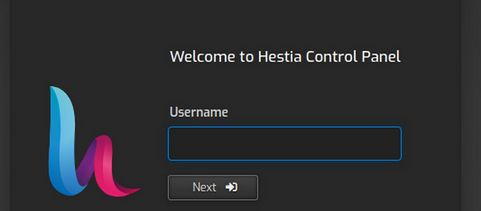
For username, type admin. Then click Next. For password, copy and paste the complex password: ImQwmOHv1rg1Yi9g
#5 Log into your old VPS account and copy the domain related emails from the old VPS to your home computer – but do not copy them to your new Hestia server (We will set up a new Hestia domain related email account).
#6 Use the old Hestia VPS File Manager to copy the website files as a single zipped folder called public_html to your home computer. (see below for details)
#7 Use the Hestia DB tool to copy the database as a single file from old VPS to your home computer. (see below for details)
#8 Log into your new Hestia Admin Control panel and create a new user. Then log into the new user panel and create a new website with the same domain name as your old VPS website. Check the email box if you want email and also check the DNS box.
#9 Use the Hestia File Manager to rename the new public_html file and then add the zipped public_html file from your home computer to the new Hestia website.
#10 Copy the database file from your home computer to the new Hestia website using the Hestia Database tool.
#11 Change the IP addresses using the Canhost DNS Manager to point the domain name to the new Hestia VPS IP address.
#12 Use Hestia to add a Lets Encrypt SSL certificate.
Note: Below we will review some of these 12 steps. There is also a Hestia command line script that can can be used to migrate a website from Cpanel to Hestia. However, the manual method only takes a few minutes and is less subject to human error. We therefore recommend that novices stick with the manual migration method. These steps assume you have already set up Hestia on your new Canhost VPS.
Step 6: Use the old Hestia VPS File Manager to copy the website files as a single zipped folder called public_html to your home computer.
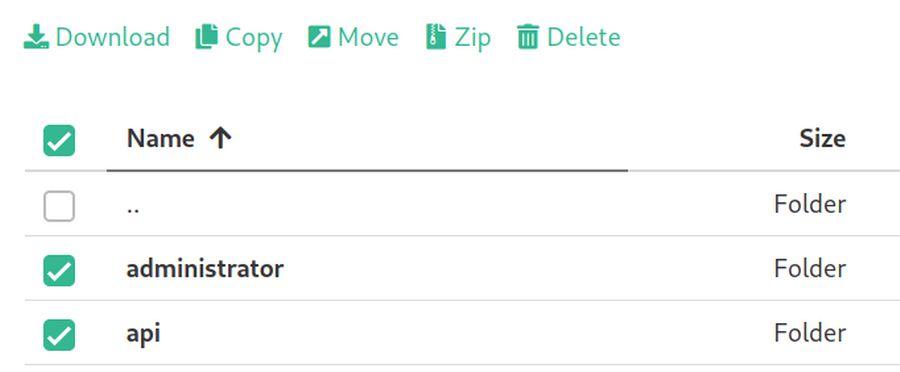
The actual transfer begins with copying your website Files from your old VPS. Log in your old Hestia VPS user account and open the File manager. Click web, your domain name, public_html. Then click the Select all box:
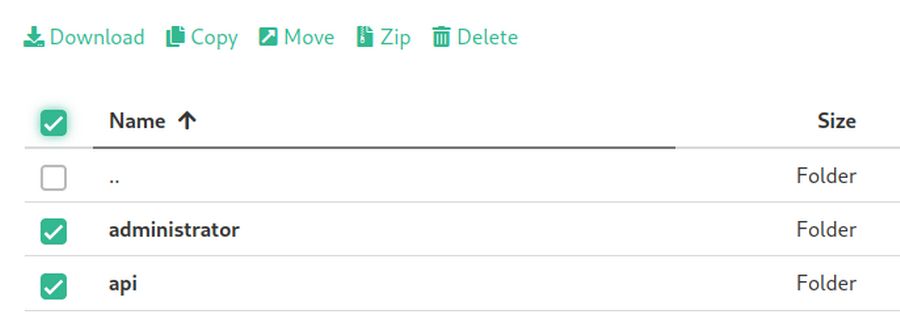
Then click Zip.
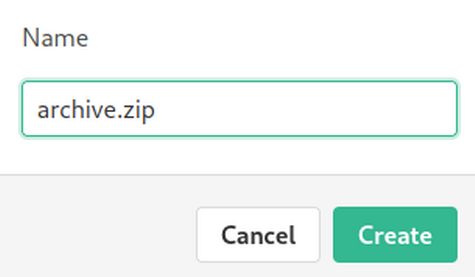
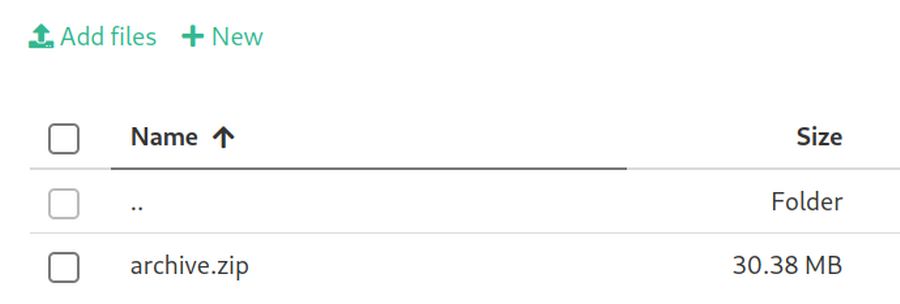
Click Create and wait for the zipped archive file to be created. Then click on the three dot so the right of the archive.zip file and click Download to download it to your Home computer Download folder.
Step 7 Copy the website database
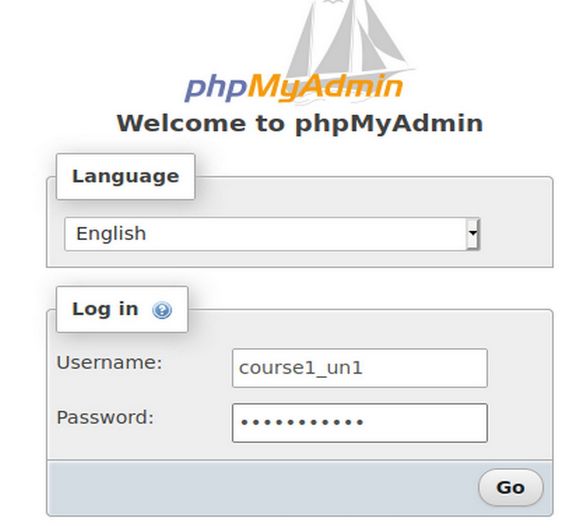
Next, we export the website database. Click Exit to Control Panel to go back to the User Control Panel. Then click DB. Then click phpMyAdmin. Enter the DB username and password.

Select the database in the sidebar by clicking on the database link. This will cause the right side of the screen to change from General Settings to database table structure. Then click Export. This screen will appear:
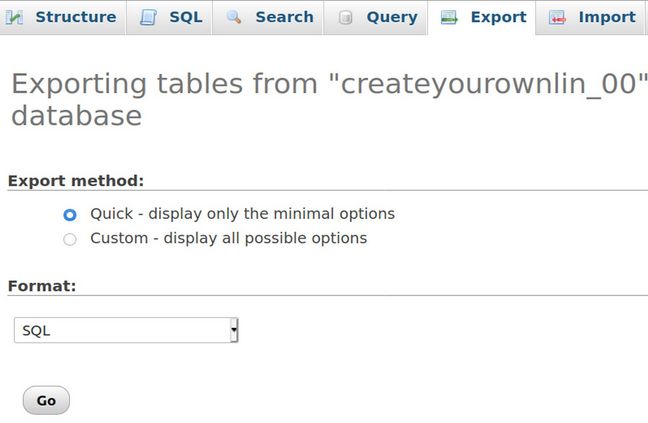
Leave it set for Quick export. Then click Export. Note that export only exports a copy of the original database. It does not delete it. Save the file to your home computer downloads folder. Then log out of and close phpMyAdmin. Then log out of the old Hestia VPS account.
Step 9: Upload Files to a new Hestia User Account
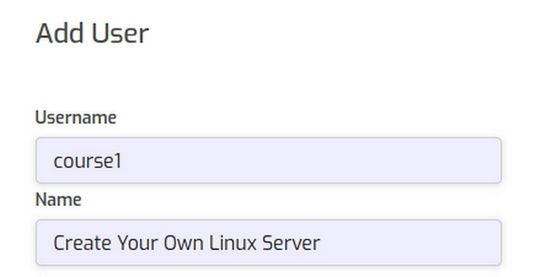
We are now ready to upload your website content to your new Hestia Control Panel and VPS. Log into your new Hestia Admin panel and create a new user. For example, call the new user course1.
Then add an email address and password and click Save and Back. Then go to your new user account and click Add Web Domain. Use the same domain name as the original website. Leave the IP address set for the new Canhost VPS server IP address. Check the DNS zone and Enable mail boxes.
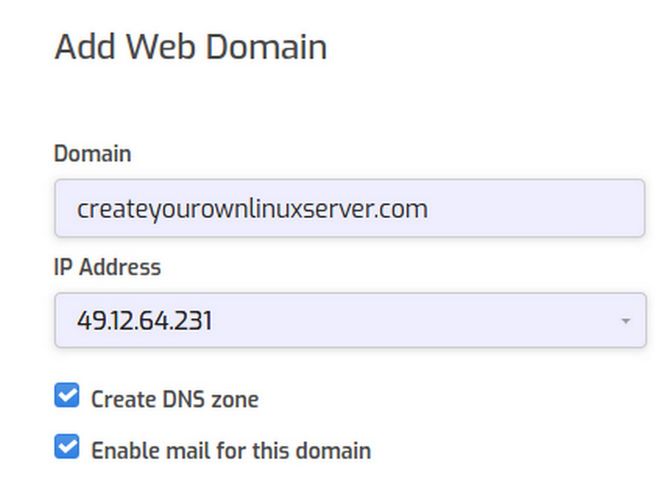
Then click Save and Back. We will not get an SSL certificate for this domain until after we have set up the new DNS settings. This created the website, DNS zone and the mail domain. But not the database.

So click DB. The click Add Database. The User Prefix will be automatically added to the beginning of the database name and username. So if your username is course1 and you type db1 into the Database box, the name will be course1_db1. If you type un2 into the Username box, the username will be course1_un1. The database password must have 8 characters including upper and lower case letters and at least one number. Then click Save.
Next, click Files and go to the web, yourwebsitename, public_html folder. Delete the index.html file and the robot.txt files. Then click Add Files and upload your archive.zip file into this new domain root directory. Hestia automatically uploads using SFTP.
Then click on the three dots to the right of the zipped file and click Unzip. Hestia will unzip the zipped file into the public_html root folder. This results in a folder called web. Delete the archive.zip folder. Then click on the web folder to open it. Click your domain folder to open it. Then click the public_html folder to open it. Click the Select All box.
Click Move. Click the plus sign to the left of web. Click the plus sign to the left of your domain name. Then click the public_html folder to move all of the files into this folder. Then click the public_html folder to open it. Delete the web folder which is inside the public_html folder.
Step 10: Upload your database
Click Exit to Control Panel to leave the Hestia File Manager and return to the Hestia User Control Panel. Before we import the database, we need to change some of the Hestia Server settings to allow more time for the database to import. Open a terminal on your home computer and start a root SSH session with ssh
Then type mc to open Midnight Commander. Press Enter to open the root folder. Then scroll up to the etc folder to open it. Then scroll down to the php folder to open it. Then open 8.x folder. Then open the fpm folder. Then select the PHP INI file and click File Edit. Type Alt plus c to display the line numbers. Then use the down arrow to scroll down to line 388. Change the max_execution_time from 30 (seconds) to 300 (seconds). Then scroll down to line 874. Change default_socket_timeout from 60 (seconds) to 300 (seconds). Then click Control plus o followed by Enter to save the file. Then click Control plus X to close the file. Then type exit to exit Midnight Commander. Then type exit to exit the SSH session.
Once the Hestia server settings are improved, go back to the Hestia User Control Panel and click on the up arrow in the upper right corner of the screen to go back to the Hestia Admin Control Panel. Then click on the Server settings wheel. Then select php8.x-fpm and click on the restart icon. This will save the changes to the PHP dot INI file.
Then click on Users and select the user and click on the right arrow to return to the Hestia User Control Panel. Then click DB to go to the Databases screen. Then click phpMyAdmin to log in to the database edit screen. Type in the username and password of the Hestia database you just created. Then click Go.
Once logged into the new Hestia database, select the course1_db1 database in the upper left corner.
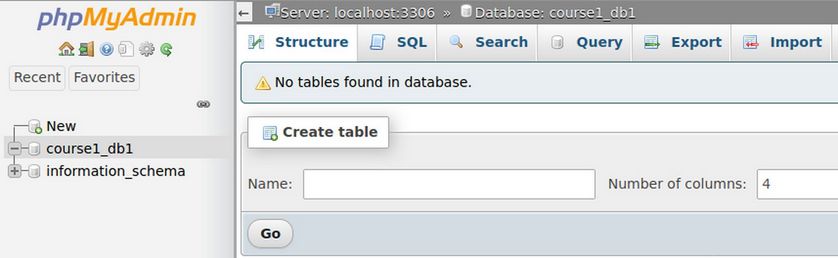
Then click Import in the top menu. You will now see the Import screen.
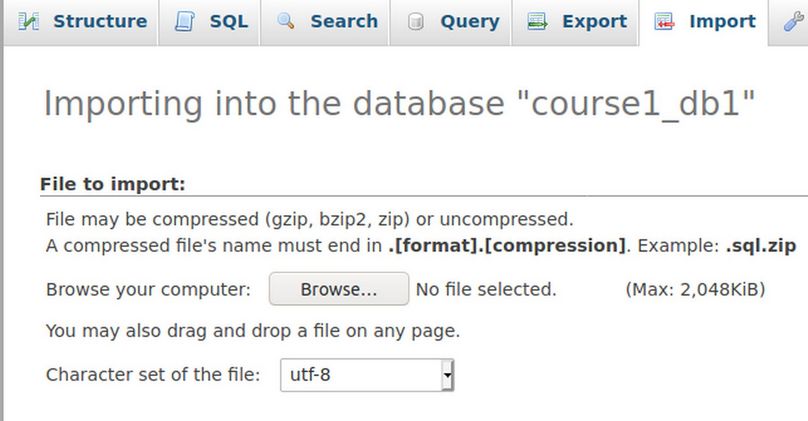
Click Browse and navigate to the old VPS SQL database file to select it. Then click Open. Make sure you are connected to the Internet with a fast Ethernet connection. Then scroll down the page and click Import to upload the old database into the new database. Your database will be successfully restored. Log out of phpMyAdmin by clicking on the log out button in the upper left corner of the screen.
Connect your new database to your Hestia website
Your database is restored but it’s still not connected to your Hestia website This is because in your old VPS, your database name and path might be different from your new database name and path. To connect your new website to your new database, you have to tell your website the name of the new database, its new username,and updated password.
First, you will have to locate the configuration file where database login details are defined. Click on Files to open the new Hestia File Manager. Then go to the public_html folder and scroll down to configuration.php
Click on this file to open it. To update the database information, scroll to line 17 18 and 19. Here are the current entries:
public $user = 'createyourownlin_00';
public $password = 'u53p5S5)S@';
public $db = 'createyourownlin_00';
Edit these three lines to replace old database details with the details of the database you just created.
public $user = 'Database username goes here';
public $password = 'Database password goes here';
public $db = 'Your database name goes here';
Here are my new values:
public $user = 'course1_un1';
public $password = 'Course1_pw1';
public $db = 'course1_db1';
Some of the paths also need to be changed. Scroll down the page to lines 59 and 60 to change:
public $log_path = '/home/createyourownlin/public_html/administrator/logs';
public $tmp_path = '/home/createyourownlin/public_html/tmp';
Change these paths to:
/home/course1/web/createyourownlinuxserver.com/public_html/administrator/logs
/home/course1//web/createyourownlinuxserver.com/public_html/tmp
Then click Save and Close. Then Exit to Control Panel.
#11 Create new DNS records
We will use the Canhost DNS Manager to point the domain name to the new Hestia VPS IP address. In this example, the Canhost VPS server IP address is 49.12.64.231 and the website name is createyourownlinuxserver.com. This website is still live and being routed through the old Canhost IP DNS server. To change this website from the previous IP DNS server to your new Canhost IP VPS DNS server (ns1.your website.com), log into your Canhost account and click on Domains, My Domains. This will open a table showing all of your domain names. To the right of your domain name, click on the small down arrow and click Manage Nameservers. Then click Manage DNS in the side menu.
You will see four A records at the top of the list with each pointing to the old IP address. Delete each of these and change the IP addresses to the IP address of your new Hestia Server. Then click SAVE at the bottom of the screen. Assuming you have set up your CAA records, there is no need to change these. Your website will now point to the IP address associated with your new VPS. However, it may take a few minutes for the Internet to update this new route to your website. Clear the browser cache. Then refresh the web browser page. This will send a new request to the global DNS system. You can check the status of your DNS records propagation by using any global DNS checker such as
Type in just your domain name and click Search. Red Xs indicate that your domain name has not propagated. Green check marks indicate it has propagated. You will likely be greeted with a warning saying the site is a security risk.
Click Advanced and accept the risk. You should now see the site on your new server – but without a security certificate.
#12 Use Hestia to add a Lets Encrypt SSL certificate.
After loading the new Database, and changing the IP to your new VPS IP address, we need to use Hestia to get a new SSL Certificate. Log into your Hestia User panel. Select the domain name and edit it. Check Enable SSL for this domain. Then check Use Lets Encrypt. Also check Enable automatic HTTPS redirection.
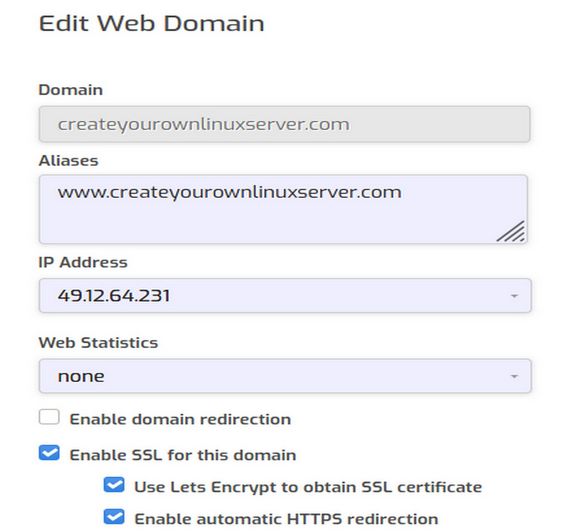
Then click Save. Wait for the Certificate to Install. It ended with Changes have been saved – meaning that the new SSL certificate was installed and the old SSL certificate was removed. Then click Back. Then open a new browser. Clear the cache and visit the site.
Success! Now log into your Joomla website control panel and see if we can update extensions and Joomla version. From the Joomla Control Panel, click Extensions, View Updates. The JCE Editor updated without an error. However, BF Stop had this error:
An error has occurred. 1146 Table 'course1_db1.#__bfstop_whitelist' doesn't exist
Click the back arrow to go back to the Joomla Control Panel. BF stop extension did update anyway. Then click on the Joomla Update Now button. Click Install the Update. Joomla updated successfully. Finally, go to Content, Media and upload a new header image.
Also create a new custom email address on the new server and change the email address in Joomla to the new custom email address.
Log out of the Joomla Control Panel and close the browser. Also log out of the Hestia User panel and close the browser. We are done migrating this website from one Hestia VPS to another.
What’s Next?
You can see that the migration process of moving a website from a from one Hestia VPS to a new one is complex with lots of ways to go wrong. But if you go slow and carefully follow each step, you can migrate a website to a new VPS in under an hour.