Tip 4 Move a Site to a New VPS

 Hestia has an easy backup and restore system. However, this is best used for restoring a website on the same server. We will use a different process to move a website from one Hestia server to a different one. This process is similar to the process of moving a website from Cpanel to Hestia. Be aware that this process will result in all old custom emails being lost so you should review and copy any old emails you may want to retain before making the move.

Three components of a Website
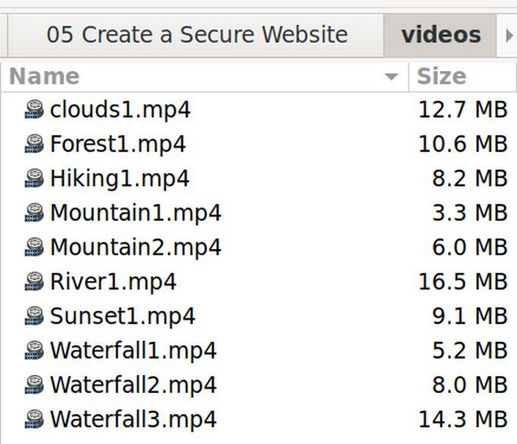
Content Management Systems such as Joomla and Wordpress consist of three main components. The first component consists of the website Files which are located in a folder called public_html. The second component is a website database which holds additional information. The third component is the custom website emails which are located in a separate folder. The process for migrating the Files and Database, but not emails consists of 12 steps:

#1 Set up a Canhost account using a secure Proton Mail email address. Change Additional Information from CAD to USD. Enter your name, address, city, state and zip code which is needed for registering your domain name. https://www.canhost.ca/hosting/register.php

#2 Transfer your domain names to your new Canhost account so you can manage their DNS Records directly from your Canhost account. Then add an ns1 A record to one of your domain names. Then pay for a VPS-Express-2 Server $20 per month with 4 GB RAM, 4 CPU, 40 GB SSD storage. This is enough space to run up to about 20 Joomla websites. Use the domain ns1.yourwebsite.com for the host name and change the Operating System from CentOS to Debian 12. Add a server password and system username.

#3 SSH into your VPS. Wait to get an email from CanHost which contains your primary IP address.

Open a terminal on your home computer. Use the Primary IP address given to you by Canhost in their email to SSH into your new server from our home computer terminal with this command:

ssh yourusername@yourIPaddress>

Example: ssh This email address is being protected from spambots. You need JavaScript enabled to view it.

Press Enter. Then type yes to accept the SSH connection. Then enter your VPS password and press Enter. Your terminal screen should then display the line that looks something like:

david@ns1


This means you are logged into your Debian VPS and can begin to edit its settings.

Create a Root User and Password
We need to create a Root User in order to install the Hestia Control Panel. However, we need to change the SSH configuration file before we can create a root user. Once logged into your user SSH session, copy paste: sudo nano /etc/ssh/sshd_config

to open the ssh configuration file. Use the down arrow to scroll down to PermitRootLogin. Delete the hash at the beginning of the line PermitRootLogin and set the value to yes:

PermitRootLogin yes

Save this file by pressing the Control key and the lower case o key at the same time, followed by pressing the Enter key. Close the file by pressing Control plus the x key at the same time. To make the new setting take effect, restart the ssh service:

sudo systemctl restart sshd.service

While VPS is running, and still in your user ssh session, copy paste the following into the ssh terminal: sudo passwd root

Enter your sudo user password. Then add a root password typing it twice. Reply should be: passwd: password updated successfully

Log out of the user SSH with exit. Then close the home terminal.

#4 Install Hestia to your new VPS

SSH into your VPS from your home computer terminal with this command: ssh root@yourIPaddress> For example, ssh This email address is being protected from spambots. You need JavaScript enabled to view it.

When prompted for the password, use the root password you just created. Once logged in as the root user, uninstall the Canhost firewall called CSF with these commands: cd /etc/csf

Press enter, then copy paste: sh uninstall.sh

Then press Enter again. Go back to root with cd /

Next, install the Midnight Commander graphical file manager with this command: apt install mc

Midnight Commander is a graphical file manager that makes it easier to edit and move files in our VPS. We will use Midnight Commander to change some settings after we install Hestia.

While logged in as root, copy and paste the following commands:

apt-get update

apt-get upgrade

Then open a browser and go to the Hestia Install page.
https://hestiacp.com/install.html

Uncheck mutli-php and clamav. Then click Submit. This screen will appear:

Tip 3 Four Better Search Engines

Google and Bing search engines have terrible records when it comes to user privacy. They data mine and sell user data to advertisers without users consent. Even worse, they do not show accurate search results. Instead, they censor alternative points of view and shadow ban websites that criticize governments and large corporations. Duck Duck Go, announced in March 2022 that they will also start censoring their search results. Startpage also censors results because they use the Google Search engine. Therefore, if we want balanced search results that list both sides of a debate, we need to replace Google, Bing and Duck Duck Go with alternative search engines. Four good search engines to consider are Gibiru, Search Encrypt, Mojeek and Brave Search.

Gibiru… The Private Search Engine Gibiru search is that it qualifies as a “private search engine.” This style of search tool has become much more popular in recent years as Google’s sins have accumulated, and have then been made public. The idea behind most of them is to offer ways to search the web without giving away personal data (or at least having the chance to consent to any data usage).

01

The Gibiru search engine bills itself as “uncensored anonymous search”. When users search for terms using Gibiru search, the content of their searches is not logged or linked to an IP address. So there’s profiling individual web users. Gibiru doesn’t sell any information to third parties. When you submit a Gibiru search, you’ll see “all results” and “uncensored” options. The uncensored option lets you see all results that won’t appear in Google searches.

Tip 2 Crop and Resize Videos with Open Shot

The common video sizes are ratios of 16 by 9 or 4 by 3. Thus, any free background videos you download are likely to be one of these two aspect ratios. This can be a problem if you want a background video for a module that is 16 by 4.5 or 16 by 16. In this article, we will explain how to use Open Shot to add custom aspect ratios to their list of options. We will then explain how to resize and crop a video to fit whatever size you need for your website module video backgrounds.

Download and Change the Appearance of Open Shot
You can download a free video editing program called Open Shot from the Debian Software Center. Then from the Debian Start icon, go to Sound and Video category and click on Open Shot to open it.

01

You can change the appearance of Open Shot to a light background by clicking Edit Preferences and changing the default theme from dark to no theme. Then close and open Open Shot again. Click Views, Views, Simple View.

02

Create a Custom Profile for Open Shot
A profile is a collection of video settings (size, frame rate, aspect ratio). Profiles are used during editing, previewing, and exporting to provide a quick way to switch between common combinations of these settings.

One of the first steps in editing any video is to choose the Profile for the Video Preview Panel. Click File, Select Profile to see this popup:

Tip 1 Create a Joomla Module with a Video Background

Joomla modules are boxes of content you can place on any page of your website and in any position on any page. Joomla modules can also be any width and any height and can contain almost any content. They typically contain a Title, a one sentence description and a link to more information which takes the reader to a separate page. Joomla modules are commonly displayed with a background color or background image to set them apart from the rest of the content on the page. You can make a Joomla module even more distinctive and eye catching by adding a video background to the module. In this article, we will describe two ways to add a video background to a Joomla module.

We will focus on creating a full width header module with a video background and text in the foreground - but the same steps apply to creating a row with two or even three modules. Here is an image from one of our Joomla header module with a video background.

01

To see this header module with the video background, go to this website: https://collegeintheclouds.org/

This article is divided into the following four parts:

Part 1 Find or Make Short Free Short Background Videos

Part 2 Add a Video Background using a Free Joomla Extension

Part 3 Add a Video Background using HTML and CSS

Part 4 Edit Background Videos with Open Shot

Part 1 Find or Make Free Short Background Videos
The first step is finding short videos. Because we will load them into our website media manager, each video should have a file size of less than 20 MB. Anything more than 20 MB will severely slow down your page loading speed. This means the duration of the video will likely be less than 30 seconds. Common sources for free video backgrounds include YouTube.com and Pixabay.com. We will also provide a few background videos on our course Free Downloads page. You can also create your own video backgrounds using any camera or computer screen capture tool. Here is what these videos look like in my home computer file manager after downloading them:

02

Load the Background Videos to your Joomla Website
One option is to load your background videos to a video hosting service like YouTube. The problem with this option is that a link to a remote server will take a longer time to load the page. Also, if YouTube ever changes the link or takes down the video channel, your background images will stop displaying. We therefore recommend loading background videos to your website server provided that the videos have a file size less than 20 MB.