
Joomla modules are boxes of content you can place on any page of your website and in any position on any page. Joomla modules can also be any width and any height and can contain almost any content. They typically contain a Title, a one sentence description and a link to more information which takes the reader to a separate page. Joomla modules are commonly displayed with a background color or background image to set them apart from the rest of the content on the page. You can make a Joomla module even more distinctive and eye catching by adding a video background to the module. In this article, we will describe two ways to add a video background to a Joomla module.
We will focus on creating a full width header module with a video background and text in the foreground - but the same steps apply to creating a row with two or even three modules. Here is an image from one of our Joomla header module with a video background.

To see this header module with the video background, go to this website: https://collegeintheclouds.org/
This article is divided into the following four parts:
Part 1 Find or Make Short Free Short Background Videos
Part 2 Add a Video Background using a Free Joomla Extension
Part 3 Add a Video Background using HTML and CSS
Part 4 Edit Background Videos with Open Shot
Part 1 Find or Make Free Short Background Videos
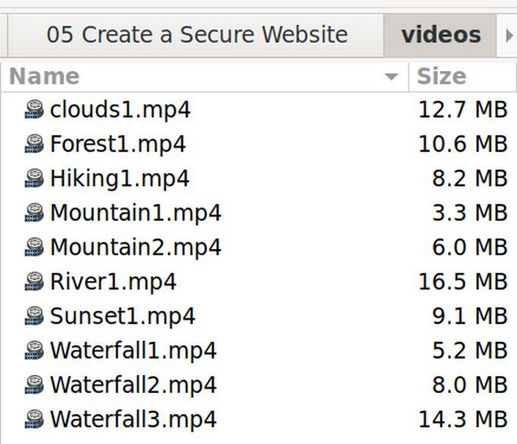
The first step is finding short videos. Because we will load them into our website media manager, each video should have a file size of less than 20 MB. Anything more than 20 MB will severely slow down your page loading speed. This means the duration of the video will likely be less than 30 seconds. Common sources for free video backgrounds include YouTube.com and Pixabay.com. We will also provide a few background videos on our course Free Downloads page. You can also create your own video backgrounds using any camera or computer screen capture tool. Here is what these videos look like in my home computer file manager after downloading them:
Load the Background Videos to your Joomla Website
One option is to load your background videos to a video hosting service like YouTube. The problem with this option is that a link to a remote server will take a longer time to load the page. Also, if YouTube ever changes the link or takes down the video channel, your background images will stop displaying. We therefore recommend loading background videos to your website server provided that the videos have a file size less than 20 MB.
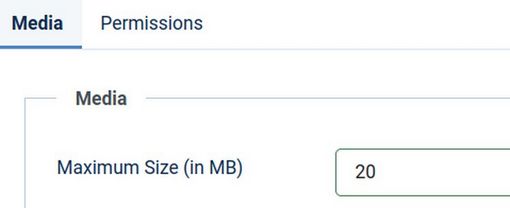
Before we add videos to our website server, we need to change the Joomla Media Manager Options setting to permit loading each of these videos. Log into your Joomla Dashboard and click Content, Media. Then click Options in the upper right corner. Change the Upload Limit from 10 MB to 20 MB.
Also turn off Check Mime Types. Then click Save and Close. Note: we are also assuming you are using the Hestia Control Panel and have made the suggested changes to the PHP.INI file to permit large files to be loaded to your website Media manager.
Next, still in the Joomla Media Manager, click Create New Folder to create a folder named videos.
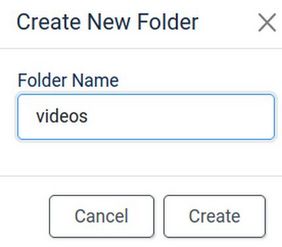
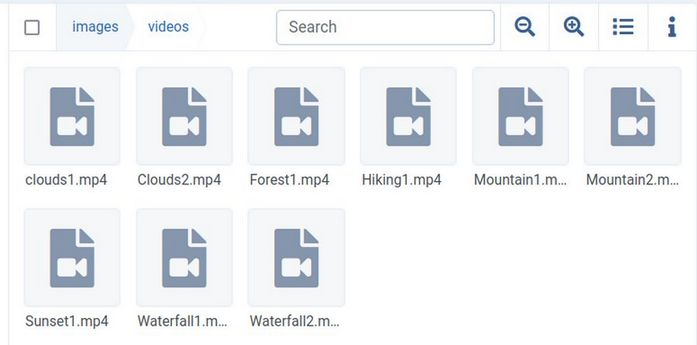
Click Create. Then click on the videos folder to open it. Then click Upload to load your videos to this folder. Load the videos one at a time. Here is what your Media Manager videos folder will look like after several background videos have been loaded.
Make a List of the Absolute File Paths to each video
The link to our course home page is: https://createasecurewebsite.com/
To go to the videos in the images/videos folder, we add this to the URL for the Home page: https://createasecurewebsite.com/images/videos/
To get the path to a single video, add the file name of each video to the above. For example for the first video, the link is: https://createasecurewebsite.com/images/videos/clouds1.mp4
Here is our list of background video URLS:
https://createasecurewebsite.com/images/videos/clouds1.mp4
The first video has a black bottom between the video and the controls. This black bottom is not present on the other videos.
https://createasecurewebsite.com/images/videos/Forest1.mp4
https://createasecurewebsite.com/images/videos/Hiking1.mp4
https://createasecurewebsite.com/images/videos/Mountain1.mp4
https://createasecurewebsite.com/images/videos/Mountain2.mp4
https://createasecurewebsite.com/images/videos/Sunset1.mp4
https://createasecurewebsite.com/images/videos/Waterfall1.mp4
https://createasecurewebsite.com/images/videos/Waterfall2.mp4
Open a new browser tab and visit this URL to see if the video is shown. Note that sunset1 has an error that needs to be cut from the beginning of the video.
Create Module Positions for our Video Background Modules
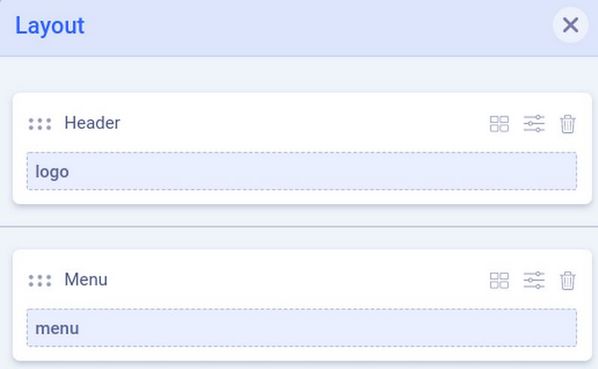
Before we set up the Geek Masthead module, we need to create a place to put it. We will assume that you have installed and configured the Helix Ultimate template. Go to Templates, Styles and click on the Helix template to edit it. Click Layout. To add a Header module, click the plus sign at the top of the layout to add a Header Row. Then assign the logo module position to your Header row:
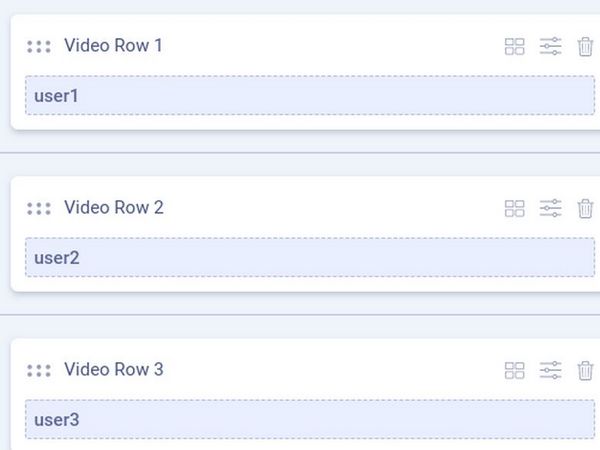
To demonstrate our background video modules, we will also add rows called Video Row 1, Video Row 2 and Video Row 3. All are full width. Assign the user1 module position to Video Row 1, user2 to Video Row 2 and user3 to Video Row 3:
Then click Save and Close.
Make a Background Video Module Page
We will display the header on all of our pages. But we need a page to display our example video background modules. So click Content, Articles, New and name the page Video Background Modules. For text, type Below are some example Joomla Custom modules with background videos. Then click Menus, Main Menu, New and select Articles, Single Article. Select the Video Background Modules article and for Title, type Video Background Modules. Click Save and Close.
Part 2 Add a Video Background using a Free Joomla Extension
The easiest way to add a background to a Joomla Module is to use a free Joomla Module Extension called Geek Masthead. This module extension works on either a Joomla 3 or Joomla 4 website. Here is a link to this extension in the Joomla Extensions Directory: https://extensions.joomla.org/extension/geek-masthead/
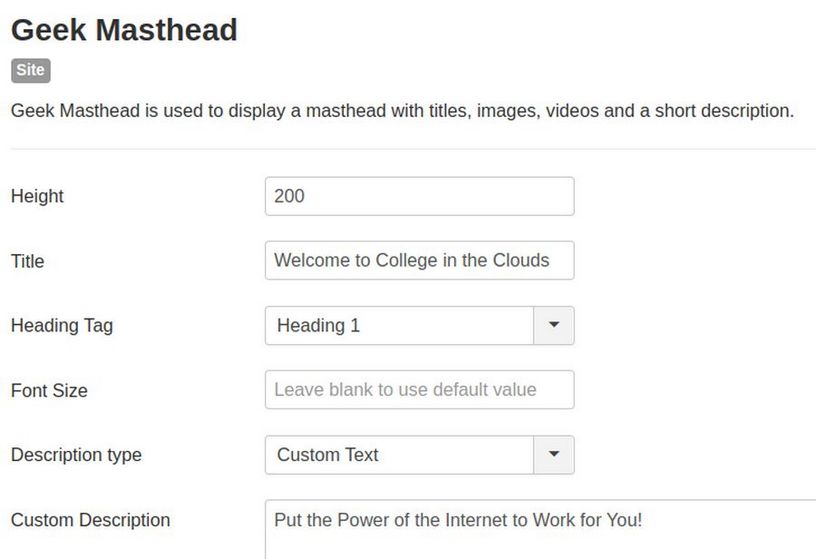
Download the module. Then go to System, Install, Extensions to install the module. Then go to Content, Site Modules and click on the Geek Masthead module to open it. Assign it to the logo position and turn off the title. Set the height for 200 to 200 pixels and type in a title and a custom description.
Copy and paste the absolute URL into the Source URL box.
https://createasecurewebsite.com/images/videos/Header2.mp4
Change Mask opacity to 0.1 and change the font color to dark blue.
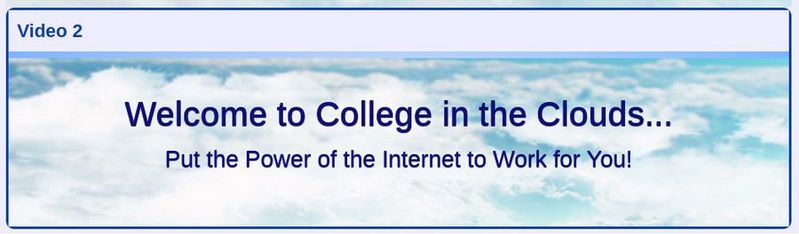
Note that the background video will not play on most mobile devices as it counts against data transfer plans. Thus, this module provides a way to add a “Poster” background image which will display on mobile devices instead of the background video. Then save and close the module and view the result:

To better understand how this background video module is created, right click on the source code.
Here is the HTML of the Geek Masthead module minus the mask:
<div class="geek-masthead-wrapper">
<div id="geek-masthead-98" class="geek-masthead">
<video autoplay loop muted>
<source src="https://collegeintheclouds.org/images/Header2.mp4" type="video/mp4">
</video>
<div class="inner">
<h1 >Welcome to College in the Clouds...</h1>
<p>Put the Power of the Internet to Work for You!</p>
</div></div></div.
Here is the CSS in the file mod_geekmasthead/assets/style.css
.geek-masthead-wrapper {overflow: hidden;}
#geek-masthead-98 > .inner h1,
#geek-masthead-98 > .inner h2,
#geek-masthead-98 > .inner h3,
#geek-masthead-98 > .inner h4,
#geek-masthead-98 > .inner h5,
#geek-masthead-98 > .inner p { color: #111177 text-shadow: 0 1px 1px #000055; text-align: center; }
#geek-masthead-98 { height: 200px;}
.geek-masthead {position: relative; display: table; width: 100%;
overflow: hidden;}
.geek-masthead > video { position: absolute; display: block; z-index: 1; top: 50%; left: 50%;
transform: translateX(-50%) translateY(-50%);
min-width: 100%;
min-height: 100%;
width: auto;
height: auto;
background-size: cover;
transition: 1s opacity;
overflow: hidden; }
.geek-masthead > .inner { z-index: 2; position: relative;
display: table-cell; vertical-align: middle; padding: 20px;}
.geek-masthead > .inner h1 { font-size: 3em;}
.geek-masthead > .inner p {font-size: 1.375em;}
Next we will explain how to add a video background to a Joomla Custom Module using HTML and CSS.
Part 3 Add a Video Background using HTML and CSS
The Geek Masthead module is a quick way to add a background video as long as all you need is a Title and Short Description. But learning how to use HTML and CSS will give you the ability to add any foreground content to your Video Background module.Thankfully, Joomla offers a Custom Module that makes this task pretty easy.
Go to Content, Site Modules, New and click on Custom module. Then click on the Code tab and paste the same video HTML used by the Geek Masthead module above. However, replace the class geek-masthead-wrapper with video-container, replace the element ID geek-masthead-98 with video-element, replace the class geek-masthead with video-background and replace the class inner with video-text. Note that we will skip using a mask for now:
<div class="video-container">
<div id="video-element" class="video-background">
<video autoplay loop muted>
<source src="https://collegeintheclouds.org/images/Header2.mp4" type="video/mp4">
</video>
<div class="video-text">
<h1 >Welcome to College in the Clouds...</h1>
<p>Put the Power of the Internet to Work for You!</p>
</div></div></div.
Assign the custom module to the user2 module position and the Video Background Module page. Then click Save and Close and view the result.

Sadly, the Title and Description were placed below the background video rather than in front of the background video. To solve this problem, we need to add some CSS for our IDs and classes to our custom.css file! Again, we will copy and slightly alter the Masthead CSS. Here is the custom CSS we will use:
.video-container {overflow: hidden;}
#video-element > .video-text h1,
#video-element > .video-text h2,
#video-element > .video-text h3,
#video-element > .video-text h4,
#video-element > .video-text h5,
#video-element > .video-text p { color: #111177; text-shadow: 0 1px 1px #000055; text-align: center; }
#video-element { height: 300px;}
.video-background {position: relative; display: table; width: 100%;
overflow: hidden;}
.video-background > video { position: absolute; display: block; z-index: 1; top: 50%; left: 50%;
transform: translateX(-50%) translateY(-50%);
min-width: 100%; min-height: 100%;
width: auto; height: auto; background-size: cover;
transition: 1s opacity; overflow: hidden; }
.video-background > .video-text { z-index: 2; position: relative;
display: table-cell; vertical-align: middle; padding: 20px;}
.video-background > .video-text h1 { font-size: 2em;}
.video-background > .video-text p {font-size: 1.375em;}
Copy and paste the above custom CSS into the end of your Helix template custom.css file. Then Save and Close and view the result.

Add a Border with a Module Class Suffix
A major advantage of using the Joomla Custom Module and our own custom HTML and CSS is that we can add whatever we want to the module. This includes images, borders and module class suffixes. To see how this is done, create a Duplicate of our first video module and call it Video 2 and put it in the user3 position. Then click on the Advanced tab and in the Module Class box, type (space)fullroundblue. Note: We are assuming here that you have added the CSS for the Rainbow Modules to your custom dot css file. Click Save and view the result.
Add a CLICK HERE TO LEARN MORE button
A very important element that is missing from the Geek Masthead module and from our Joomla Custom Module is a Call to Action button. This is OK if the module is just our header module. But for all other modules, we should add a CLICK HERE TO LEARN MORE button. This will encourage our readers to go to a full web page with much more information that can be displayed in a Joomla module.
To see how this is done, make a Duplicate of Video 2 and call it Video 3. Place it in the user4 position. Then switch from the Code tab to the Editor tab. Press Enter to start a new line. Then add this text to the JCE Editor workspace: CLICK HERE TO LEARN MORE!
Select the text and click Bold. Then select the text and click on the Link Icon.
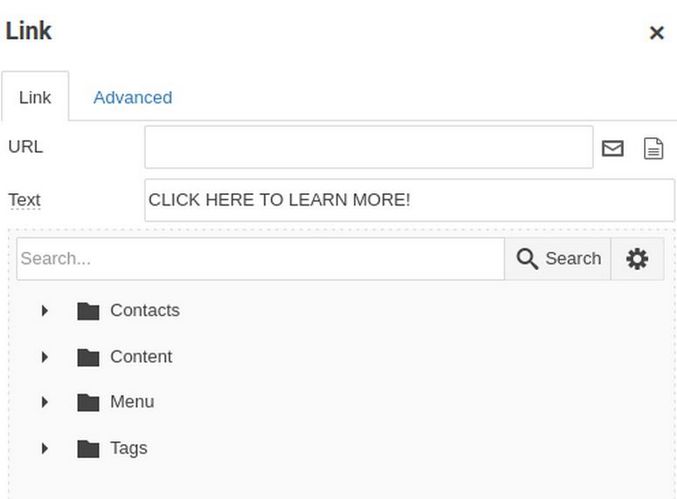
Click on the Content folder to select an article to link to or click on the Menu, Main Menu folder to select a menu item to link to. Then click Insert to insert the link. Then click Save and close and view the result.

Click on the link to make sure it goes to the correct page.
Place Two Modules Side by Side
It is common to place two or even three modules on the same row. To see how this is done, go to Template Styles and click on the Helix template to edit it. Click Layout. Change Video Row 4 from one column to two columns. Then add the user3 position to the second column. Then click Save and Close and view the result.
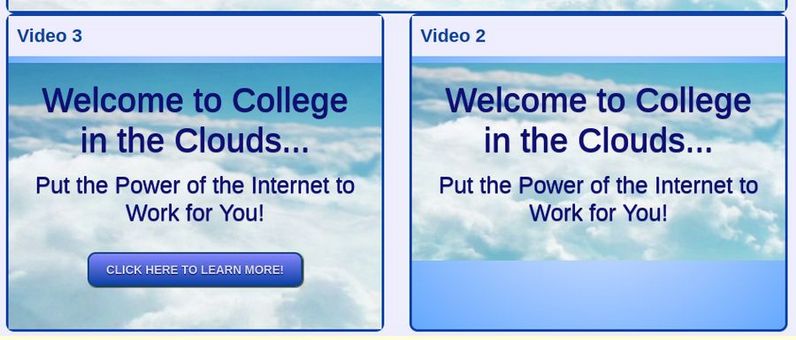
The blue space at the bottom of Video 2 is caused by the height being set for 200 pixels and the fact that we did not add a READ MORE button to the second video. For more information on creating and customizing Joomla modules, read these four articles:
https://createasecurewebsite.com/final-steps/7-create-custom-modules/7-1-style-custom-modules-with-inline-css
https://createasecurewebsite.com/final-steps/7-create-custom-modules/7-2-style-modules-with-internal-and-external-css
https://createasecurewebsite.com/final-steps/7-create-custom-modules/7-3-use-preset-classes-to-style-custom-modules
https://createasecurewebsite.com/final-steps/7-create-custom-modules/7-4-use-rainbow-presets
You may also want to read this article that explains how to crop and resize background videos using Open Shot:
https://createasecurewebsite.com/10-more-web-tips/2-crop-and-resize-videos-with-open-shot
As always, I look forward to your questions and comments.