
In a later chapter, we will review Joomla website structure – including various menu options. In this article, we will simply review how to use our Helix template to add first a normal horizontal menu and then a custom Mega Menu.
Helix Horizontal Menu
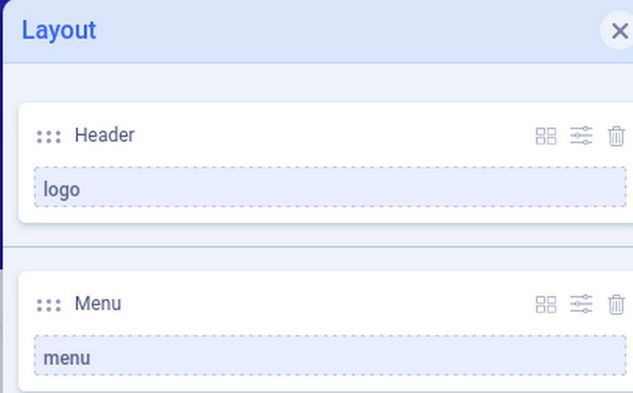
To see our Helix menu, we need do do three things. First, we need to use the Helix Layout tool to create a row called Menu with a menu module position. The word menu is very special because the Helix menu will automatically use this module position.
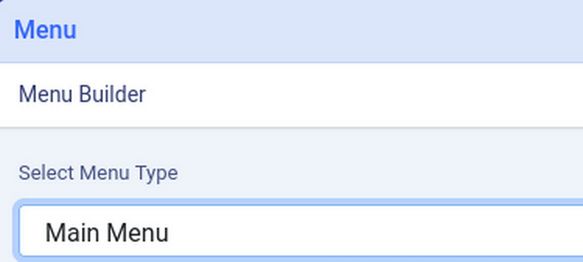
Second, we need click Menu and set the Helix Menu Builder for Main Menu:
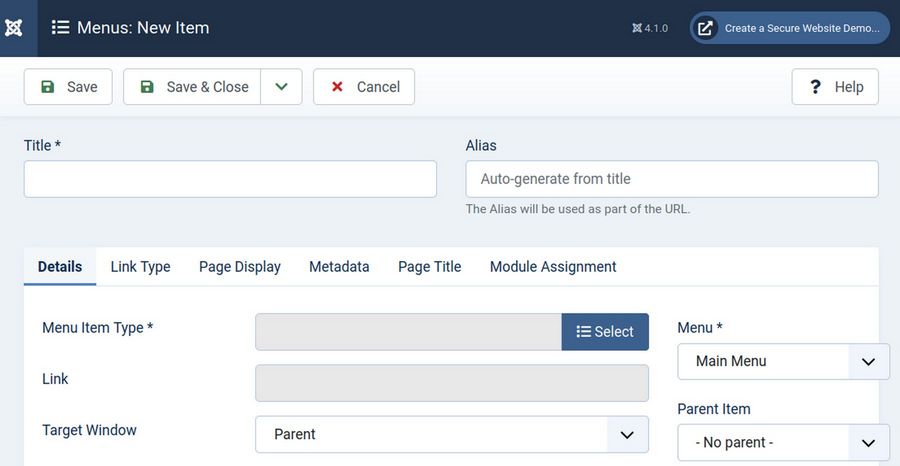
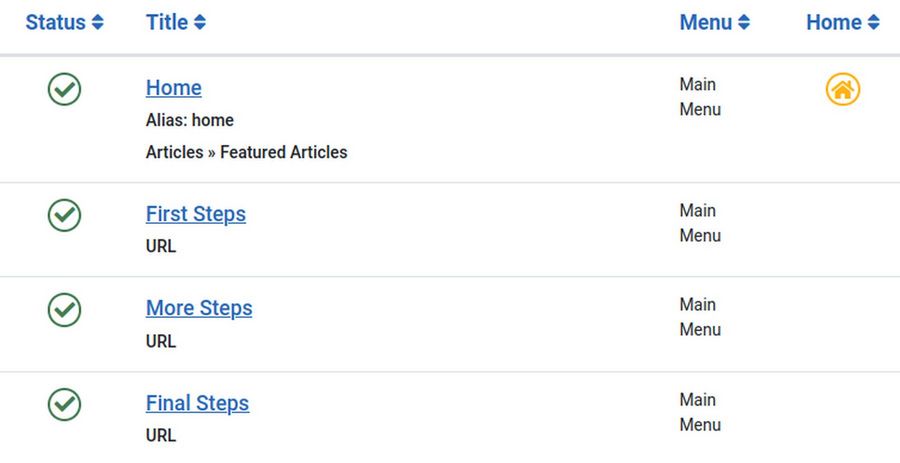
Third, we need to create some menu items. So go to Menus, Main Menu. There is only one menu item called Home.
Step 1 Add Three Top Level Menu Items
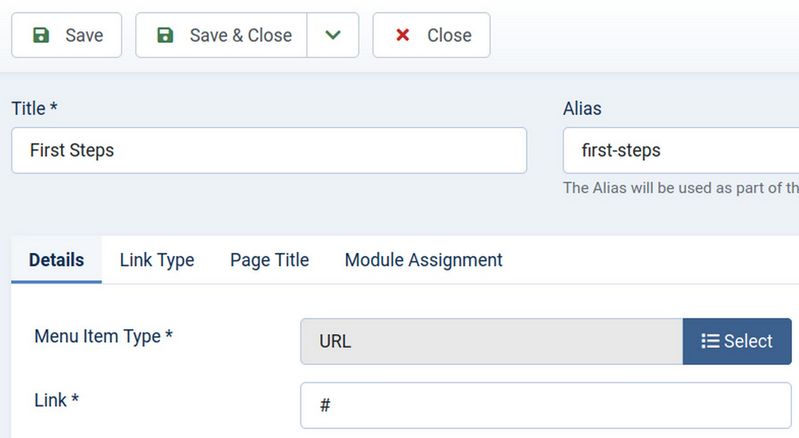
We will make three more top level menu items called First Steps, More Steps and Final Steps. Click New.
Then click the Blue Select button. Click System Links. Then scroll down to URL. After we have written our real content, we will later change the menu item type to Single Article. But for now, we will use URL as a placeholder.
For Link, type a hash sign #. For Title, type First Steps.
Then click Save and New. Repeat to create More Steps and Final Steps. Then click Save and Close.
Here is our Main Menu in the back end:
Here is our main menu in the front end:

Step 2 Add 9 Second Level Menu Items
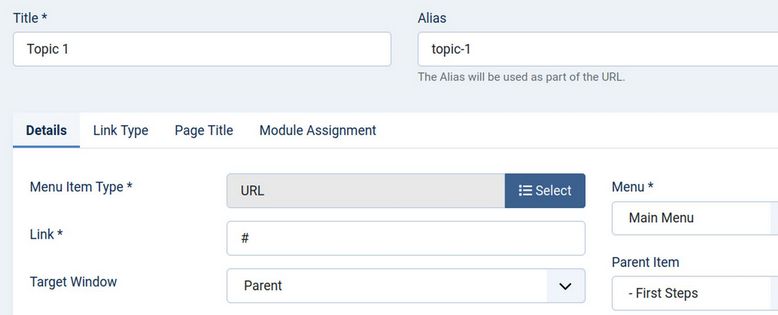
We will next add nine second level menu items called Topics 1 through 9. To create our first second level menu item click New.
Then click the Blue Select button. Click System Links. Then scroll down to URL. For Link, type a hash sign #. For Title, type Topic 1.
Then to assign this menu item to a parent, on the right column change the parent item to First Steps.
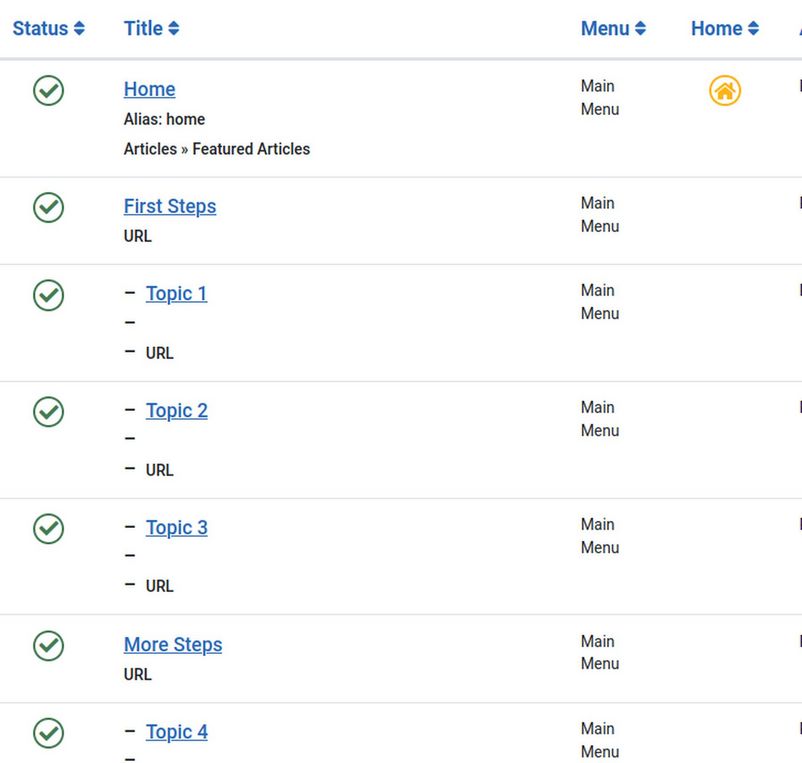
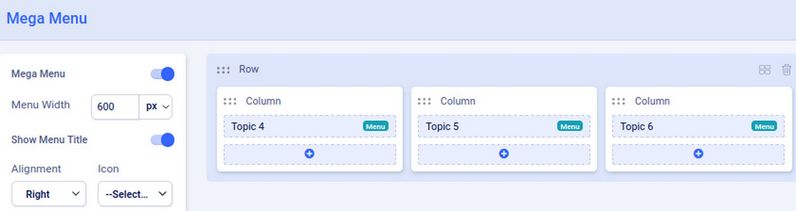
Then click Save and New. Repeat this process for Topics 2 and 3. Then for Topics 4, 5 and 6, change the parent to Second Steps. For Topics 7, 8 and 9, change the Parent to Final Steps. Then click Save and Close. Here is what our main menu looks like in the back end:
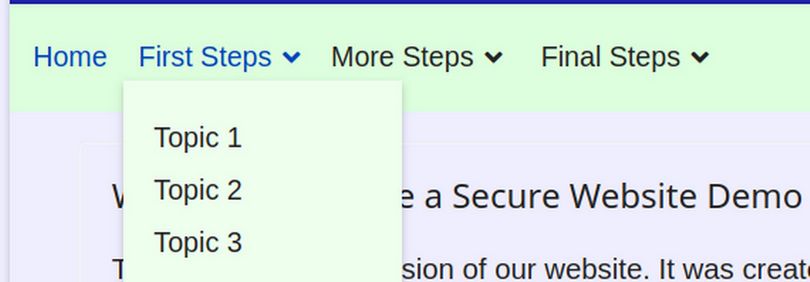
Here is what our main menu now looks like in the front end:
Step 3 Add 18 Third Level Menu Items
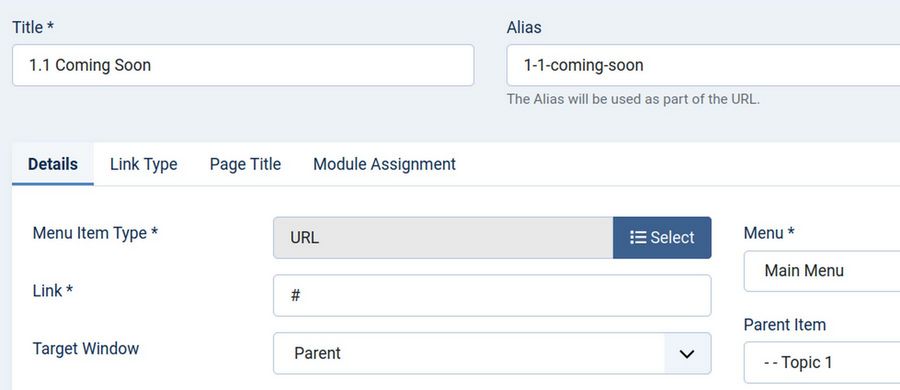
We will next add 18 third level menu items called 1.1 Coming Soon, 1.2 Coming Soon, 2.1 Coming Soon, etc. To create our first third level menu item click New. Then click the Blue Select button. Click System Links. Then scroll down to URL. For Link, type a hash sign #. For Title, type 1.1 Coming Soon. Then to assign this menu item to a parent, on the right column change the parent item to Topic 1.
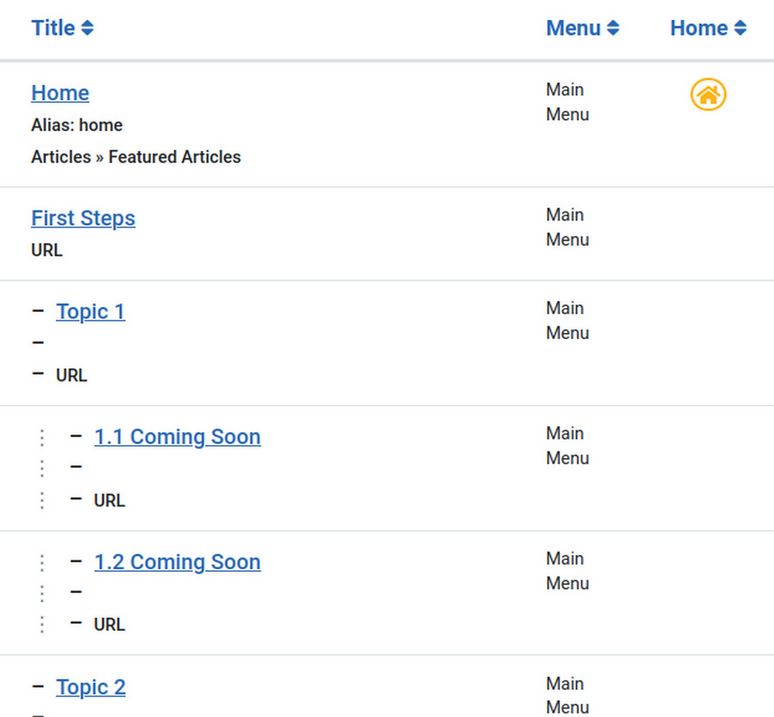
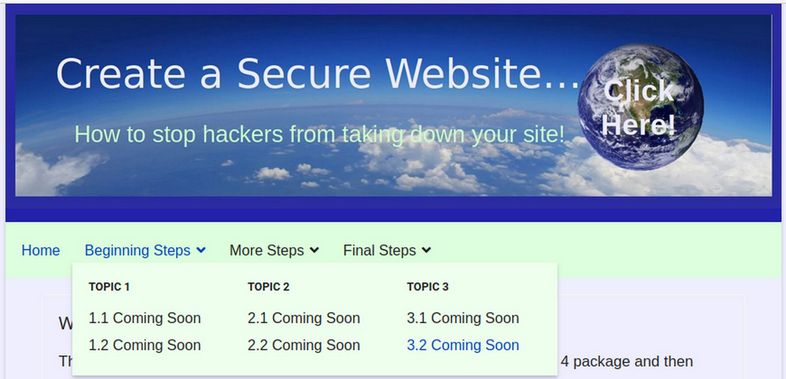
Then click Save and New. Repeat this process for 1.2 Coming Soon. Then for 2.1 Coming Soon, change the parent to Topic 2. Repeat to add the remaining Coming Soon menu items. Then click Save and Close. Here is what our main menu looks like in the back end:
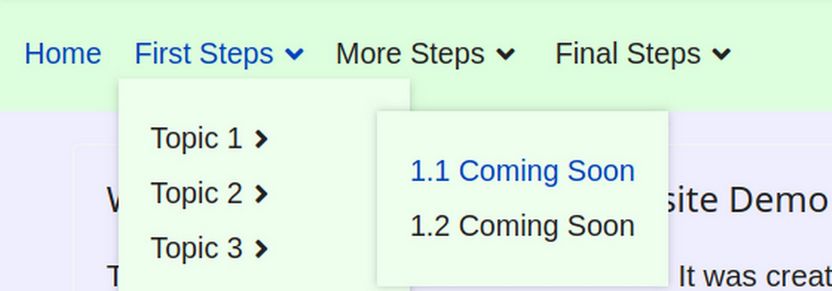
Here is what it looks like on the front end:
If you only have a few menu items, you should stick with the normal top level menu and add a few second level menu items. But if you have so many menu items that you are using third level menu items, then you should consider switching to a Helix Mega Menu. We will cover this next.
Step 4 Switch from a Normal Menu to a Mega Menu
The first steps for creating a mega menu are the same as for creating a normal menu. The key difference is that you MUST create second level and third level menu items for the Mega Menu to display properly. We have already created three top level menu items – each with its own second and third level menu items. We therefore can create a mega menu for each of our three top level menu items.
To create your first mega menu, click Templates, Styles and click on the Helix template to edit it. Go to Menus and find your first top level menu item which in our case is called First Steps. Hover to the right of the First Steps menu item to see three hidden icons. The first is Edit. The second is delete and the third is Mega Menu:
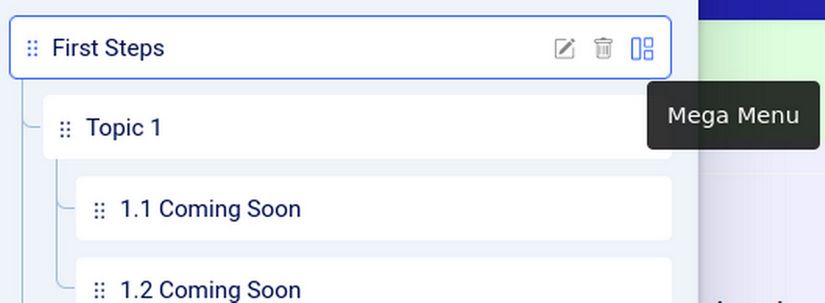
Click on the mega menu icon to open it. Then click on the button to the right of the words Mega Menu to open the Mega Menu screen:
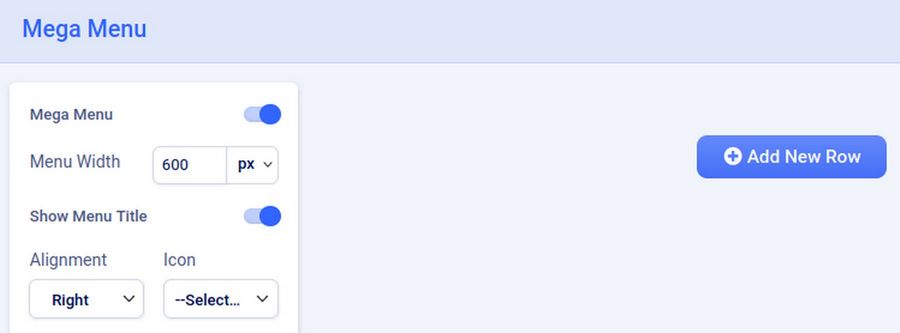
Click Add New Row:
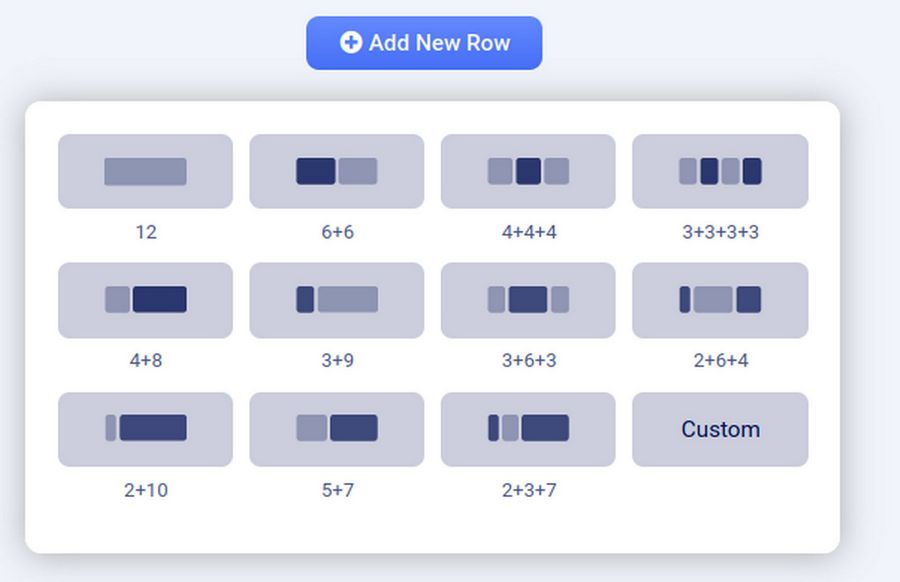
Click 4 + 4 + 4 to create a three column mega menu drop down.
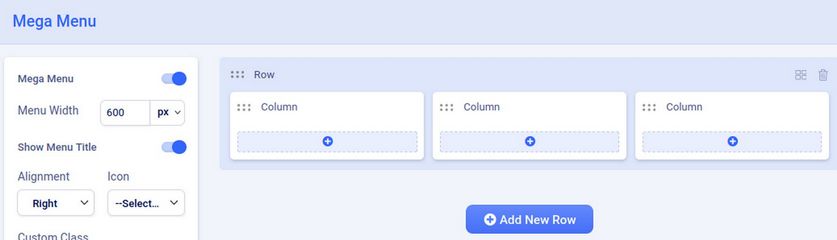
Click Save. Then click on the mega menu item for First Steps to open it again. This should have resulted in Topics 1, 2 and 3 being assigned automatically to their three columns. However, the Menu Item First Steps was locked. So I had to click on System, Global Checkin to unlock this menu item. This did not solve the problem.
I had previously deleted the row and then re-added it. Perhaps this confused the Helix Mega Menu Maker. We will therefore create a new Top Level Menu item called Beginning Steps. Then Assign the Topics 1 through3 menu items to this.
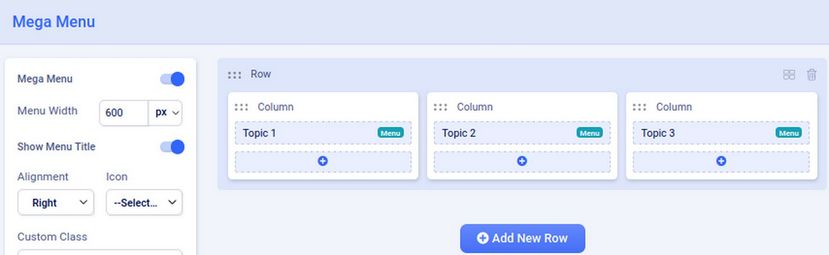
This solved the problem. The Alignment had to be changed from Left to right. Click Save. Then repeat for More Steps.
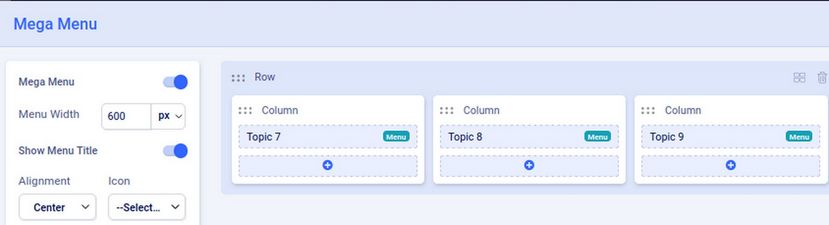
Add repeat again for Final Steps. But note that for Final Steps, we will center the drop down:
Save and Close the Template Edit screen and view the front end:
As you create your first three real website categories, you can click on the Topic 1 menu item and replace it with your first category. Repeat for your second and third categories.
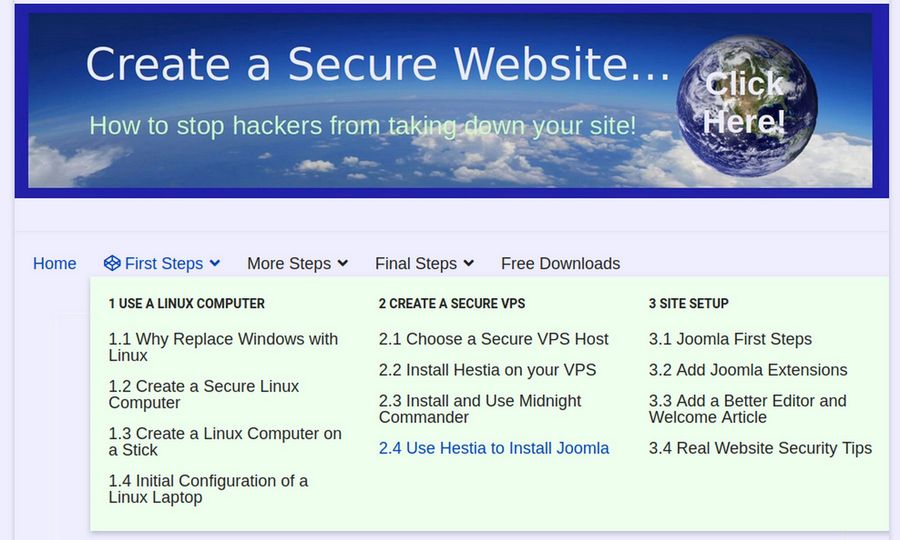
As you create your first 1.1 article, you can click on the 1.1 Coming Soon Menu item and change the menu item type to Single Article. Then select your 1.1 article and change the title to the real title of your article. Repeat for the remaining articles in your first three categories. Here is the result after adding our real articles:
Congratulations! You now know how to use the Helix template to create your own mega menus!
What’s Next?
Some website developers claim that Topography, or the font families and font styles used on websites, is the most important factor in website design. Certainly, topography presents security issues since malicious code can be hidden inside of web fonts. Therefore, in the next article, we will look at how to use the Helix template to add custom secure web font families to your Joomla website.