
A template controls the appearance and structure of your website. The default Joomla 4 template, called Cassiopeia, has numerous limitations. First, it is difficult to create additional module positions. Second, it is not able to create a mega menu. Therefore, in this article, we will add a replacement template, called Helix Ultimate, that provides easy ways to create a mega menu and additional module positions.
The Helix Ultimate template is a free, open source template that allows you to easily customize the appearance of every aspect of your website. Helix Ultimate is the only free Joomla template which allows you to easily create your own custom module positions which are responsive rows and columns where you can put boxes of content called modules or feature boxes.
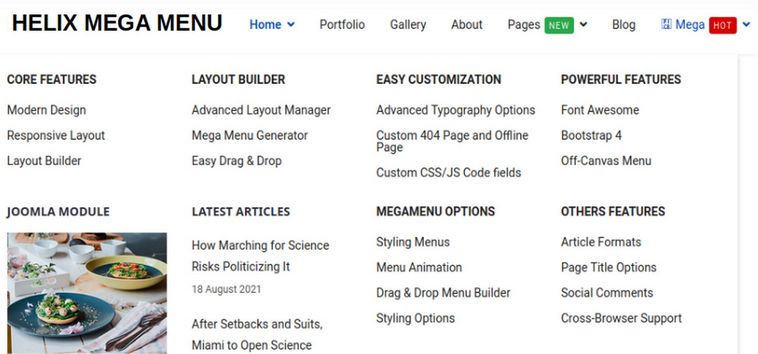
The Helix template also comes with a customizable Mega Menu allowing you to create an expandable main menu which allows website visitors to visually understand how your website is structured and quickly navigate to the area they are most interested in.
Helix Ultimate is completely free to download and use. You can sell your own template based on the Helix Ultimate framework. No license fee or credit is required.
Step 1 Download the Helix Template and Plugin
To download the Helix Ultimate Template, go to the following page:
https://www.joomshaper.com/helix
Click Download Free. Then click Download.
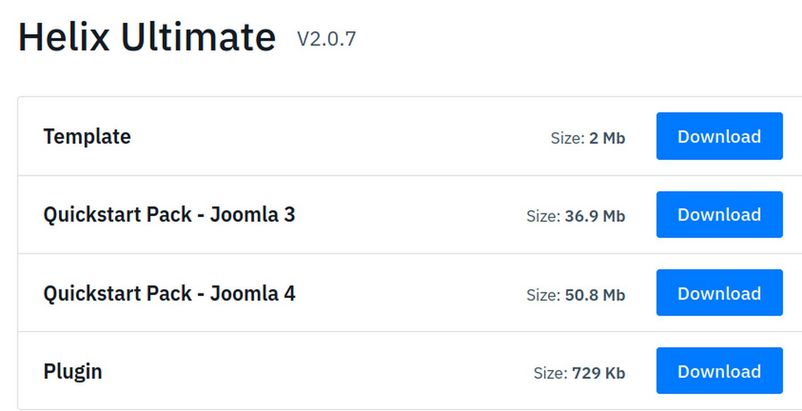
Then download the top option which is the template and the bottom option which is the plugin. The Quickstart Package suffers from numerous problems. It consists of mostly SP Page Builder examples which sadly do not work well with standard Joomla content or standard Joomla module positions. So we will simply install Joomla and then install just the Helix template and plugin.
Step 2 Install the Helix Template and Plugin
Log into your Joomla Dashboard. Then go to System, Install, Extensions to install the Helix template and plugin.
Step 3 Configure the Helix Ultimate Template Basic Settings
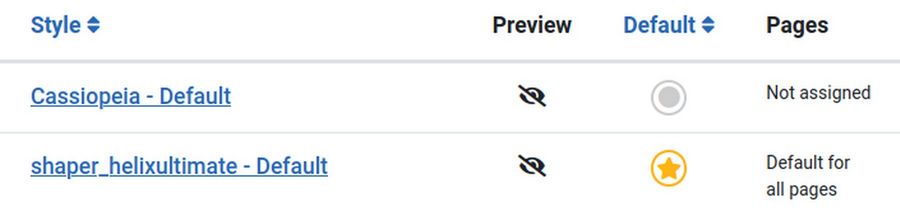
Then go to Dashboard, Templates, Styles and check the Helix template. Then click Default.
Then view the front end of the website.

To edit the Helix Template, click on it to open it. Then click on Template Options. This will open the Helix Ultimate default settings sidebar along with your website homepage. To the left side of the screen, you get the Helix Ultimate default settings options categorized in group called Basic, Presets, Layout, Menu, Typography, Blog, Custom Code, and Advanced.
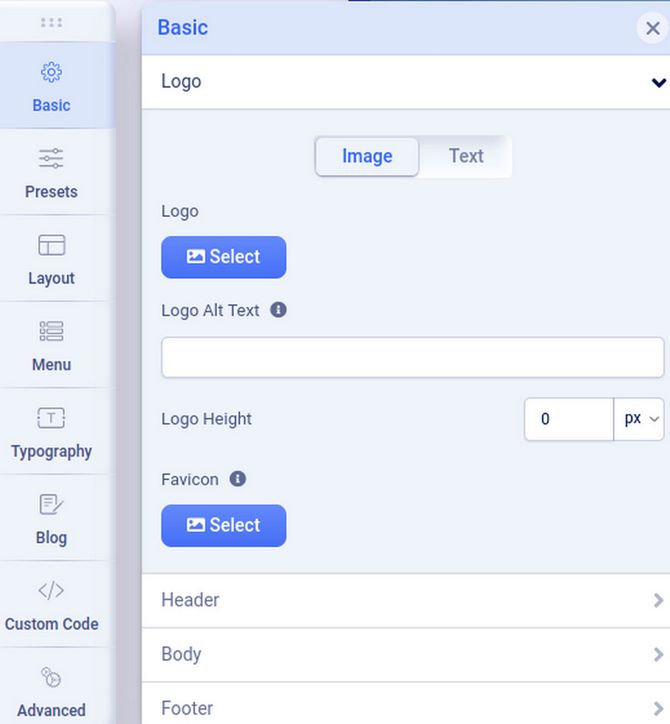
Note that you can press the six dots in the upper left corner to move the menu to a different part of the browser screen if you want.

The Basic Tab is divided into categories called Logo, Header, Body, Footer, Social Icons, Contact Info, Coming Soon and Error Page. Click on the Logo option. In order to hide the Helix logo and use only our header image, change the logo height to 0 for full screen, tablet and mobile views. Then click on the Header options.
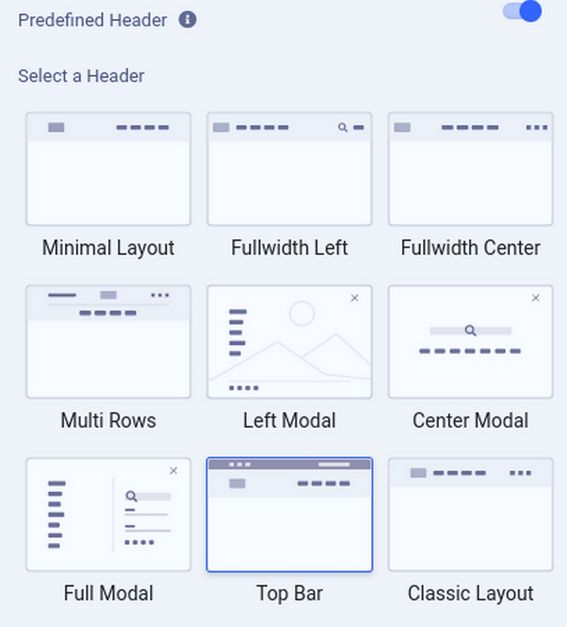
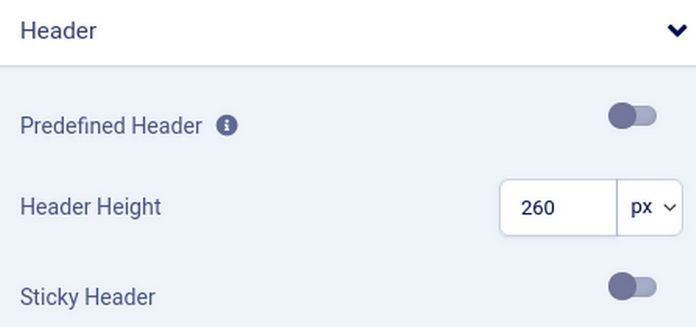
By default, the header is set for Top Bar. Turn off the Predefined Header and change the Header Height to 260 px for full screen, 120px for tablet and 40px for mobile view.
Then click Body and turn on Boxed Layout. Then click on the Footer. Turn off Copyright and Go to Top. Then click Social Icons and turn them off too. Also turn off Contact Info and Coming Soon. This completes the Basic tab options.
Step 4 Choose and Configure a Preset Color Theme
Next click Presets and choose a color theme. For example, click Preset 1. Then click the Edit pencil.
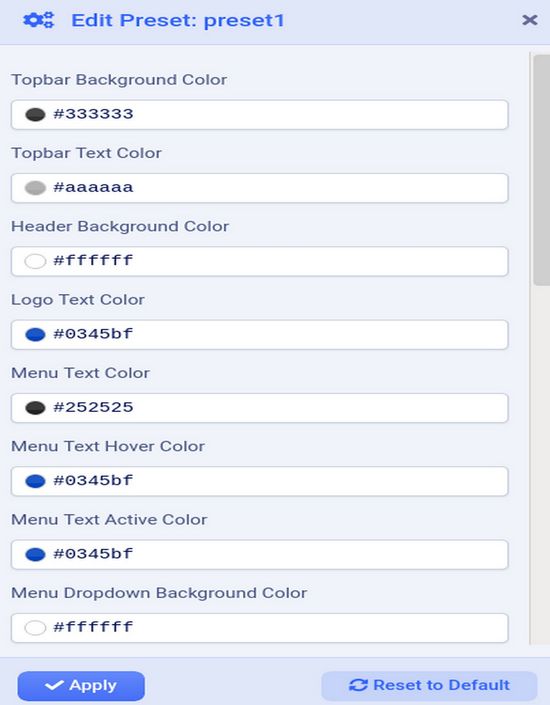
Change any values you want. We will change the body background color from white to light blue #eeeeff..
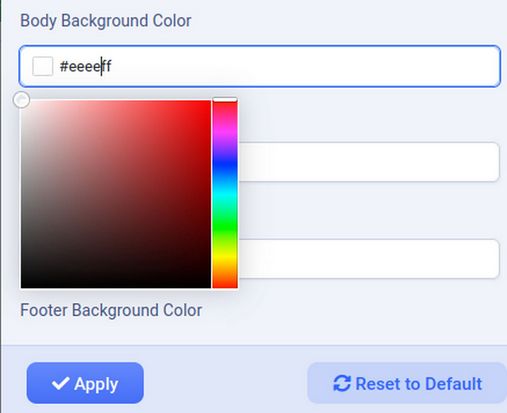
Then click Apply. Then click Layout.
Step 5 Use Helix Layout Builder to Add Module Positions
The Helix Layout Builder is one of the most important features of the Helix template. It allows us to precisely control our website layout. Click on the Layout Tab to see this popup:
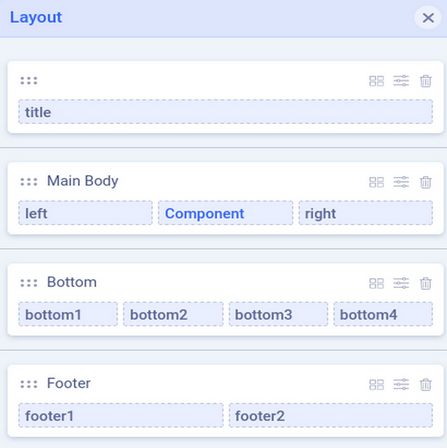
The default Helix layout consists of a Main Body with the main Joomla Content in the Component position in the middle of the page. There are also module positions to left and right of the main Joomla content component.
Note! The Helix template has two additional module positions (Content Top & Content Bottom), although they are not visible in Layout Builder, they can be used to display any modules above and below the Joomla component area.
Helix has added a single row called title above the main content and also two rows, called Bottom and Footer, below the main content area. The first bottom row has 4 columns and the second bottom row has two columns.
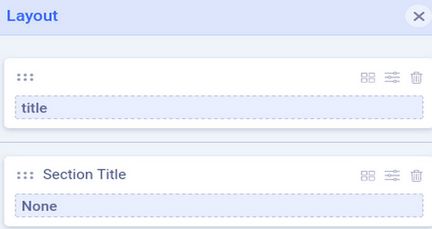
To make room for our custom header and mega menu, we will add three more rows for a total of four rows above the main content. We will use the first new row for our header, the second new row for our main menu, the third new row for a slideshow and the fourth new row for three feature boxes. To add a new row, hover your cursor over the layout. This will reveal a plus sign. Click on the Plus sign above the Main Body to add a new row.
Then click on the plus sign two more times to add two more rows.
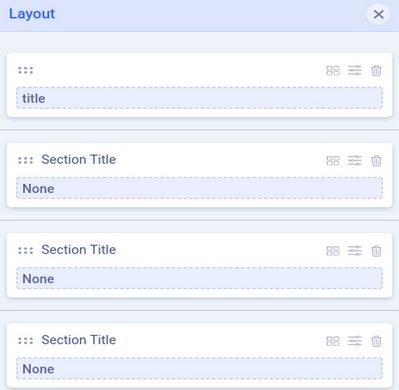
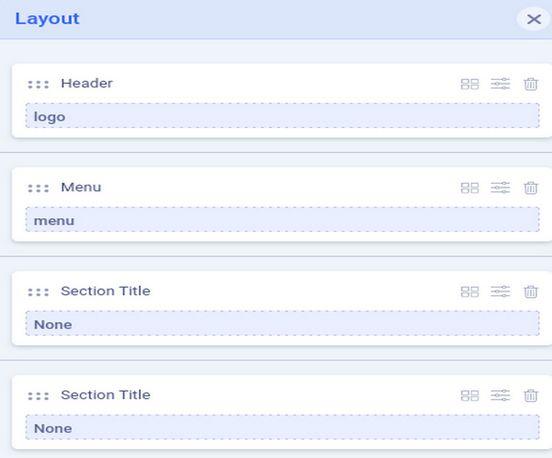
Each row has a Section title and a row name called None.
Rename the Four Rows
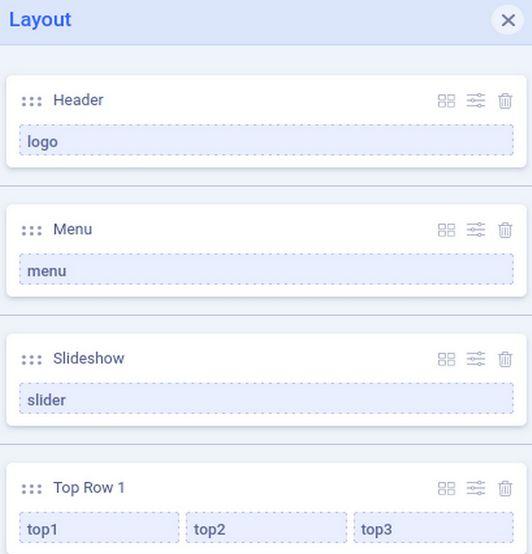
Click on the arrows in the upper right corner of the first row and rename the first row Section title Header:
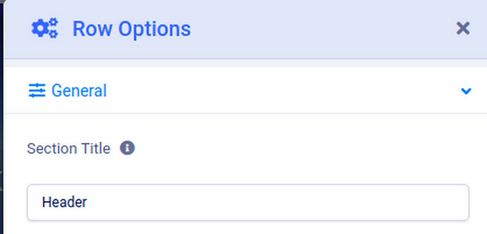
Then click Apply. Click on the second row arrows and rename the second row Menu. Then click on the three dots on the right side of the first blue row and use the drop down arrow to rename the module position logo.
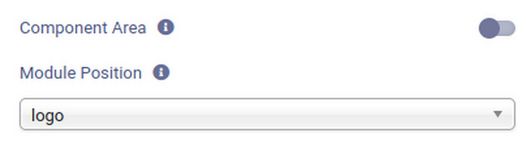
Repeat for the second blue row and rename its module position to be menu. Here is the result:
Click on the four squares to the right of the third row Section Title.
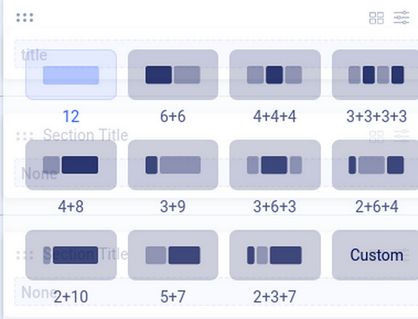
This popup allows us to divide the row into a combination of columns. Because we will use the first row for a full width header, leave it at the default value of 12. But give the fourth row three columns (4, 4. 4). Then click on the arrows to the right of the four boxes for the third Section Title Row.
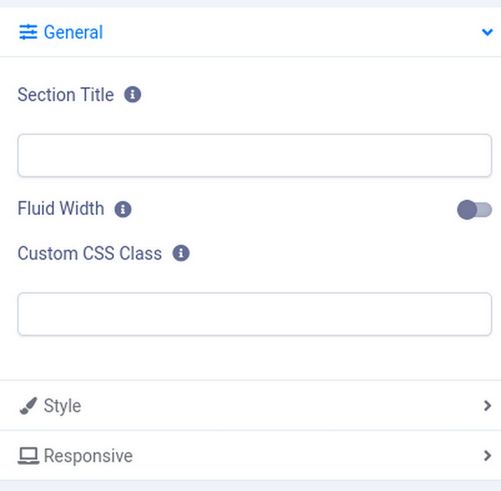
We will call this Section Slideshow and check Yes for Fluid Width. Then click on the Style button and change the background color to light blue #000000. Then click Apply. Repeat for Top Row 2 with Light Green for the fourth row called Top Row 1. Then click on the three hidden dots to the right of the word None in Slideshow.
Click on Module Position, Select an Option. This will bring up a list with more than 36 module positions that looks like this:
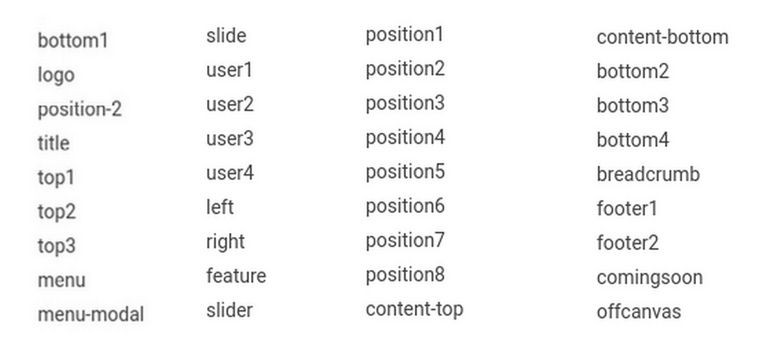
The module positions that have already been taken are logo, menu, left, right, bottom 1,2, 3, 4 and footer 1,2. This still leaves us with 27 module positions to display our content. We will call our third row slider as that is the module position we will assign to our slideshow. Then click Apply. Top Row 1 has 3 dots to the right of each word None. Call the first box top1, the second box, top2 and the third top3. Here is our new layout:
Change Row Background Colors
Adding different colors to different rows helps our website visitors better understand the layout of our website.
We would like the background of our header row to match the color of our header border which is #2222aa. Click on the Header row arrows to bring up the row edit screen. Then click on Style and change the Background Color to #2222AA. Then click Apply. Then click Save.
Next click on the Menu row edit button. Click Style and change the background color to light green #DDFFDD. Click Apply. Then click Save.
Next click the Slideshow row edit button. Click Style and change the background color to black #000000. Click Apply. Then click Save.
Next click the Top Row 1 edit button. Click Style and change the background color to #FFDDFF. Click Apply. Then click Save.
Then click the X to close the Layout popup. Then click X to close the Template Edit screen.
What’s Next?
In the next article, we will review how to display the header and use CSS to make some other needed changes.