
In this article, we will explain three options to replace your Windows computer with a more secure computer.
Three Options to Create a Secure Linux Computer
The first and most common option is to reflash an old Windows computer to turn it into a Linux computer. The second option is to buy a new Linux computer and the third option is to place Linux on a USB drive (also known as a computer on a stick) and insert the USB drive into a Windows computer after setting the computer to boot from a USB drive. This third option will not harm or change any documents, data or programs on your Windows computer.
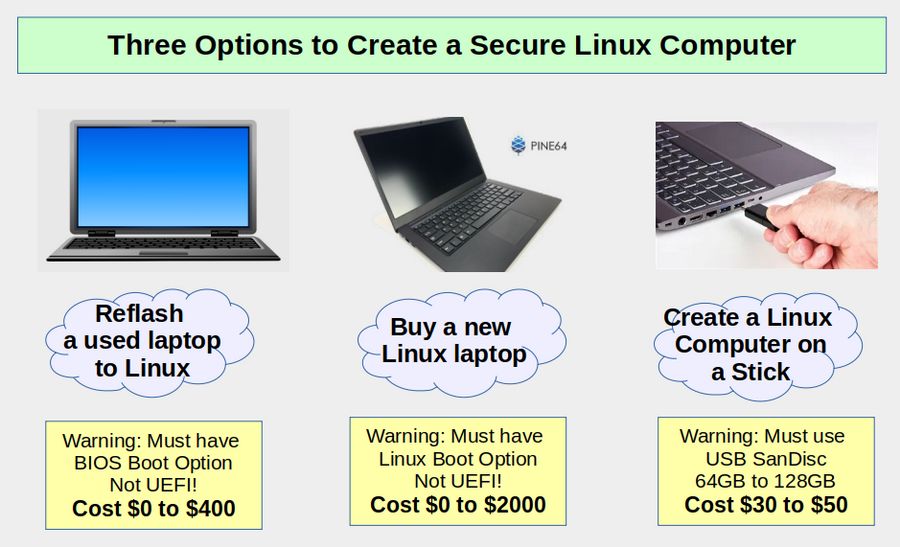
Since Microsoft Windows 11 will not work with most current computers, many people will have an older computer that they can no longer use with Windows and which can be converted to Linux. We will therefore begin with a review of how to reflash a used computer to Linux and then discuss the other two options.
What to Look for in a Used Laptop
The most important feature of a used laptop, whether you have it in your closet or buy it online, is to make sure it has the option to change from UEFI boot to BIOS boot (also called Legacy boot). Here is a link to my detailed article on the drawbacks of UEFI boot: https://learnlinuxandlibreoffice.org/news/the-fight-for-a-secure-linux-bios
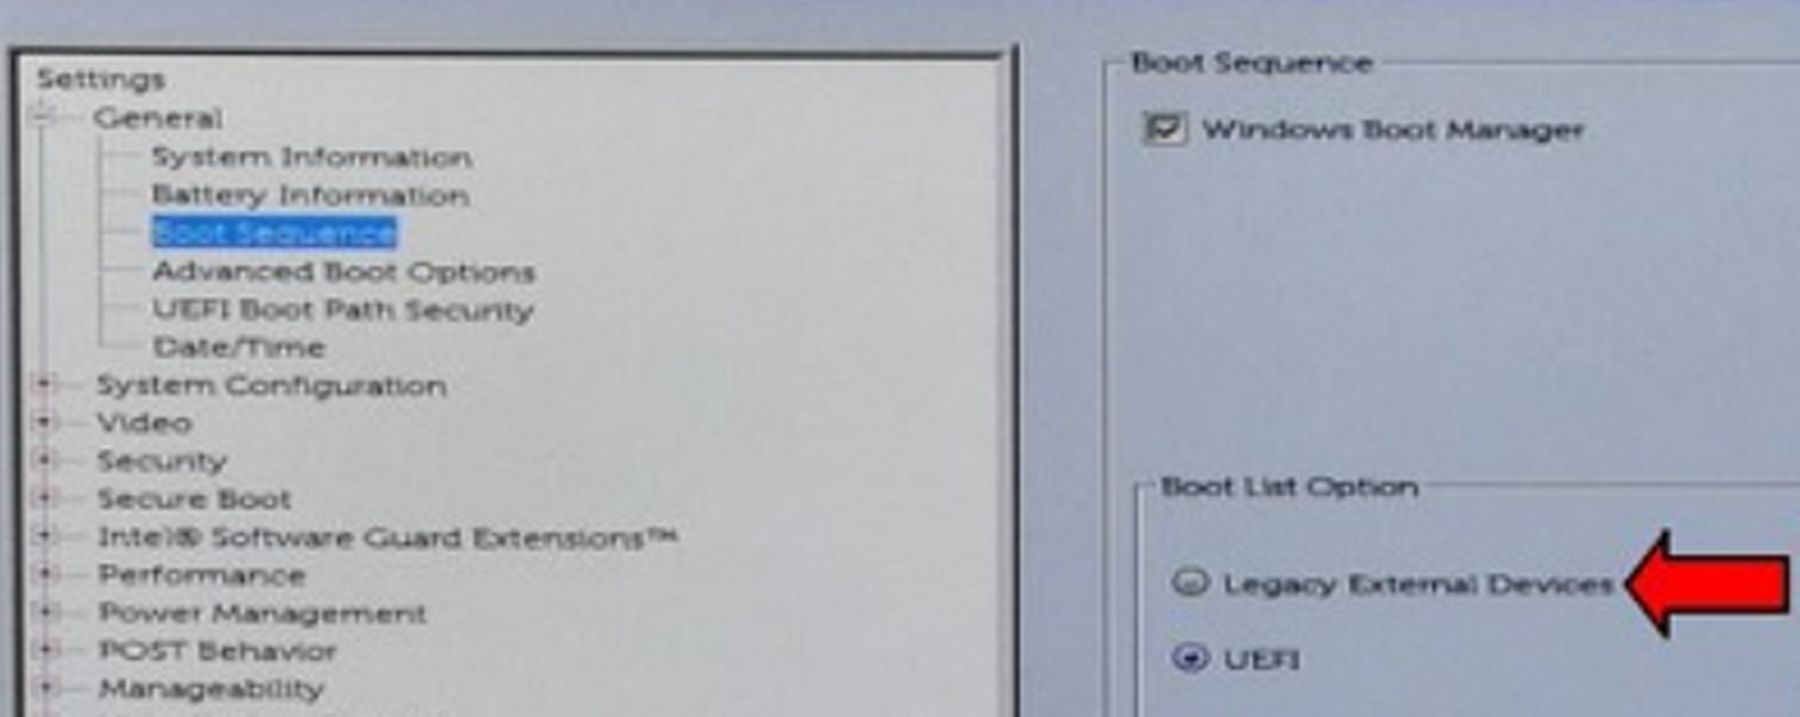
Sadly, looking for a used computer that has the BIOS option eliminates any computer purchased after 2020 and any Microsoft 11 computer because Microsoft dictated that all new Windows 11 computers must use only UEFI! Below is an example of a Dell Latitude E6540 laptop after pressing the Power On button and then pressing F2 and then clicking on Boot Sequence. It is checked for UEFI but has the option to change to Legacy boot:
The third thing to look for is a 15 inch screen such as the Dell E6540 - which is the make and model we have had the best luck in switching to Linux. Dell laptops may have some difficulty is getting the WIFI and other drivers working. But we cover solutions to this problem below. Here is a link to several E6540 Dells for under $300. https://www.ebay.com/sch/i.html?_from=R40&_trksid=p2499334.m570.l1311&_nkw=dell+e6540+laptop&_sacat=177
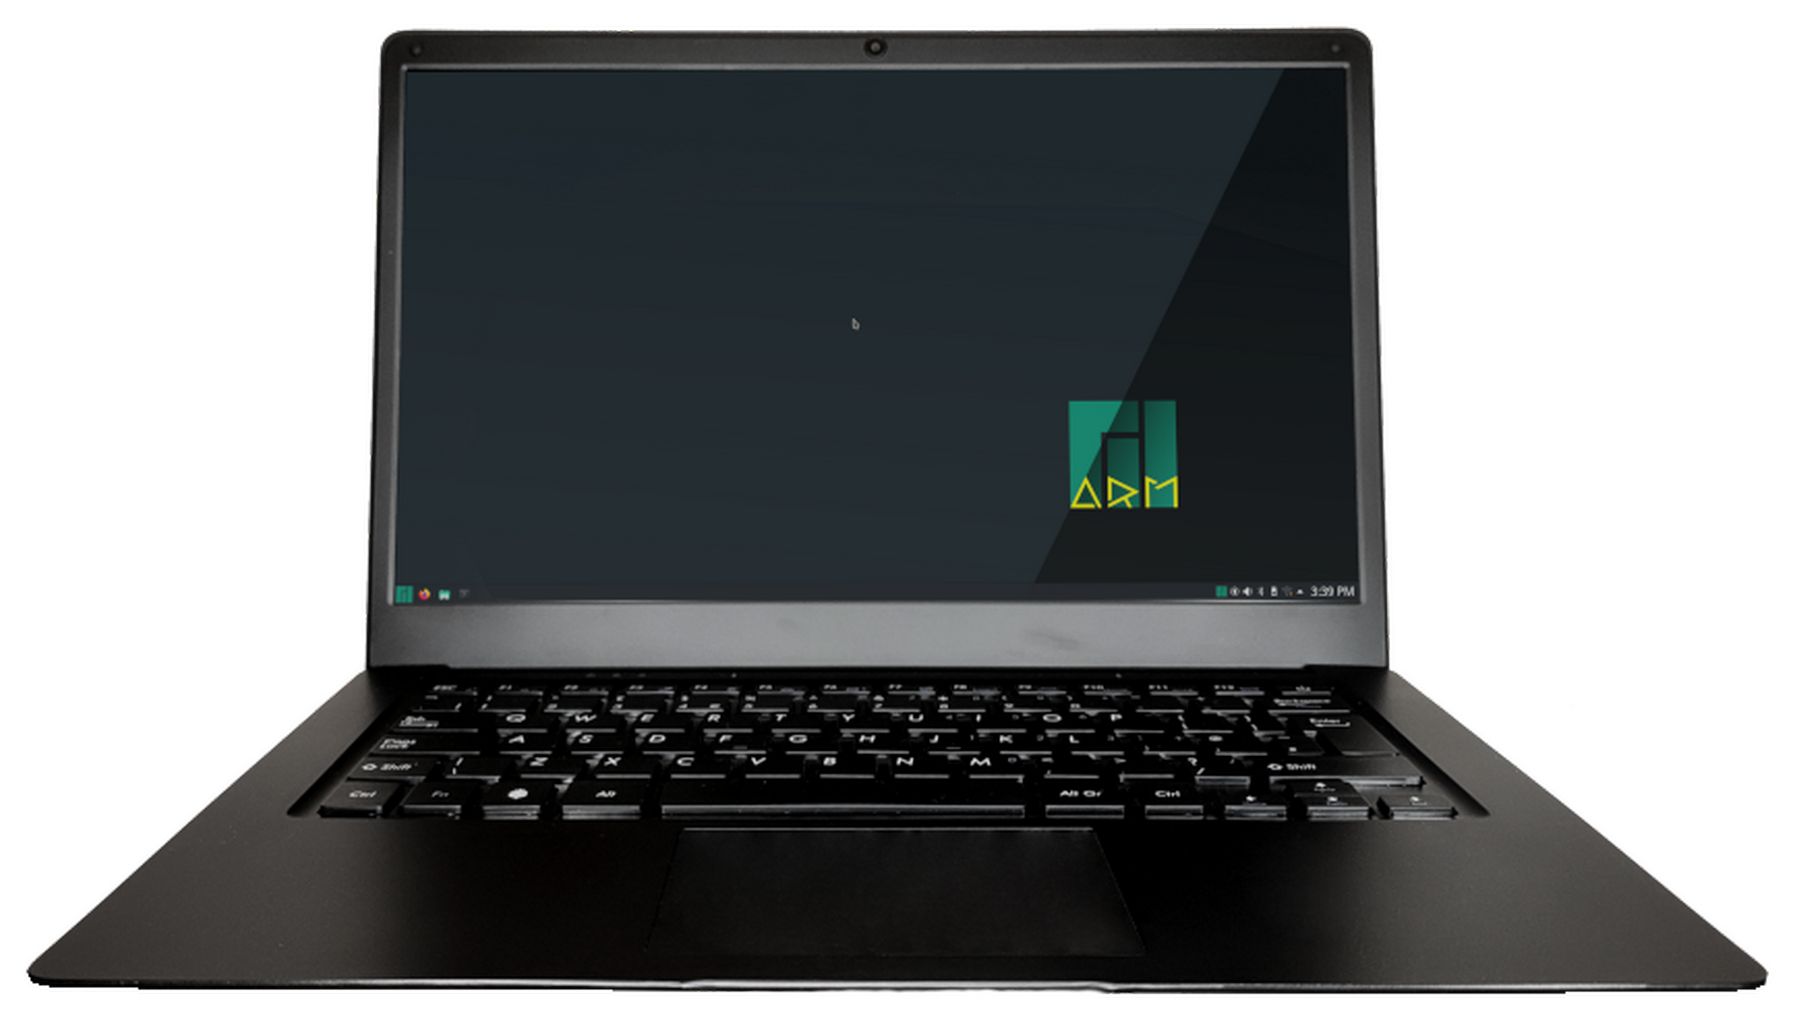
We will next review the process for reflashing any computer to install Linux Debian 11 with the Cinnamon Desktop.
Create a Debian 11 Cinnamon Live USB
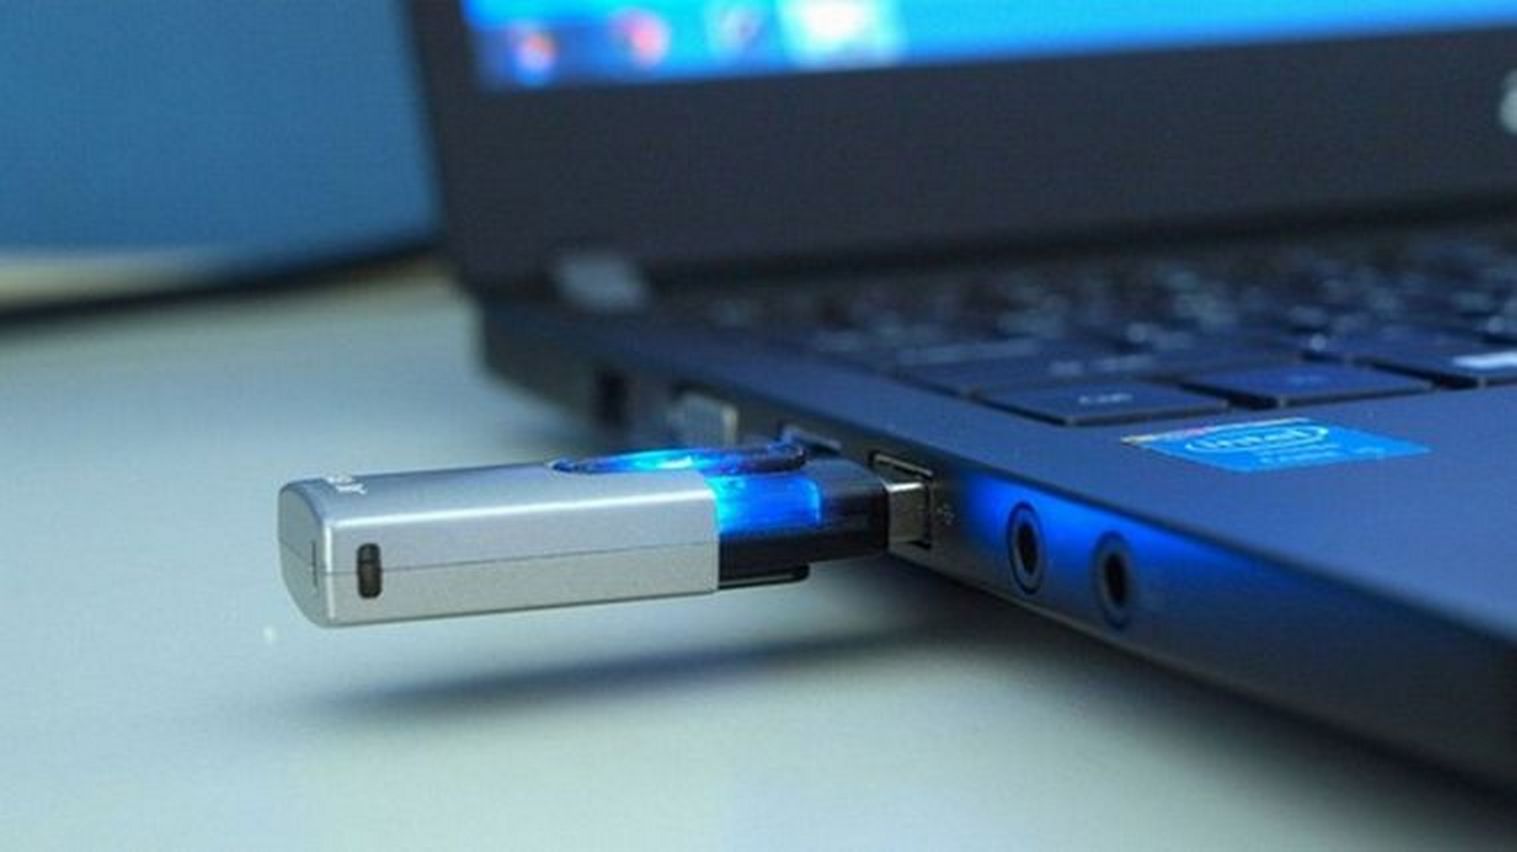
The first step in this process of creating a Live USB is to get two empty USB 3 drives. Use the first drive to make a copy of all of your documents on the computer you will be reflashing. Depending on how many documents, images and videos you have on your computer hard drive, this USB 3 drive may need to be 64 GB to 128 GB.
Note: Reflashing a computer will delete all documents and programs on the computer. Please copy all documents and make a list of all programs that you want to re-install after reflashing your computer.
The second USB drive will be converted into a Linux Debian 11 Live USB. It only needs to be 8 GB. I recommend Sandisk USB drives.
Download the Linux Debian 11 LIVE ISO File
Go to this page to download the 64 bit version of Linux Debian Cinnamon ISO file with non-free software (the non-free software may be needed to install WIFI and Printer drivers on your computer). The exact link changes as new versions of Debian are released. Therefore, we will start at this page:
https://cdimage.debian.org/cdimage/unofficial/non-free/cd-including-firmware/
Then click on the current-live folder. Then click the amd64 folder. Then click the iso-hybrid folder. Scroll down and click on cinnamon + nonfree.iso option. Then click on it to download it. Save this file to your home computer. It will be about 3.4 GB.
Download Etcher
We will use a free program called Etcher to create our live USB. Go to this page to download Etcher. https://www.balena.io/etcher/
Extract the zipped file to reveal the App Image. Then click on Etcher to bring up this screen:
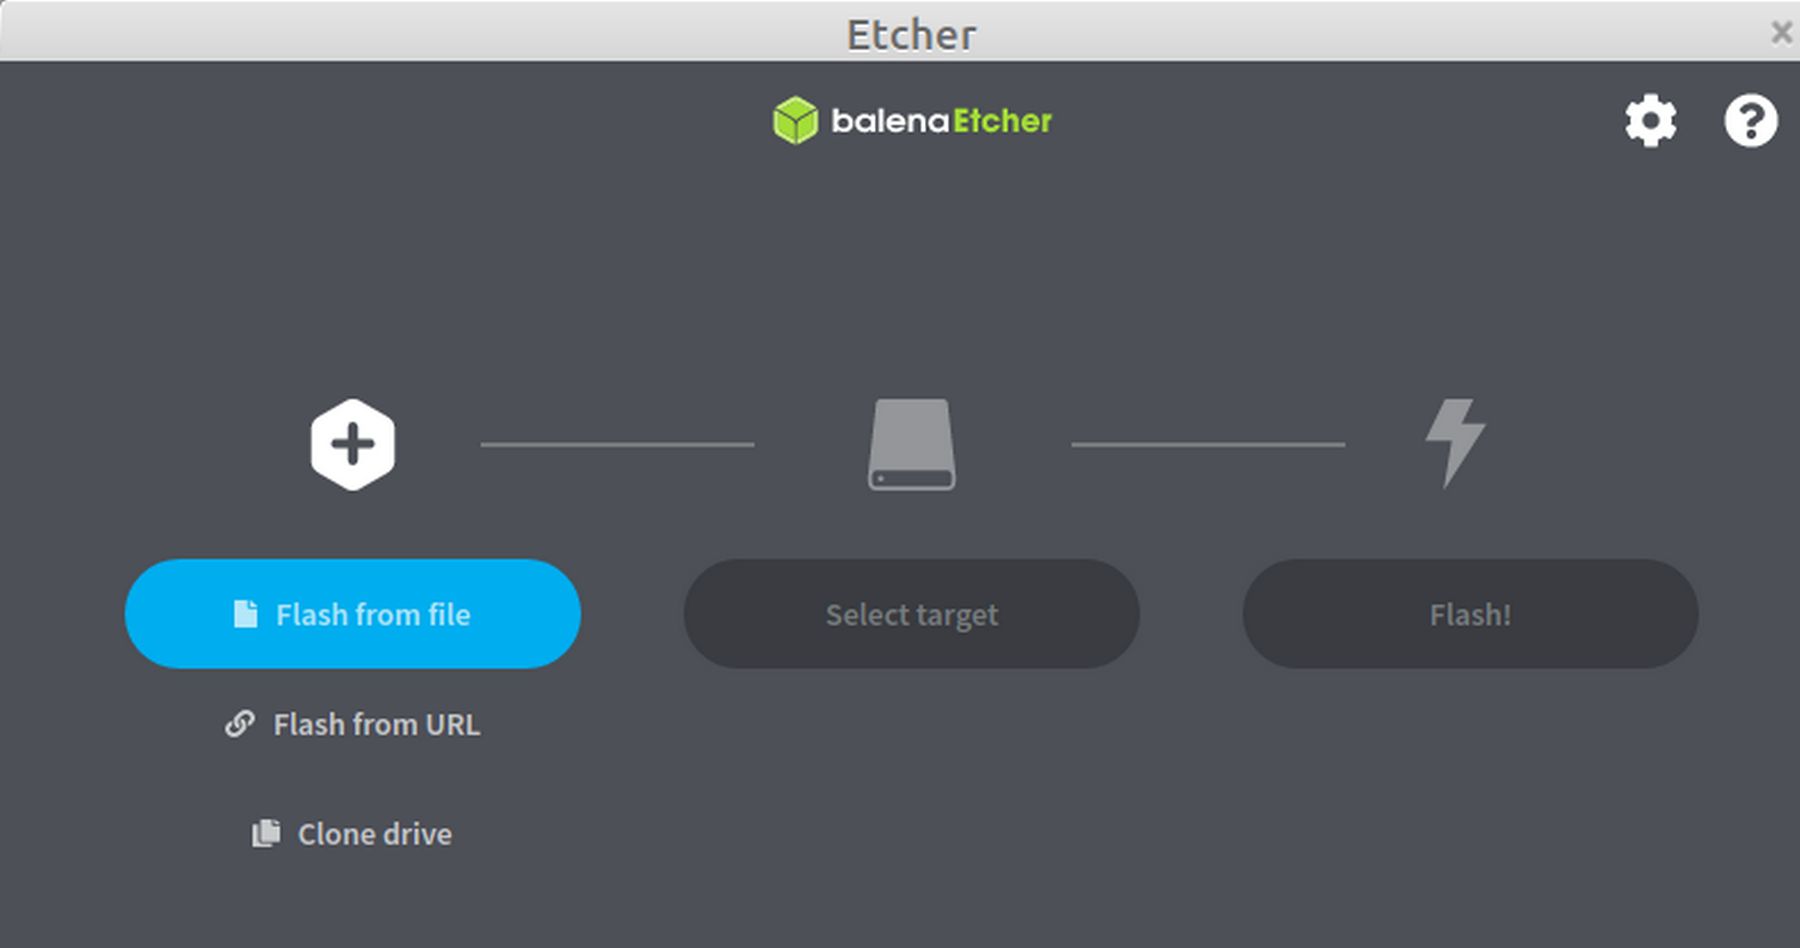
Click Flash from File. Then navigate to the Debian 11 Cinnamon non-free iso file to select it.
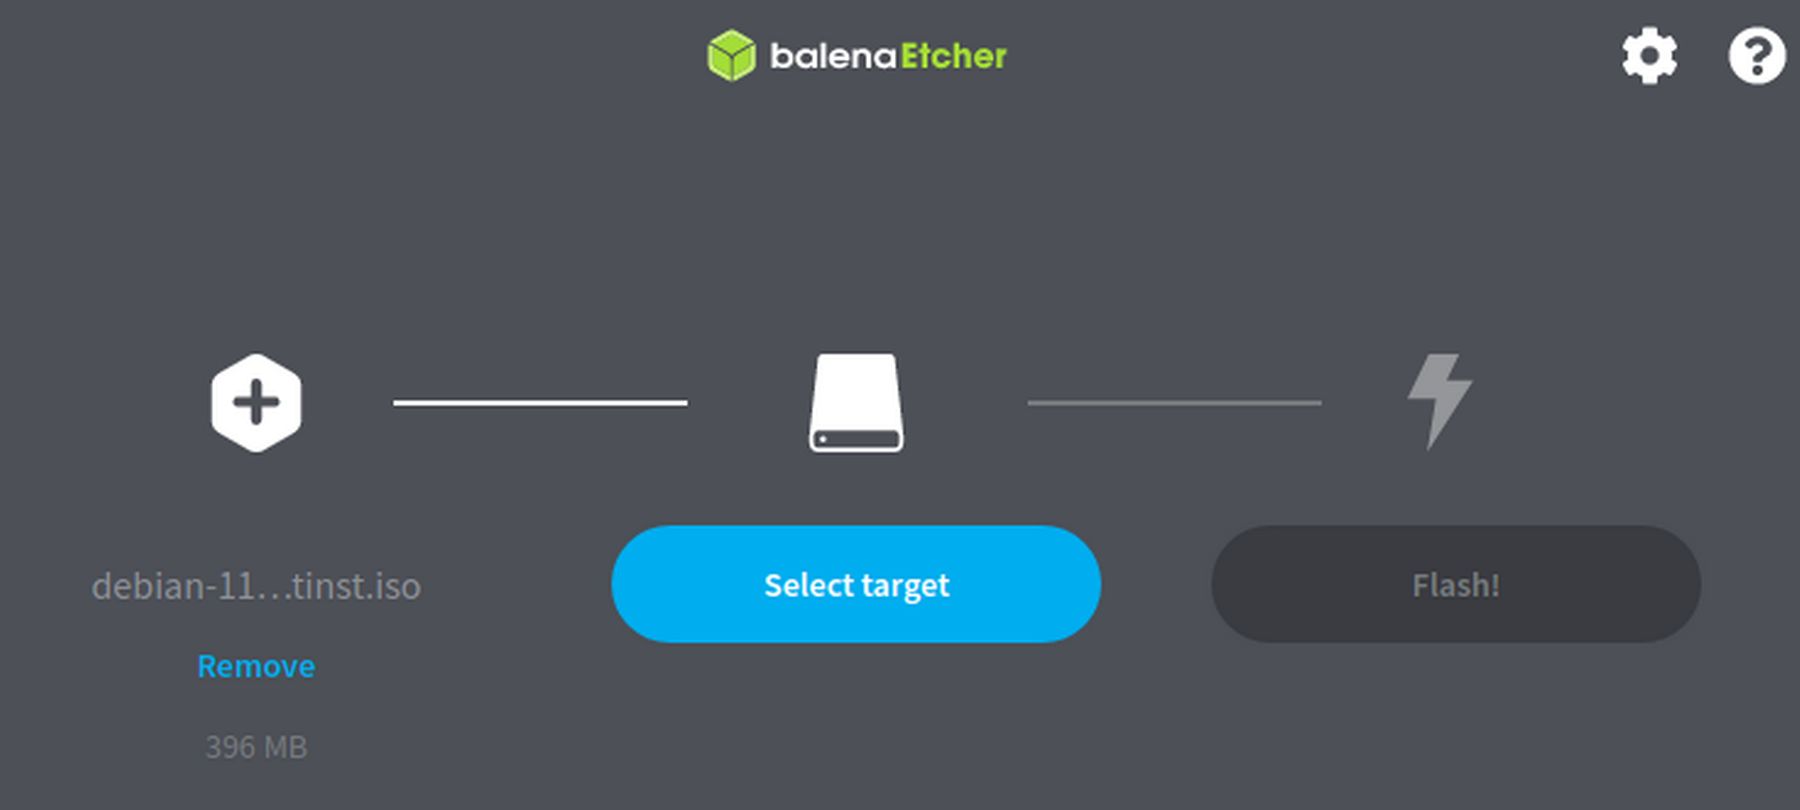
First insert a USB drive into a USB port. Then click Select Target and navigate to your USB drive. Note that whatever is on the USB drive will be erased during the installation of Debian. Then click Flash to flash the USB drive with Debian. When done, you will have a Linux Debian Live USB. You can use this USB to reflash as many computers as you want.
Reflash a computer using a Linux Debian Live USB
Once you have created a copy of all of your documents and placed them on a separate USB drive and made a list of all of the programs you want to replace, you are ready to start the reflashing process.
First, it is best to have your laptop connected to your router with an Ethernet cable (it is also possible to use WIFI but it is not as secure or as faster as using an Ethernet connection). Then place your Linux Debian Live USB into a USB 3 port on your computer. Generally USB 3 ports are on the left side of your laptop as you are facing your open laptop screen. Then turn on the computer and immediately press whatever keys are needed to enter your BIOS settings. On a Dell computer, it is usually F2. On a Lenovo, it may be the Function key plus the F2 key. On an HP laptop, it might be the Escape key.
Once you enter your BIOS, go to the Boot Settings to make sure that the laptop is set to boot from a USB drive before booting from the internal hard drive. If your laptop has the option to boot from Legacy or UEFI, choose the Legacy Mode. If your laptop has the option to turn off secure boot, then turn off secure boot. You may need to do an online search to determine the best options for your particular computer. Here we will review the process for a Dell E6540.
Once the BIOS has been set to boot from a USB in Legacy mode, click Save and Close. In a few seconds, you should see the GRUB2 screen with Linux Debian as the first option. Wait a few seconds and the Debian Calamares Installer Welcome screen will appear.
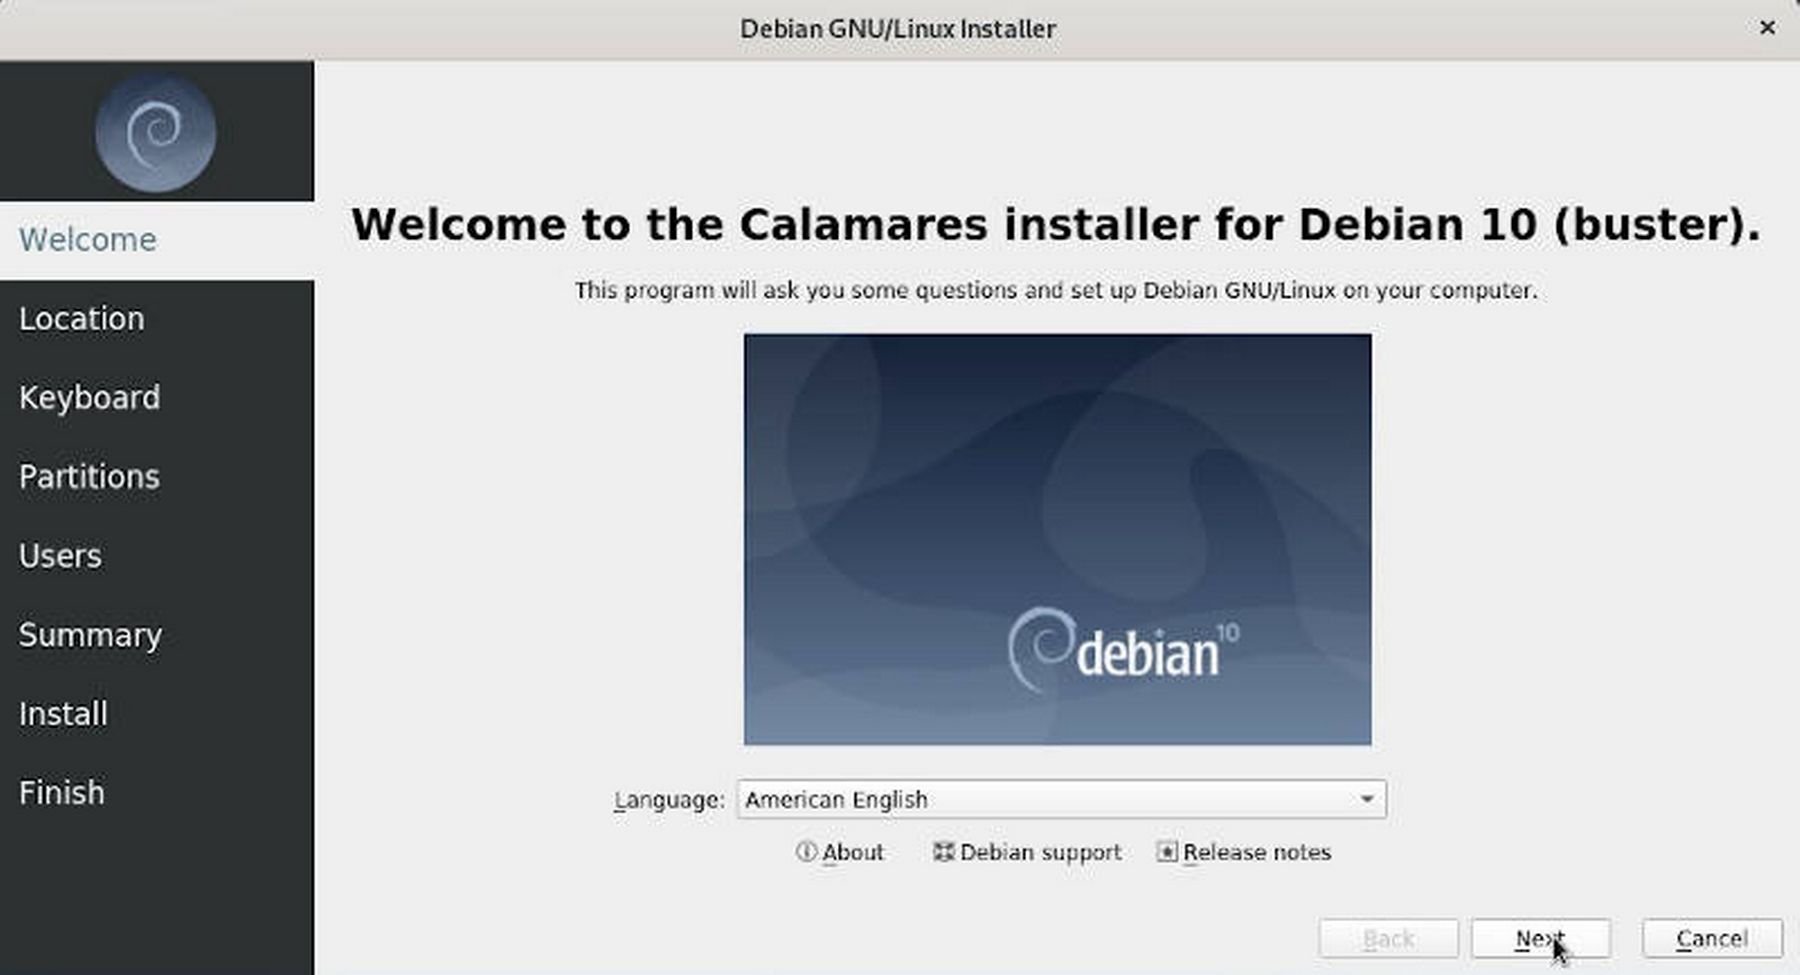
At the Debian installer first screen, leave the Language at American English. Then click Next. For Location, click on your time zone. Then click Next. For keyboard, click US and click Next. For Partitions, click on your hard drive at the top of the screen to select it. Then click Use the Entire Drive.
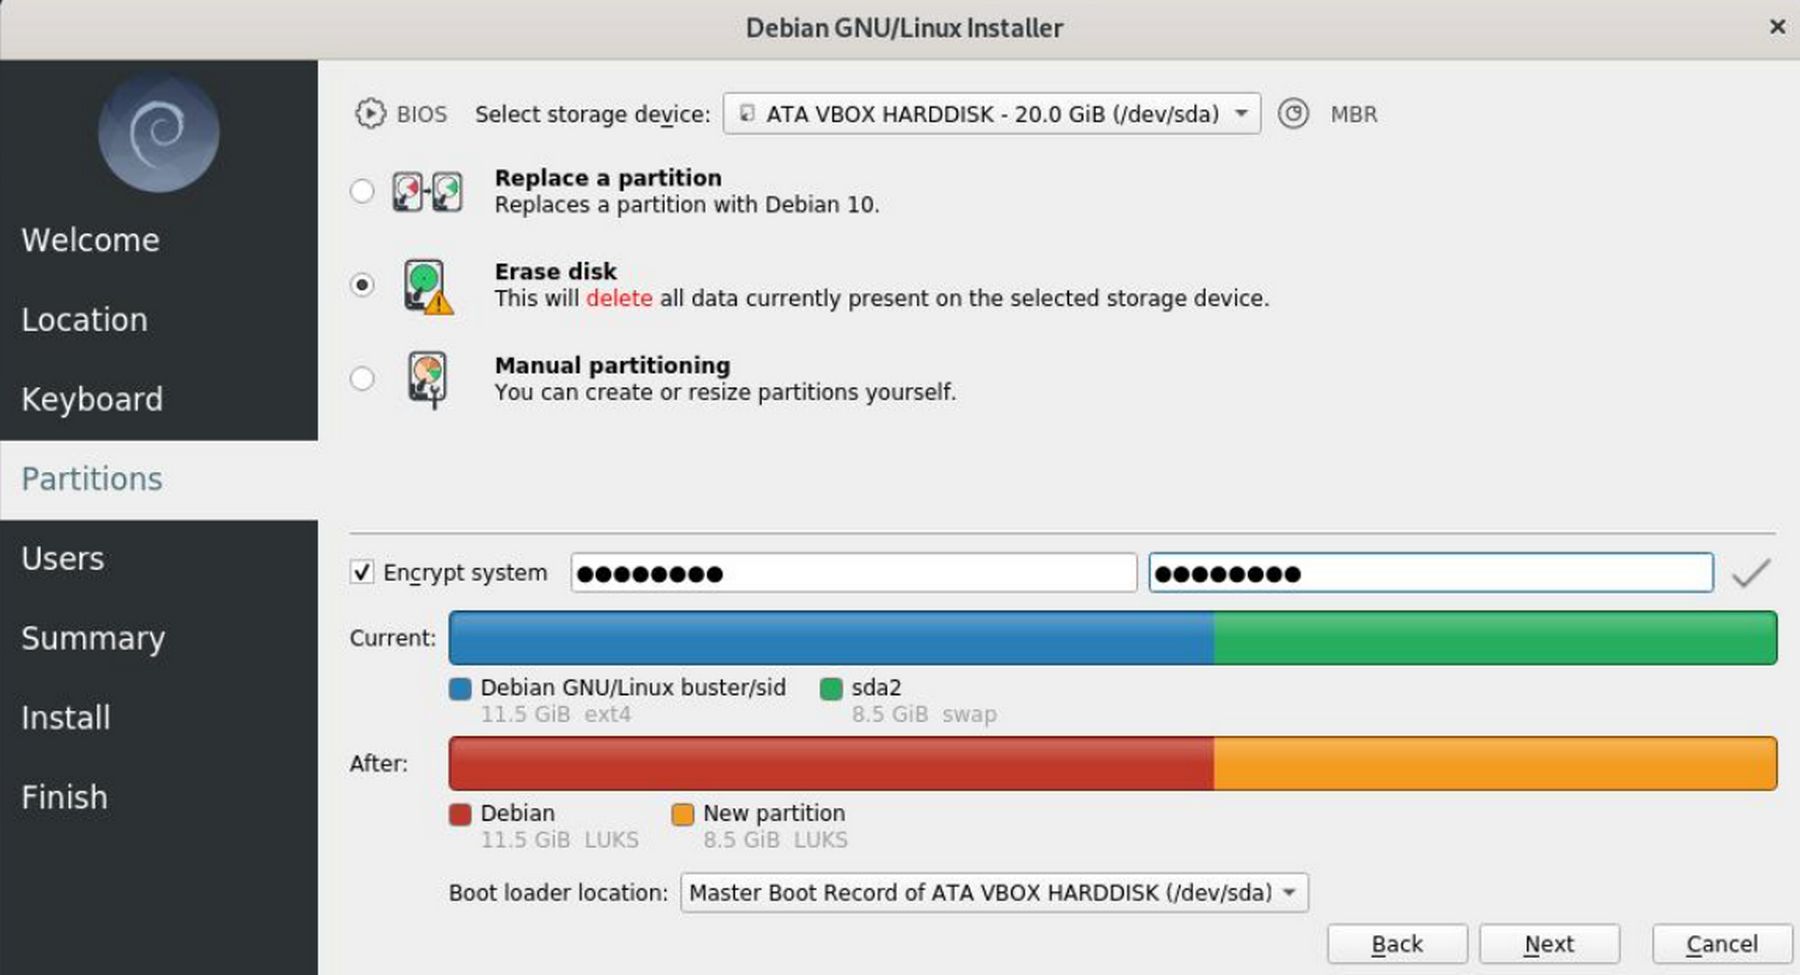
Note that I recommend leaving Encrypt System unchecked. Then click Next. On the Users screen, enter your username and password. You can also check the box to automatically log in.
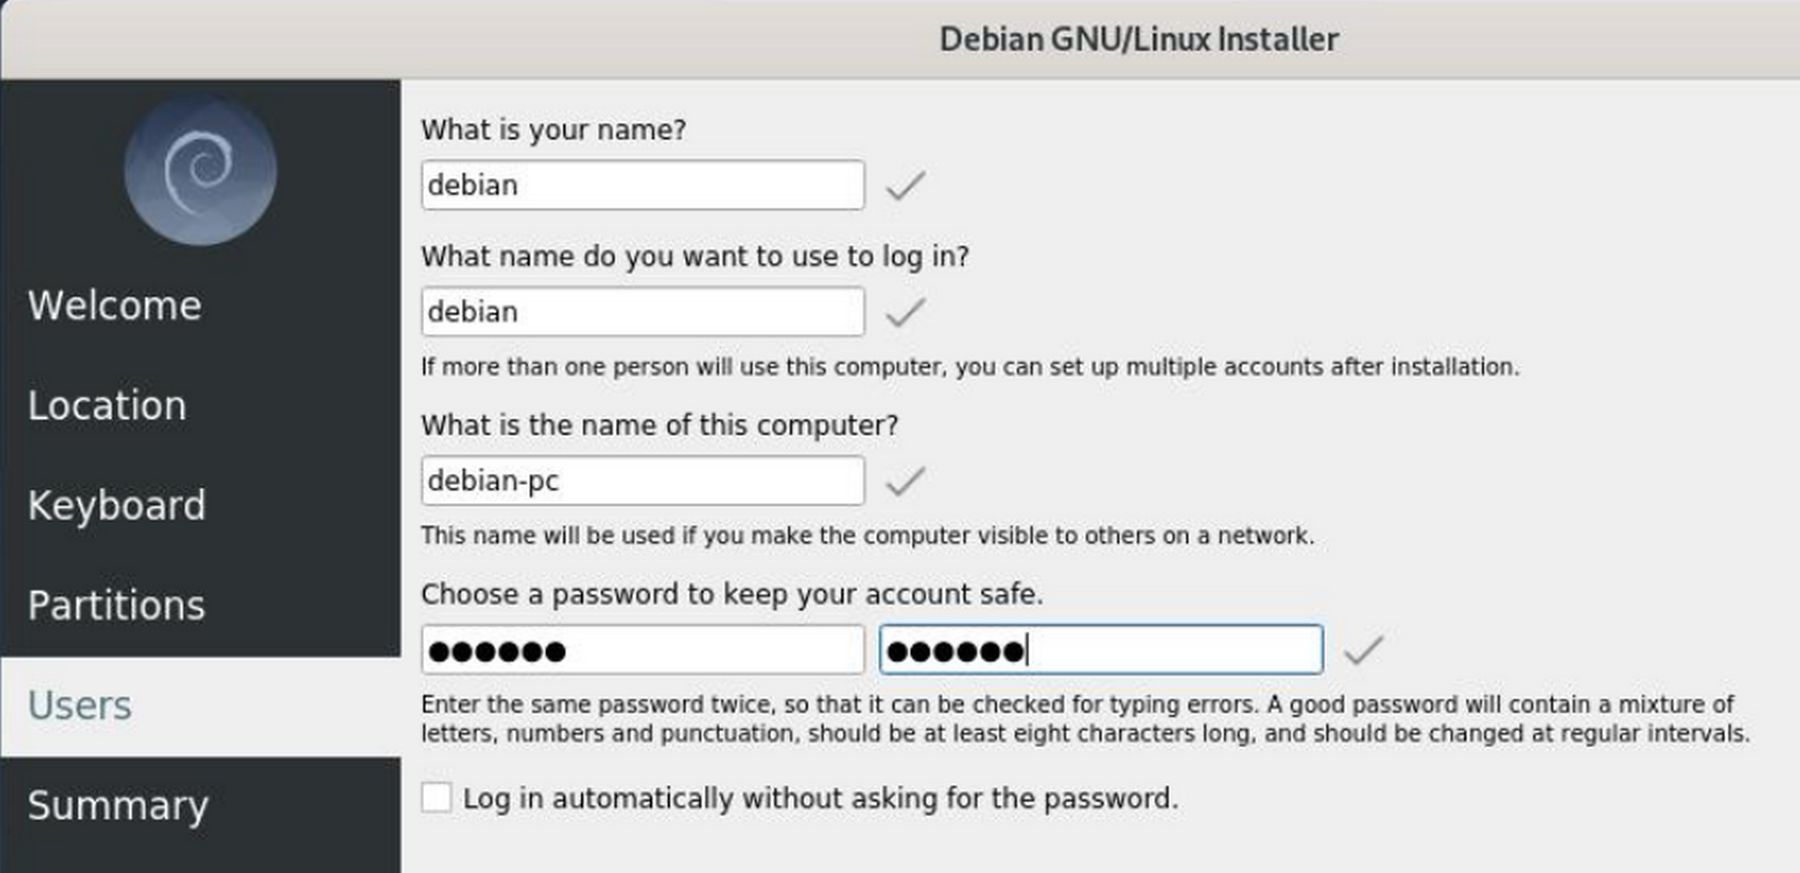
Click Next. The Summary screen will show the Installation summary. Click Install. The Install screen will show the Installation progress. The Finish screen will state All done and ask if you want to restart now. When you restart, quickly remove the USB Live stick!
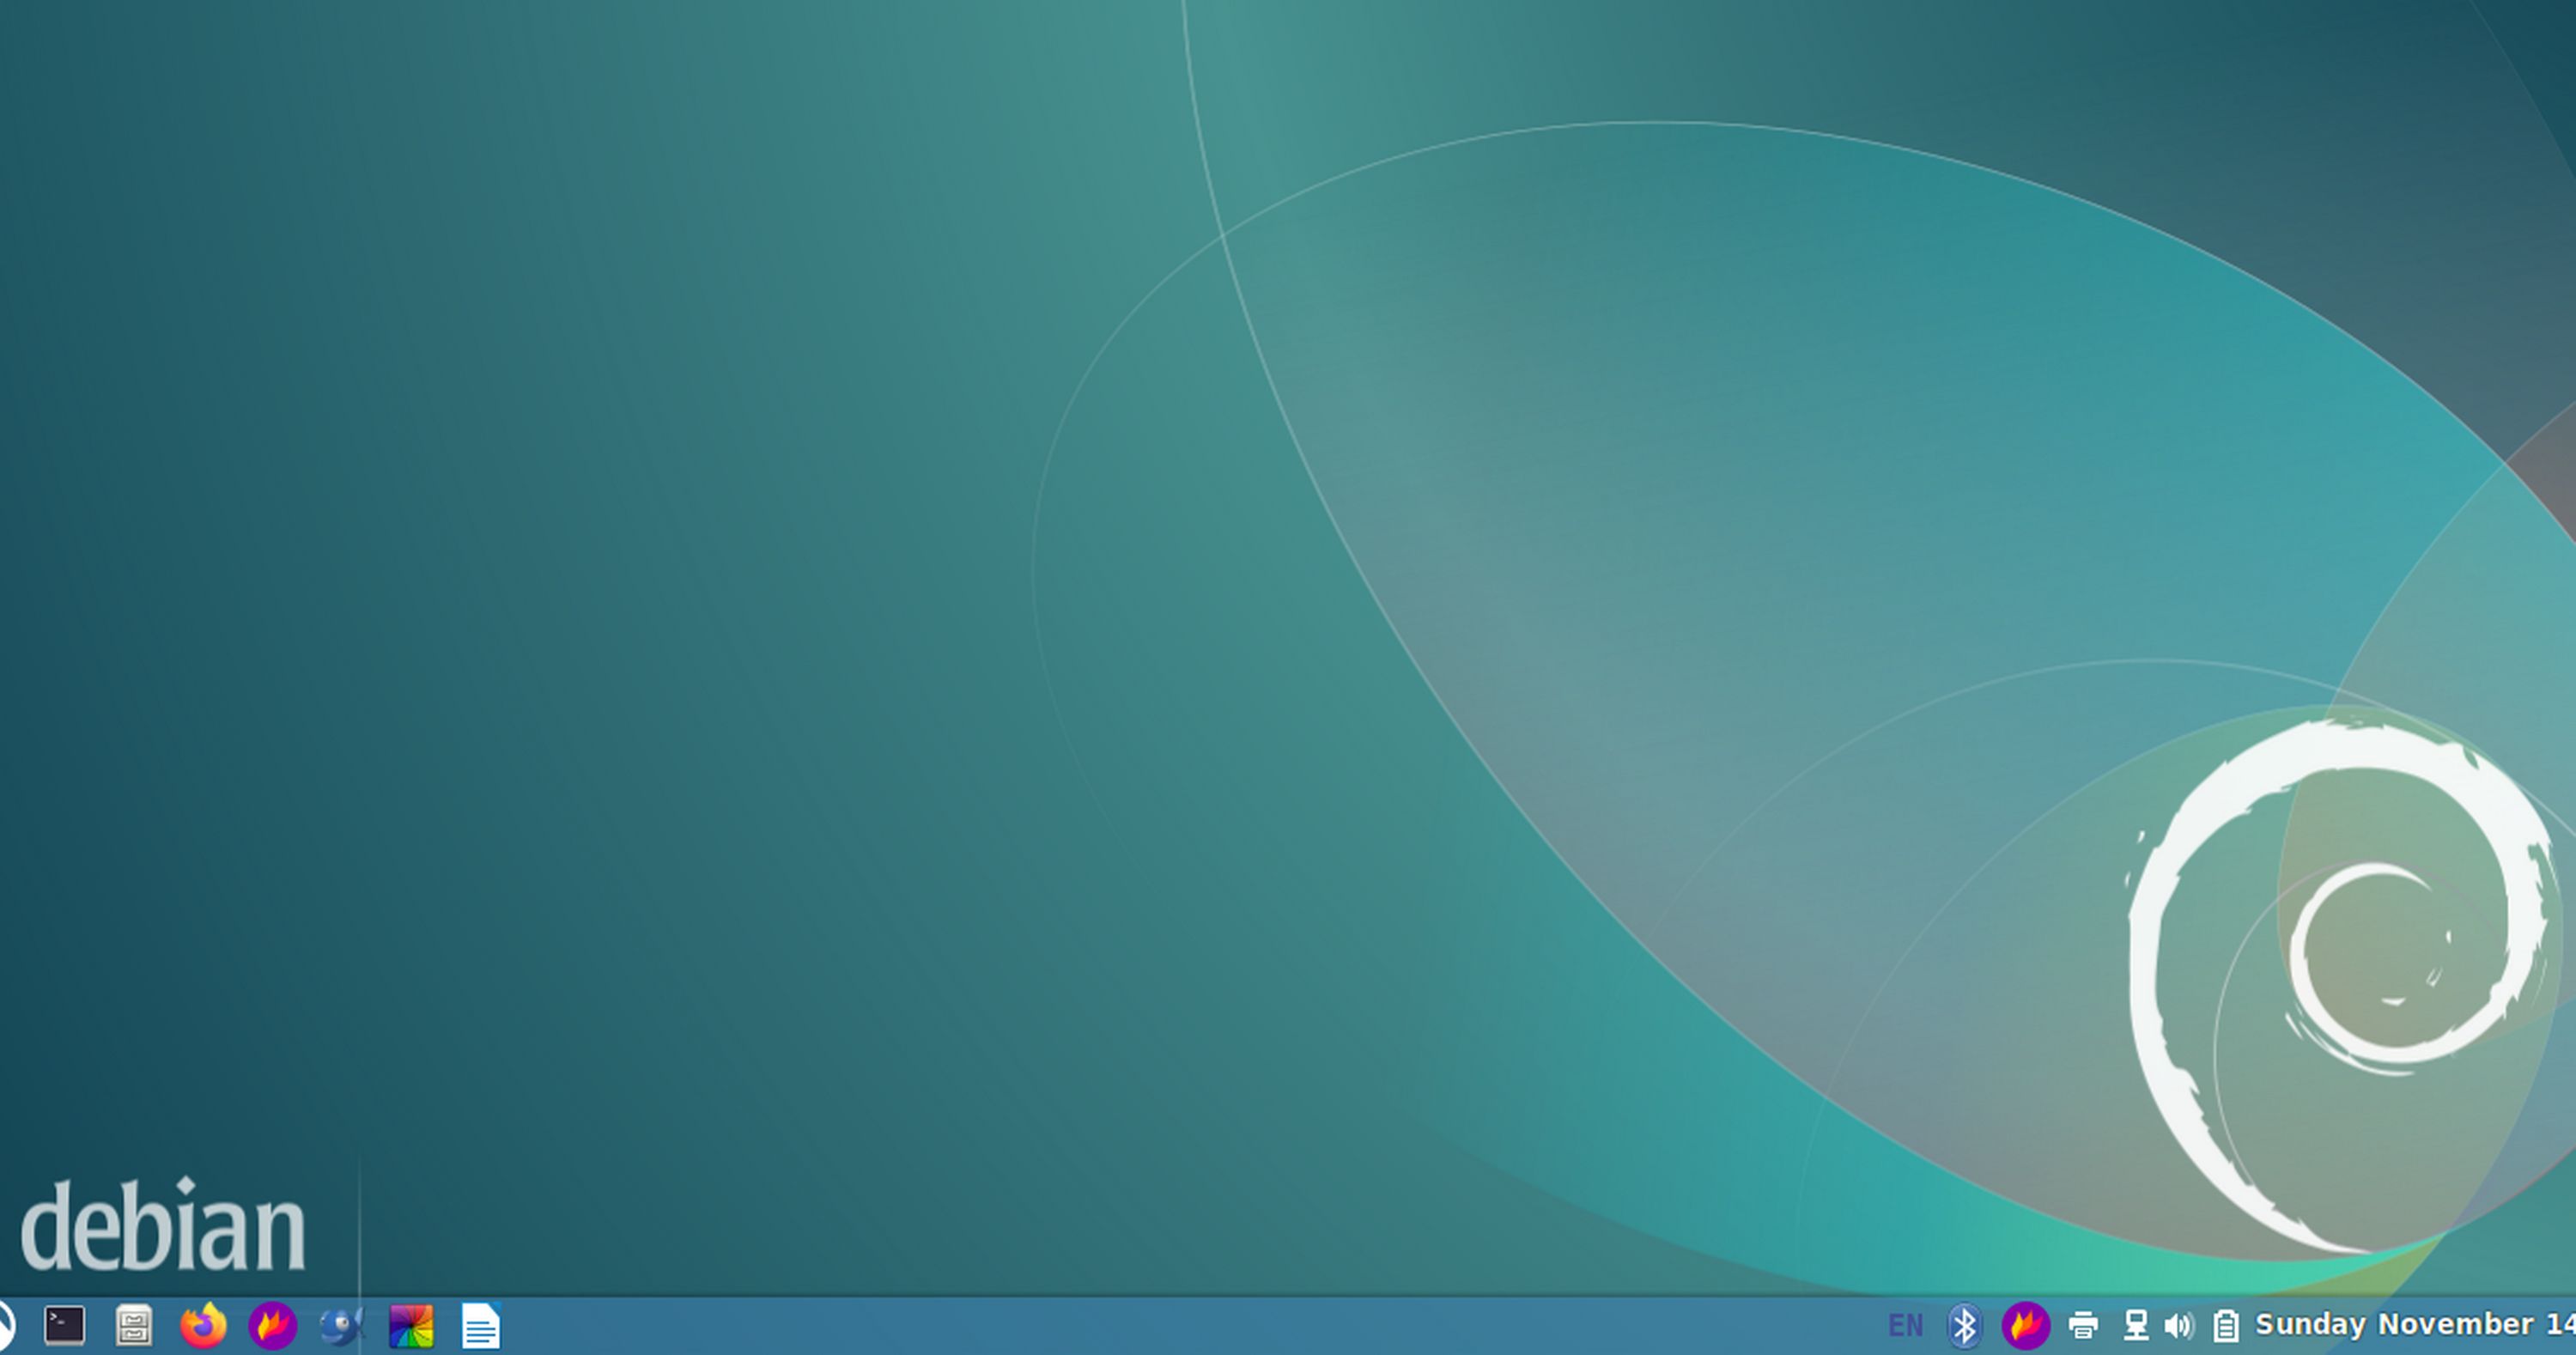
When you restart, your laptop should boot into the Debian Cinnamon Desktop screen with the Start programs button in the lower left corner.
Options for buying a New Linux Laptop
While there are more than a dozen companies that sell new Linux Laptops, the sad truth is that nearly all of them use the extremely insecure UEFI start up program. There is no point in buying a Linux computer if it has UEFI as hackers can take remote control of your Linux computer via the UEFI program.
Currently, there are only two Linux Laptops that use a secure Linux boot program instead of UEFI. These are the Pinebook Pro 14 which costs under $300 and the Purism Librem 14 which costs about $2000.
Pinebook Pro 14 Laptop
The Pinebook Pro is not available at the moment. If you manage to get a used or new Pinebook Pro, be aware that it does not use an X86 processor. Instead, it uses an ARM processor. Therefore Debian 11 will not work on the Pinebook Pro.
I have written a detailed article on how to configure the Pinebook Pro. Here is the link:
https://learnlinuxandlibreoffice.org/4-pinebook-pro-tips
Here is a link to the Pinebook Pro website: https://www.pine64.org/pinebook-pro/
Here is a link to their forum where you can get the latest information on when it might be available again: https://forum.pine64.org/forumdisplay.php?fid=112
Purism Librem 14 Laptop
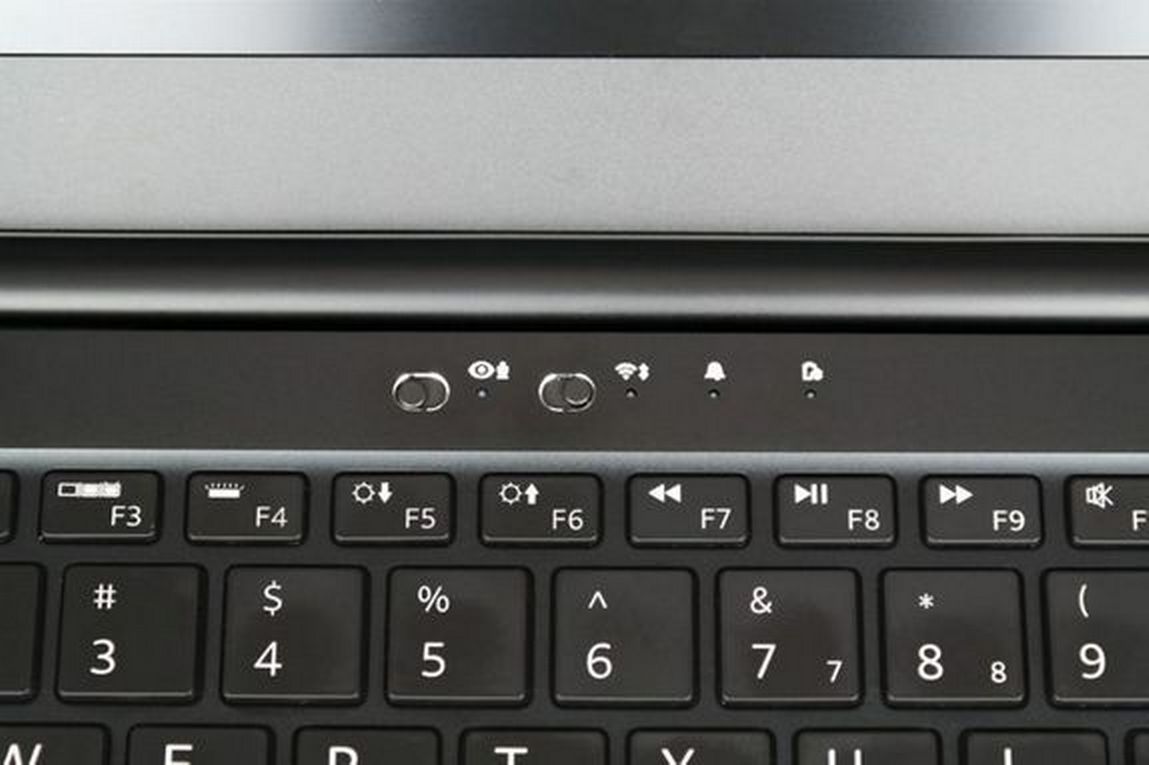
The Purism Librem 14 is the world's most secure laptop. This is because it replaces UEFI with the Coreboot SeaBios startup program. It also comes with a series of special hardware kill switches at the top of the keyboard.
The Purism Librem 14 is typically not available. However, as of March 2022, there is a limited supply available at this link: https://shop.puri.sm/shop/librem-14/
The base model is $1370. If you order one of these, I recommend replacing the 8 GB of Memory with 16 GB. This adds $80. I also recommend replacing the SATA Storage with 500 GB NVME storage which adds $170. I recommend keeping the Pure OS operating system which is a slightly modified version of the Debian 11 operating system. For most people, there is no need to pay for the Interdiction program. The total cost with these two upgrades is $1650. You can also upgrade the warranty from one year to three years for $170.
We you get the laptop, connect it to the charger and turn it on. There are a series of steps on the install screen. One thing I do not like is that there is no option to turn off encryption of the hard drive.
Because you will need to enter the hard drive encryption password every time you log into your laptop, I recommend keeping that password short and easy to remember. Also keep your log in username and password short and easy to remember.
Once you complete all of the configuration screens, you will log into the Pure OS start screen. Sadly, Pure OS uses the Gnome 3 desktop which can be difficult for Windows converts to learn and use.
I therefore recommend adding the Cinnamon Desktop to the Pure Operating system. To add the Cinnamon Desktop, open a terminal and type the following commands one at a time:
sudo apt-get update
sudo apt-get dist-upgrade
sudo apt install task-cinnamon-desktop
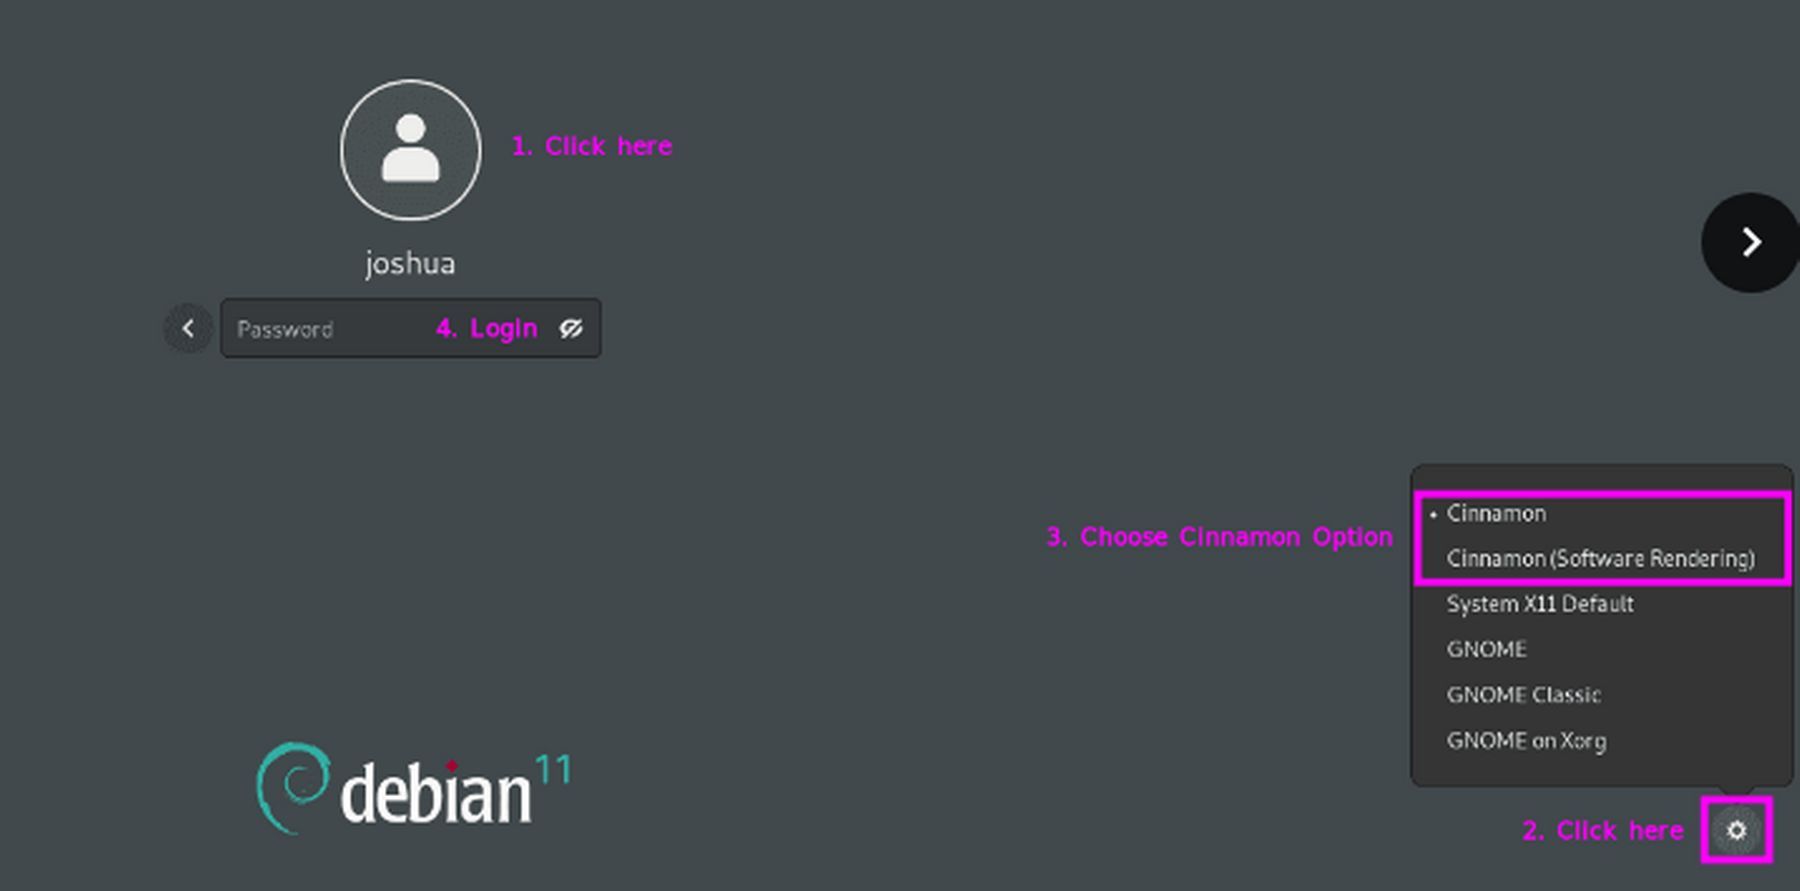
Then power off and restart your laptop. Enter your encryption password. At the log in screen, click on the person icon which will bring up a desktop selection screen in the lower right corner. Change the Desktop to Cinnamon. This only needs to be done once. On future logins, the Cinnamon Desktop will automatically be selected.
Then log in with your normal username and password. This will bring up the Cinnamon Desktop. There are a few more needed changes, but we will cover those in a later article.
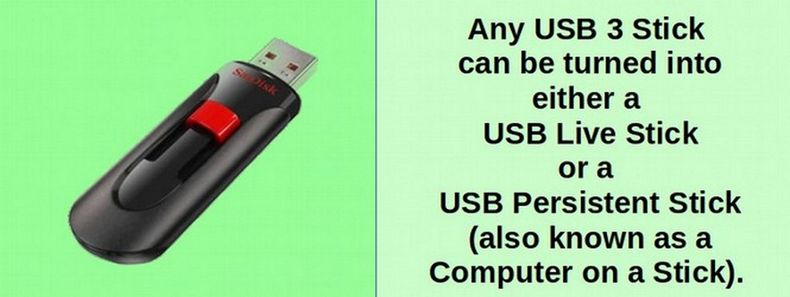
Benefits of a Computer on a stick
A USB External Drive with Persistent storage is also called a Computer on a Stick – because it works exactly like a computer with an internal hard drive. The only difference is that a computer on a stick does not have a keyboard and monitor. It therefore borrows the monitor and keyboard of the “host” computer which it is plugged into. When you work with programs and save documents, instead of using the host computer internal hard drive, you use the USB external drive to run programs and save documents.
If you do not have a computer you want to reflash, and you do not want to buy a laptop - and you want to try Linux on your existing Windows computer before making the move to switch to Linux, then your best option is to use a USB computer on a stick. A computer on a stick plugs into your current computer and uses your current computer keyboard and screen and processor and RAM. It basically temporarily replaces your computer hard drive without affecting your hard drive. It takes about one hour to create a computer on a stick.
The benefit of having a computer on a stick is that you do not have to actually change anything other than a couple of BIOS settings on your host computer to allow it to boot from an external USB drive rather than its internal drive. This means you can keep your Windows computer just the way it is and still use a Linux “computer-on-a-stick” to learn how to use Linux and/or to set up a Linux web development test environment.
Linux USB without persistent storage is called a Live USB and is normally used to replace the prior operating system on the hard drive (either Windows or Linux) with a newer version of a Linux operating system. You can start a computer with a Live USB and do things like installing programs, saving files, and changing settings. But, as soon as you turn off and turn on your computer, all your changes you made with the Live USB will be gone.
If you want a USB drive that retains the changes you make, you need to create a USB with persistent storage – a computer on a stick. With persistence, whenever you boot the USB drive on any computer, your files, settings, and installed programs will be there. This allows you to take your work with you and work on almost any computer anywhere anytime. A Persistent USB also allows folks to learn about Linux on their existing computer without the need to create virtual machines or dual boots.
This method of creating a Linux computer on a stick is ideal for teachers and students because it allows them to use a school’s computer lab without altering in any way any of the computers in the lab. Students can save their work and bring their Linux Mint Persistent sticks home and continue to practice using Linux on any computer they may have at their home.
But the most important reason to create a persistent USB drive is that you can test Linux based business website development programs without ever having to worry about borking your normal computer. This is why creating a computer on a stick is called setting up a TEST environment. If things go bad, you simply reflash the USB drive and start over.
What’s Next?
Whether you reflash an existing computer or buy a new computer or create a computer on a stick, the goal is to create a secure Linux computer with the Cinnamon Desktop. In the next article, we will review how to create a computer on a stick. We will then review important First Steps for completing the initial configuration of Linux Debian laptop.