
Joomla 4 was released in August 2021. Joomla 4 offers significant benefits over Joomla 3. The most important of these is being compatible with PHP 8. By April 2022, there were usable templates and extensions to begin the process of updating Joomla 3 websites to Joomla 4. As support for Joomla 3 will be ending in the next year, there are now millions of websites needing to be updated from Joomla 3 to Joomla 4. In this article, we will provide a few tips which will make this process as painless as possible.
Tip 1 Choose your simplest website to update
If you have more than one website, choose a website that has the least content. You can even set up a test migration website to practice with. As most of our course websites at College in the Clouds dot org have dozens of pages with hundreds of images, we will begin by updating a website that we have not yet completed yet and thus it only has content on the Home page.

Tip 2 Make sure your server is using at least PHP 7.4 PHP 8.0 is recommended.
Note that if you have recently installed the Hestia Control Panel on your VPS, it uses PHP 8 by default.
Tip 3 Update your Joomla 3 website to the latest version of Joomla 3.10
Log into your Joomla Administrator Dashboard. In the Dashboard top menu, click on the Joomla Icon to reach the Dashboard Home page. If your Joomla 3 website is not using the latest version of Joomla 3, a red notice should appear advising you to update to the latest version of Joomla. To make sure you are using the latest version of Joomla 3.10, in the left side column menu, Maintenance category, click on Joomla is Up to Date to go to the Joomla Update page.
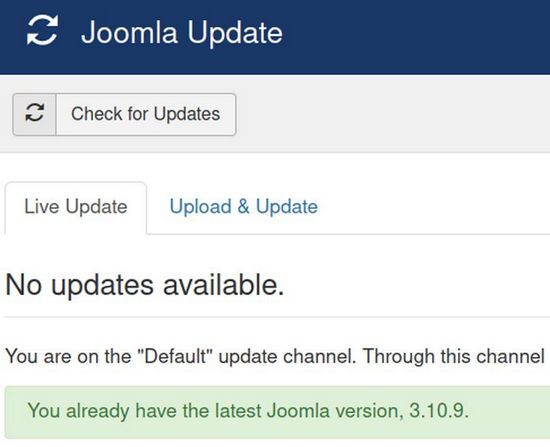
Click Check for Updates. It should reply No Updates Available.
Tip 4 Take Screen Shots and copies of all text and images to rebuild the site if the update process goes really wrong
The text, images and screen shots of each page should be copied to its own Libre Writer document. These Libre Writer documents should be stored in Category folders inside of your website root folder on your Home computer. If you have followed the directions in our course, Create a Secure Website dot com, you already have all of these Writer documents in their proper category folders.
Tip 5 Create a List of all Joomla extensions on your website. This includes all components, modules and plugins that are not part of the Joomla core.
Delete any extensions you are not using. Then update all of extensions to the latest version and verify that the latest version of each extension is compatible with Joomla 4. If an extension is not compatible with Joomla 4, consider replacing it with another extension that is compatible with Joomla 4 – or waiting a few months before you update to Joomla 4 with the hope that the extension you need will be released in a Joomla 4 version. On each of my Joomla 3 websites, I updated the JCE editor to the latest version. I then uninstalled each of the security extensions as I will be replacing each with the new Joomla 4 security extensions after the update to Joomla 4.
To uninstall extensions in Joomla 3, go to Extensions, Manage, Manage. Select the Component, Plugin and or Module and click Uninstall.
These security extensions I have uninstalled include BF Stop, Marco Interceptor (which will be replaced by DB Interceptor), TJ Set Generator (which will be replaced by Remove Generator), Spam Protection Factory, Eyesite and Phoca Commander.
Tip 6 Change your website template to the Helix Ultimate template before updating it to Joomla 4
One of the many benefits of the Helix Ultimate Template is that it works well with both Joomla 3 and Joomla 4. Hopefully, this will result in a better maintenance of the website layout after the transition to Joomla 4. When you change to Helix, be sure to create a new custom dot css file for Helix by copying the custom dot css file from your old template.
Download the Helix Ultimate Template from the following page:
https://www.joomshaper.com/joomla-templates/helixultimate
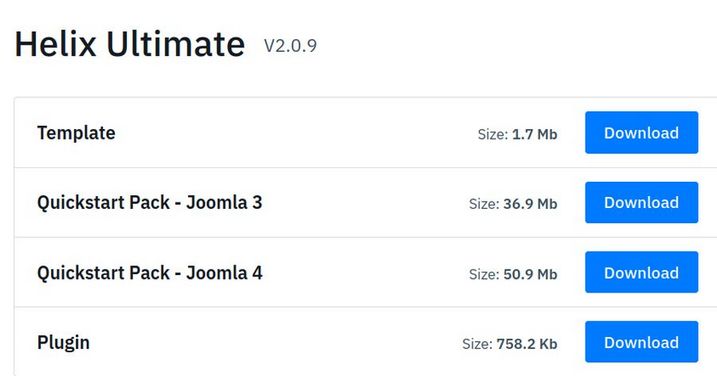
Download the Template and the Plugin. Do not download either quick start package. To install the Helix template, go to to Extensions, Manage Install. Then go to Extensions, Templates, Styles and select the Helix template to be the default template. To configure the website layout for the Helix template, go to this link: https://createasecurewebsite.com/more-steps/4-site-appearance/4-1-helix-template-first-steps
In particular, you want to go to Extensions, Templates, Styles, and edit the Helix template. In the Basic section, turn off the Logo and the Header. Then go to the Helix Layout Tool and add a couple of rows for the Header and the Main Menu. Add the logo module position to the Header Row and the menu module position to the Menu Row.
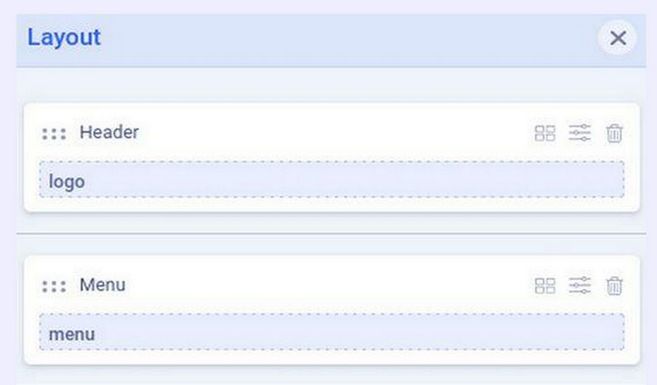
Also change the Mega menu type from Mega menu and off canvas to just mega menu. Then go to Extensions, Module and assign the Header module to the logo position and the Main Menu module to the menu position. Also unpublish the Main Menu module. In my case, even after doing this, the main menu appeared inside of the header.

This problem should be corrected once we have updated the website to Joomla 4.
Tip 7: Make a copy of the custom dot css file from your old template.
Some of these changes may need to be added to the new Helix template custom dot css file after the update.
Tip 8: Delete your old 3 Party template.
Once your old template is no longer the default template, go to Extensions, Manage, Manage to uninstall the old template and old template plugin. You do not need to delete the default Joomla template, called Protostar, as it will be converted to the new default Joomla template during the update.
Tip 9 Take a Hestia Backup of the Site just before the update so you can have the option of rolling it back in case things go wrong.
Log into your Hestia control panel and click on the User to go to the User control panel for the website you are updating. Then click on Backups and download a Hestia backup to your Home computer.
You are now ready to begin the Joomla 3 to Joomla 4 Updater.
Step 1 Use Pre-Update Check for extension compatibility
In the Joomla 3 Dashboard, click Use Pre-Update Check for extension compatibility. To navigate to the Pre-Update Check-screen, in the top bar Components, click on the Joomla! Update menu item. If you do not see the Pre-Update Check-screen, click on the Check for Updates button or clear cache and refresh the page.
Also verify that the site is on the Joomla Next Update Channel. Go to Components, Joomla Update, Options, Update Channel. Select Joomla Next, then Save & Close.
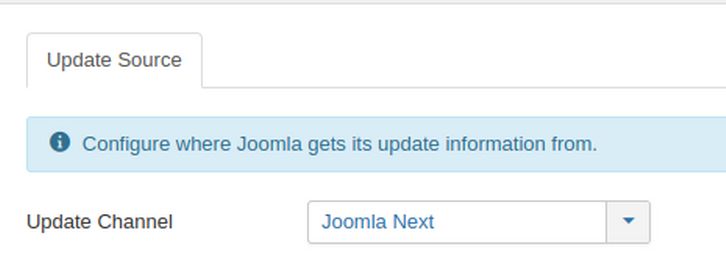
After Save, this page appears:
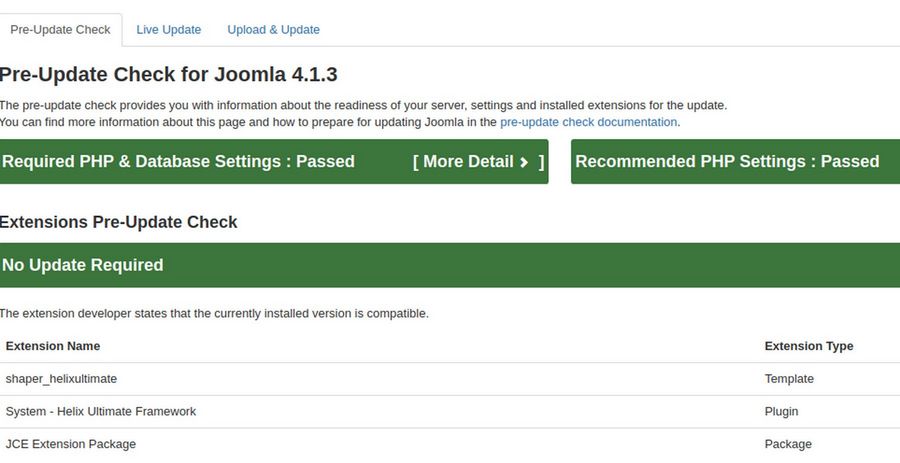
Check Extensions – Red, Orange, or Green:
Red – Updated Information Unavailable: Extension does not offer a compatible version for the selected target version of Joomla. This could mean the extension does not use the Joomla update system or the developer has not provided compatibility information for this Joomla version yet.
Orange – Update Required. Please update these extensions before updating Joomla. Please take extra care if this updated version of the extension is not also listed as compatible with your current version of Joomla. If any items are orange, it doesn’t necessarily mean that the update won’t work but it’s best if everything matches the recommended settings.
Green – No Update Required. The extension developer states that the currently installed version is compatible.
Update Extensions under Red and/or Orange
Before proceeding, determine if any add-on extensions are not needed and uninstall them. If you have a lot of extensions that need updating or uninstalling or replacing, create a new Libre Writer document and create a table listing each extension and what needs to be done to make the extension compatible with Joomla 4.
Check 3rd party developers’ websites for ‘Unknown’ / ‘Incompatible’ extensions to determine if they have a version of their extension that is compatible with Joomla 4. If they do, update the extension to the compatible version. If they don't, determine if they will be updating their extension to be compatible with Joomla 4. If they will be developing a compatible version, get a TBA date when it will be available. Note the date so you can get the compatible version and install. If they will not be updating to a compatible version, find/install a compatible alternative and uninstall the non-compatible version. Once all extensions have been updated, replaced, or uninstalled for each website, check to ensure website is functioning properly.
Since our Update Checklist was all green, we are ready to do the actual update from Joomla 3.10 to Joomla 4. To navigate to the Update-screen, click the 'Live Update' tab.
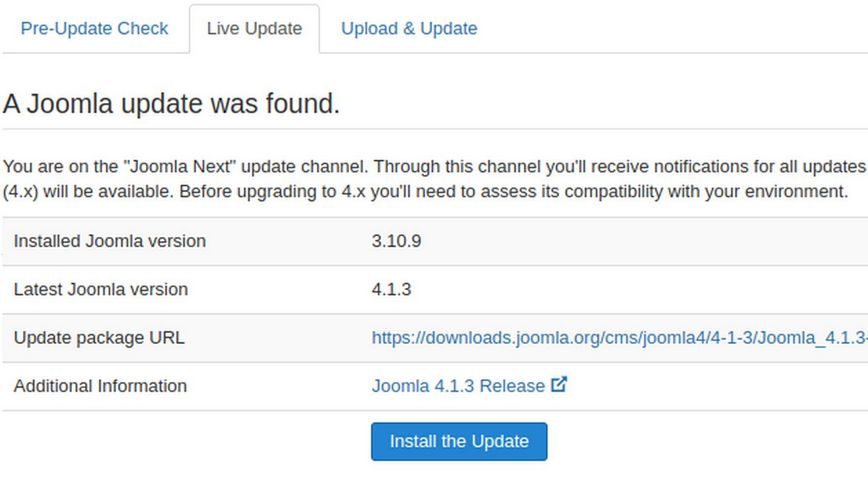
Click Install the Update.
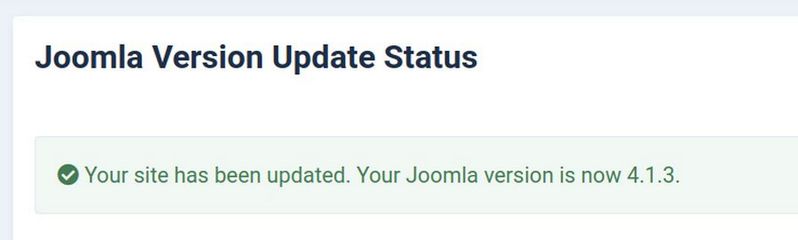
Now click on the website front end to see the result.

Sadly, the main menu is still inside the header. Open a different browser and clear the cache. The menu is now below the header:

There is still too much space above and below the header image. Copy our existing custom.css from a different Joomla 4 website into a new custom.css file for this website. Then view again. This added the menu item colors. But the header space is still there. I had had set the header height for 260 px. But this particular website has a header that is only 200 px tall. Go to Templates, Styles and edit the Helix template. Click Basic, Header and change the height to 200px. The extra spacing above and below the header is now gone:

There is also a problem with the Hamburger menu. Narrow the screen and the hamburger menu is in the middle of the screen:

Go to Menu. And scroll down to Off Canvas. Change Canvas position from Right to Left. This moves the hamburger menu icon to the right side of the header and the actual mobile menu to the left side of the header. The website now displays properly.
Change the Update Channel.
Click Updates, Joomla Options. Change the channel from Joomla Next to Default. Then click Save and Close and go back to the Joomla Dashboard.
Add the Top Menu back to the Joomla Administrator Dashboard.
Download the Phoca Top Menu plugin from this page:
https://www.phoca.cz/download/category/123-phoca-top-menu-module
Then go to System, Install, Extensions, Upload Package File to install the Phoca Top Menu. Publish it in the custom top position.
Simplify the Joomla Administrator Dashboard
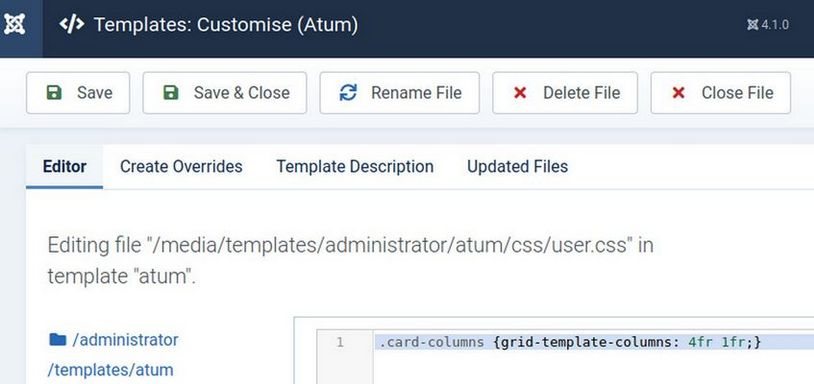
In the Joomla 4 Administrator Dashboard, click on the System settings module and unpublish it. Then click on the Site Settings module and click Edit to add the icons for Menu Items, Template Styles and Template Code. Finally, add an Atum user.css file and add this one line:
.card-columns {grid-template-columns: 4fr 1fr;}
Install and configure the Joomla 4 security extensions
Install the new version of BF Stop, Phoca commander, Remove generator, Sqlinterceptor, Eyesite and configure each of these.
Final Joomla 4 Update Steps
Enable the Joomla System Redirect plugin. Add a Custom Redirect image to the Helix template 404 page. We are done.
What’s Next?
This completes our course on how to create a secure website. Now that you have a secure Joomla 4 website, the next step depends on what you want to do with your website. For many, the next step will be to install a secure online store. Here is a link to our course and website Create a Secure Online Store dot com:
https://createasecureonlinestore.com/
For our other courses, visit our main website, College in the Clouds dot org.
https://collegeintheclouds.org/
Thanks for taking the time to learn how to create a secure Joomla 4 website. This is an important first step in making the Internet safe from hackers.
Regards, David Spring M. Ed.