
In this section, we will describe three ways to display a new article and provide examples of each. The first way is to simply place the article on your Home page, which by default is a blog page. The second way places the article in a blog which is not on the Home page. The third way, category list, creates a table of articles assigned to that category. In section 6.3 we will review the other two ways which are to create links to your article in the Main Menu or in a drop down sub menu below a main menu item.
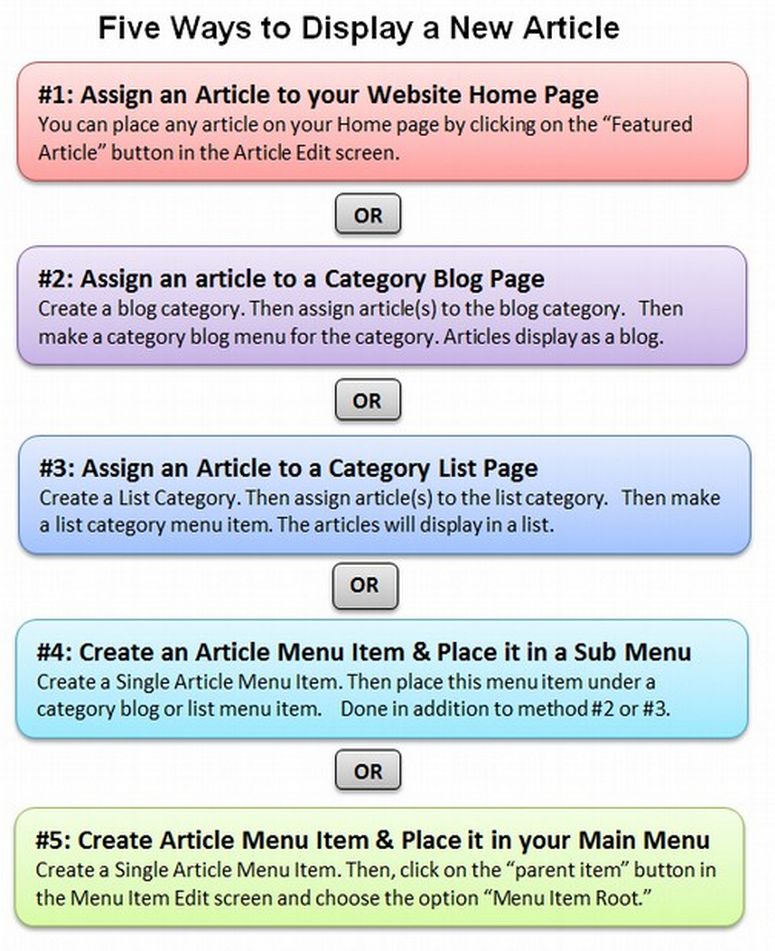
We will start with the simplest way to display an article which is to view it on the Home page of your website.
#1: Assign an Article to your Website Home Page
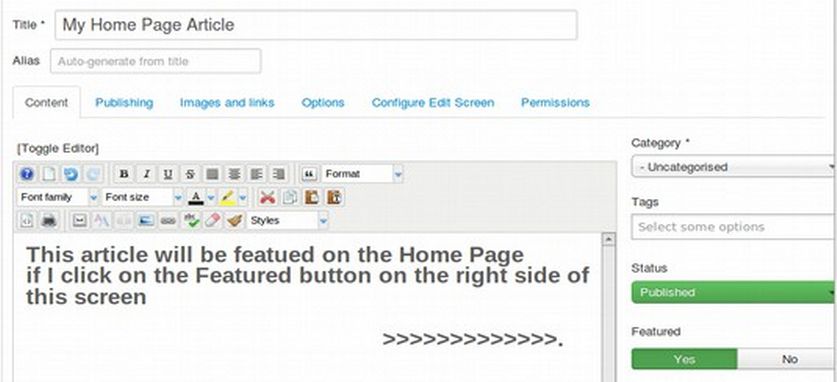
Recall that in Chapter 5, we posted a new article called Welcome to our Website. We placed this article on our Home page by clicking on the Featured box in the Edit Article screen and selecting Yes.
We can place as many articles as we want on our Home page by selecting Features equals yes. To view a list of our Featured Articles, click on Content, Featured Articles in the Top Menu.
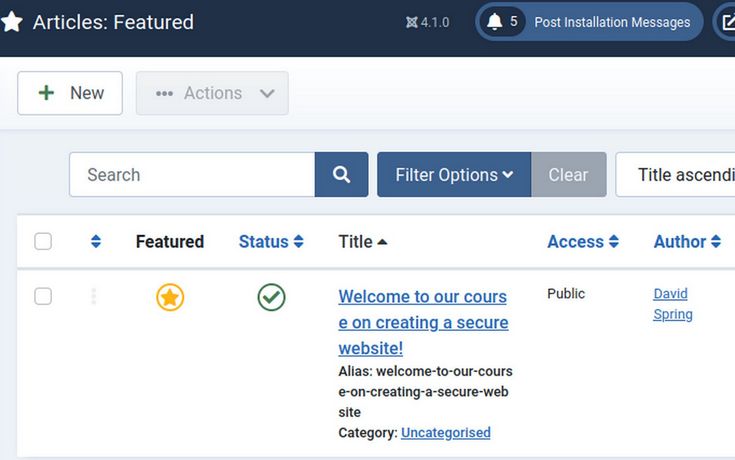
There is currently only one menu item on our Home Page. It is the Welcome article. If there was more than one featured article on the Home page, we could change the order that these articles appear on our Home page by clicking on the Ordering arrows at the top of this table. Then use the arrows to move articles up or down on this list. We can also click on the Gold Stars to remove an item from the list of articles displayed on the Home page. The fastest way to display an article on your website is to simply put it on the Home page. But not all articles should go on the Home page.
#2: Assign an article to a Category Blog page
A Blog Category Menu Item is often used to create a “Latest News” page. The benefit of this menu item type is that any articles assigned to this category do not need separate menu items created for them. They will automatically appear in the Blog page. The Home Page is a blog page and the HOME menu item can be adjusted simply by going to the Main Menu and clicking on it. We can assign an article to the Home page blog simply by setting Featured to Yes. Before we can add an article to any other blog page, we first have to create a blog category with the Category Manager and then create a blog menu item for that category with the Main Menu Item Manager.
2.1 Create a Blog Category
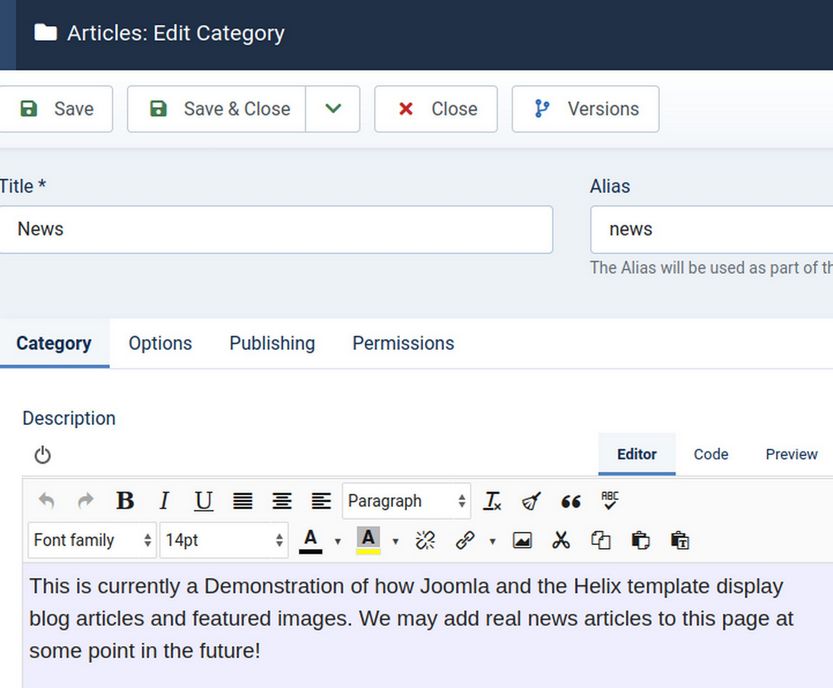
You can use any existing category for a blog layout page or you can create a new category. We will create a blog category called News. Go to Content, then Category Manager and click on NEW. Give the category a title. You can also give the blog page an introduction as shown below:
Then click Save and Close.
2.2 Assign an article to our blog category
Go to Content, Articles and select an article or create a new one. Then use the drop down arrow to assign the article to a blog category:
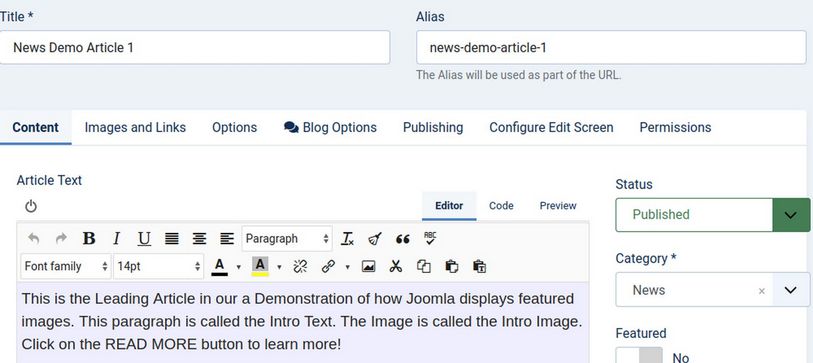
Note that the category News has been selected in the right hand column of the article edit screen.
2.3 Create a READ MORE link after the introductory paragraph and image
Inserting a READ MORE link into an article is the same as inserting an image into an article. You simply place the cursor where you want the READ MORE line to go, then click on the READ MORE button at the bottom of the page. Whether there is a READ MORE link depends on how many articles are on a page and how long each article is. With four or fewer articles, you can probably have two to three paragraphs before the READ MORE link without the page getting overly long. However with 5 to 8 articles per page, you may need to cut off each article after the first paragraph and first image. With more than 8 articles, you will generally be better off displaying them as a Category List rather than a Category Blog. Once you have added READ MORE buttons, click Save and Close.
2.4 Make a Category Blog Menu Item
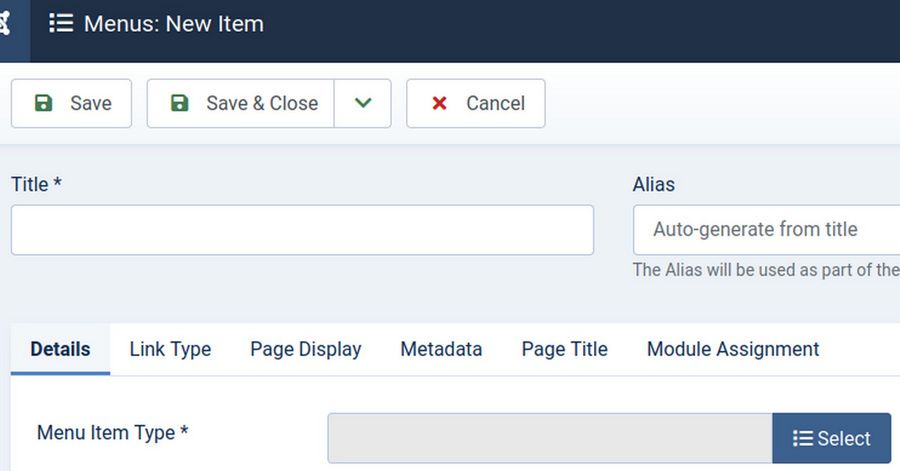
A category blog menu item can be used on any page where you want a group of articles all displayed on the same page. In other words, it can be used for any page you would like to format like the Home page. To create a Category Blog Menu Item, go to the Main Menu and click NEW to create a New Menu Item.
This brings up the New Menu Item screen.
Click the big blue Select button to bring up the Select Menu Item Type screen.
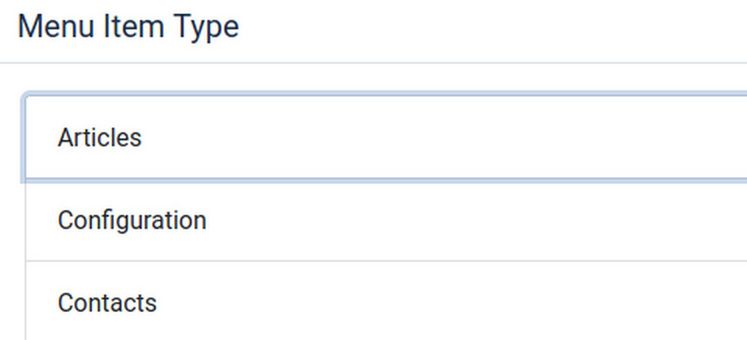
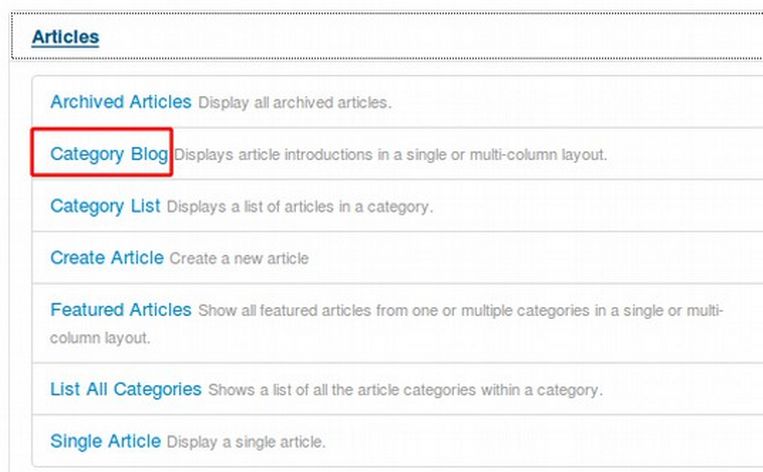
Click on Articles. Then select Category Blog.
This will bring us back to the New Menu Item screen. However, it will also magically bring up a drop down list of categories allowing us to choose which category we want to use for our category blog. Select the News category which we just created. Then type in the title of the menu item. If you type in the first letter, Joomla will suggest title names which you can click on.
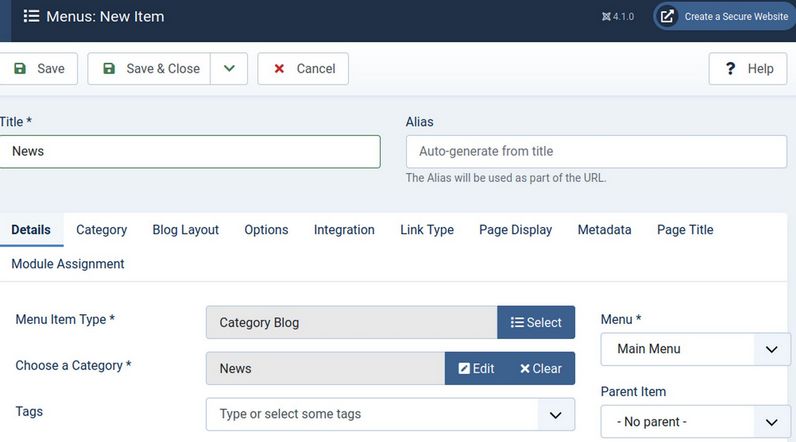
The above image shows a category blog menu item called NEWS being linked to a category called News. Any articles posted in this category will be displayed on this page. There is no need to create a separate menu item for articles assigned to a blog category (although it is helpful to make it clear to your readers that there is more than one article under this menu item). Blogs are typically posted in the in the Main Menu. To put it in the top main menu, its Parent Item will stay as Menu Item Root. Then click Save and Close and View Site to check out the new menu item in our main menu.
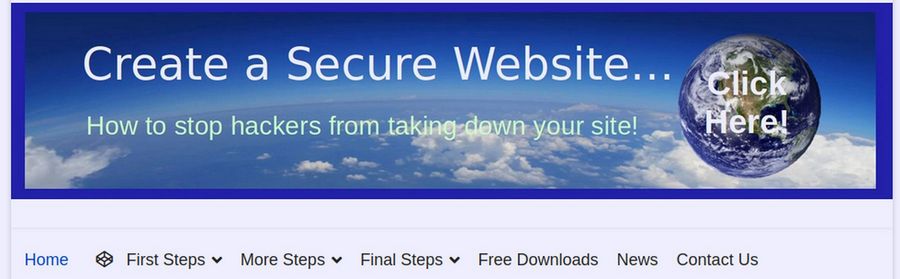
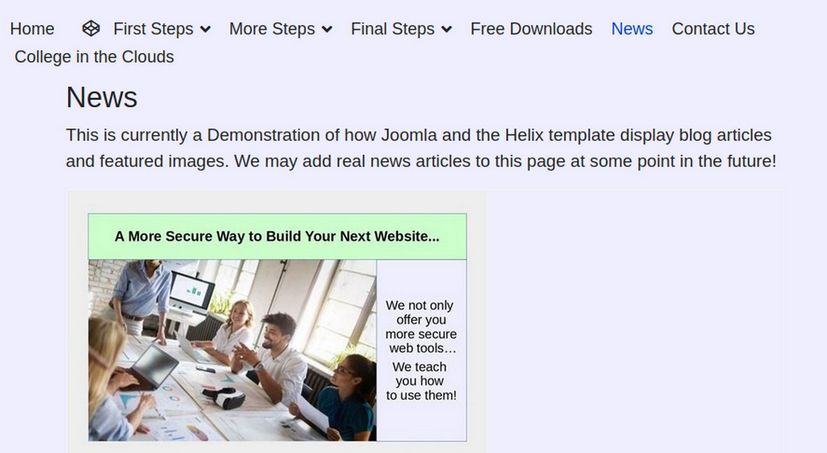
Click on NEWS to view our News blog page.
2.5 Blog Layout Options
Blog Layout Options, set either globally with the Article Manager or individually with the Menu Item Edit screen, control the appearance of the blog layout page. To adjust the layout with Global settings, go to your Article Manager and click on Options in the upper right corner. Then click on the Blog/Featured Layouts tab.
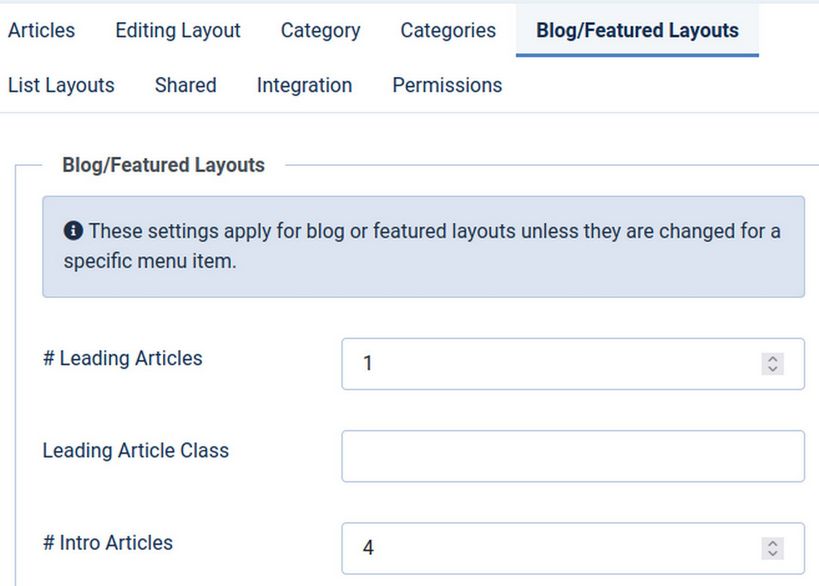
Blogs are often displayed as two or three columns of articles. But this makes them very difficult to read. We will therefore use a single column and have 1 leading and 2 intro articles which viewers can see by scrolling down the page. Below this, we will have links to up to 4 more articles. Then click Save and Close.
To get a clearer idea of what this means, a Blog Layout in Joomla has 3 main areas: Leading, Intro, and Links. These are shown in the diagram below.
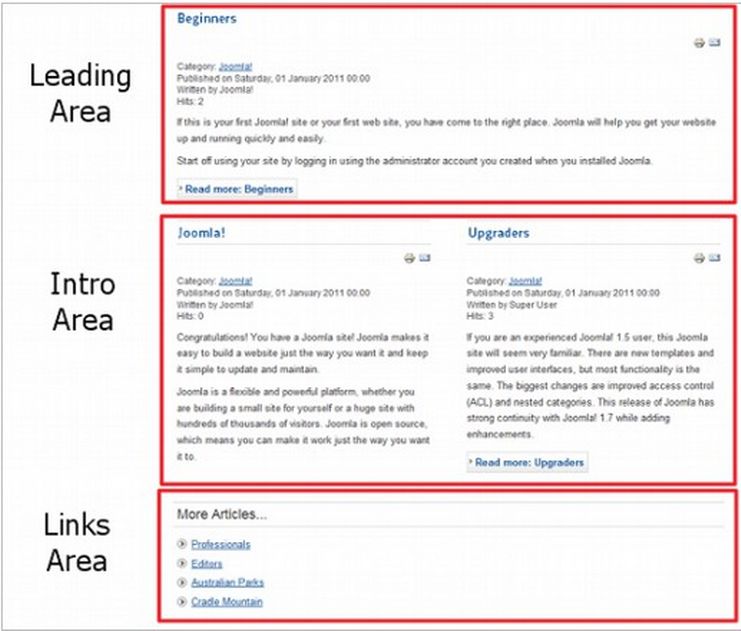
Articles in the Leading Area display in one column, using the full page width. Articles in the Intro Area may display in one, two, or three columns, depending on the Columns setting. If an Article has a "Read more..." break, only the text before the break (called Intro Text) will display, along with a "Read more..." link.
Blog Layout Options Recommended Settings
# Leading Articles. Number of Articles to show using the full page width.
# Intro Articles. Number of Articles to display on the first page of the blog after the leading Article. The order in which the articles are displayed is determined by the Article Order parameter below.
# Columns. The number of columns to use in the Intro Text area. This is normally between 1 and 3. If 1 is used, the Into Text Articles will display using the full width of the display area, just like the Leading Articles. 1 is the recommended setting.
# Links. The number of Links to display in the 'Links' area of the page. These links allow a User to link to additional Articles, if there are more Articles than can fit on the first page of the Blog Layout. This is a reasonable alternative to Pagination.
There are more settings that can be selected for each blog menu item after it is created. For example, go to your Main Menu and click on your HOME menu item.
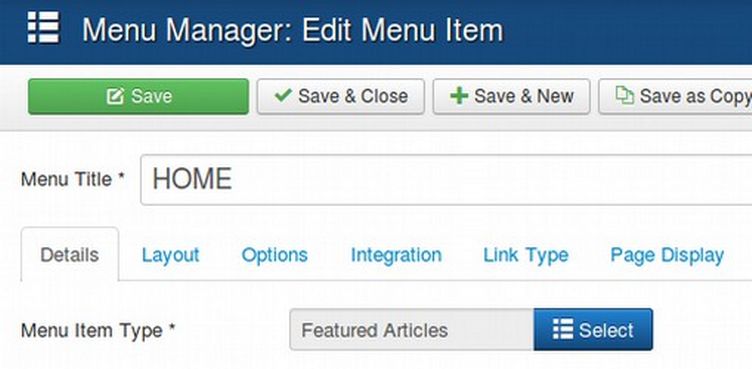
It opens to the Details tab. But click on the Layout tab and you will see not only the Options listed in the Options tab earlier, but also a way to set the Article Order (which should be set for Featured Articles Order) and a way to set Pagination (which is typically set for Auto).
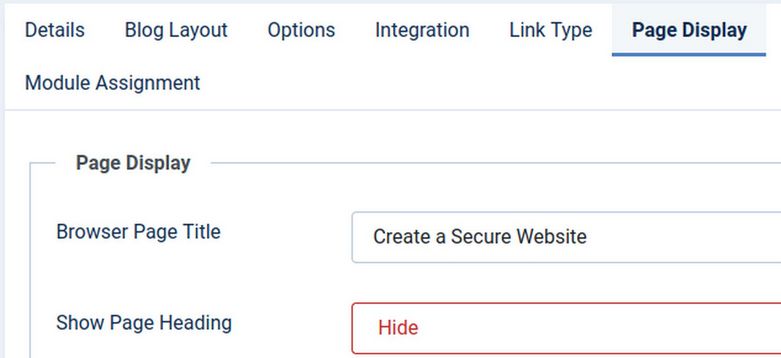
If you want to hide the title of the Home page, then click on the Page Display tab and set Show Page Heading to Hide. Then type in the title of your site to display in the browser tab:
You can make similar changes to your News blog by clicking on its menu item and then selecting the tab you want to make changes on.
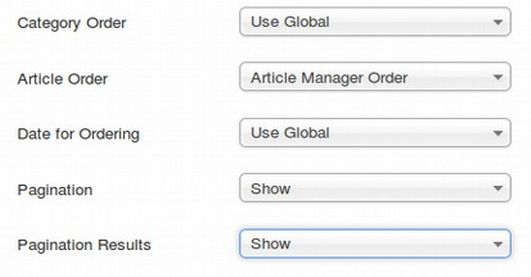
Article Order This is the order of articles in this Layout. Choose Article Manager Order. With this option, articles are ordered according to the Order column entered in the Article Manager. This option gives you the most control over article ordering.
Pagination for Blog Articles. This determines whether Page Links appear on your blog pages. Pagination provides page links at the bottom of the page that allow the User to navigate to additional pages. These are needed if all of the Blog Articles will not fit on one page. An example is shown below.

Select Show: This option will show pagination links if they are needed.
Pagination Results. Hide or Show the current page number and total pages ("Page 1 of 2") at the bottom of each page.
Now that we have a category blog in our main menu, we will next see how to add some category list menu items to our main menu.
#3: Assign an Article to a Category List Page

Blog Menu Items are a good way to post a small number of articles in a time series. However, for posting a large number of articles that are all in the same category, a category list is more efficient. Viewers can click on articles in the table without having to scroll down the page to find the article they want.
3.1 Create Categories with the Category Manager
The first step is creating a “Category List” category with our Category Manager. There is no difference between a blog category or a list category as far as the Category Manager is concerned. Any category can be turned into a blog or a list depending on how it assigned with in the Menu Item Manager. Hopefully, we created all the lists we needed in Chapter 4.1 when we made our Table of Contents. We can always add another category if needed.
3.2 Assign New Articles to these Categories
As we create new articles, in the Article Edit screen, we can assign each article to one of the categories we have created. This can be either a list or blog category. The only difference is that with a list category, there is no need to insert a READ MORE link after the introductory paragraph.
3.3 Make a Category List Menu Item
We previously discussed how to use categories to organize your Joomla articles and images. We should apply this same Category structure to organize our Main Menu. The purpose of this organization is to help readers navigate our website – just as any good book includes a Table of Contents in the front to help readers understand where things are placed in the book. To create a new category list menu item, go to the Main Menu and click on New. This brings up the New Menu Item screen. Then click on the blue Select button to bring up the Menu Item type selection screen. Click on Articles.
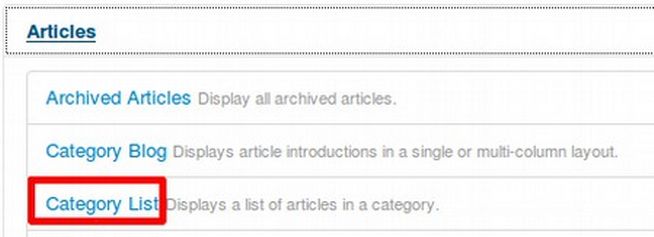
In the previous section, we selected Category Blog. In this Section, we select the Category List menu item type.
Once the Menu Item type is selected, we are automatically taken back to the Menu Item Edit screen. For Title, we type in the name of our category, for example 1 START UP. Below this there is a box to select the category we want to associate with this menu item. 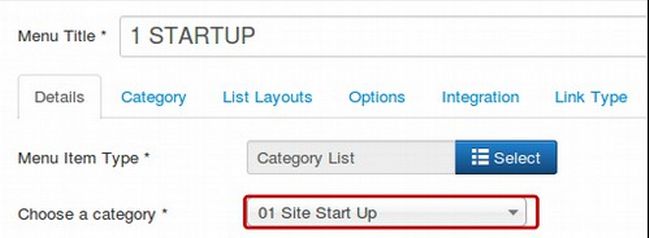
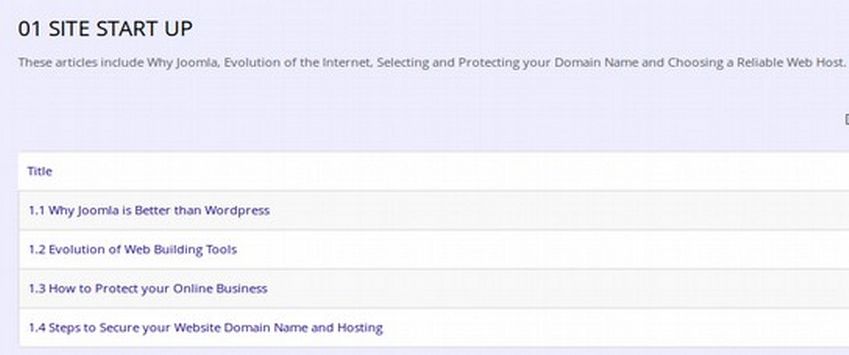
Click on the drop down arrow and choose the category 01 Start Up. As this will be a TOP menu item in the Main Menu, for Parent Item, we will leave the setting as Menu Item Root. Click SAVE and CLOSE to return to the Menu Manager for the Main Menu. Then click on VIEW SITE. When you click on a category list menu item, it will take you to a page which lists all of the articles which were placed in this category when the article was created. Here is an example of what appears when you click on the category list menu item called 1 STARTUP.
What's Next?
In our next article, we will review how to create a menu item for a single article.